
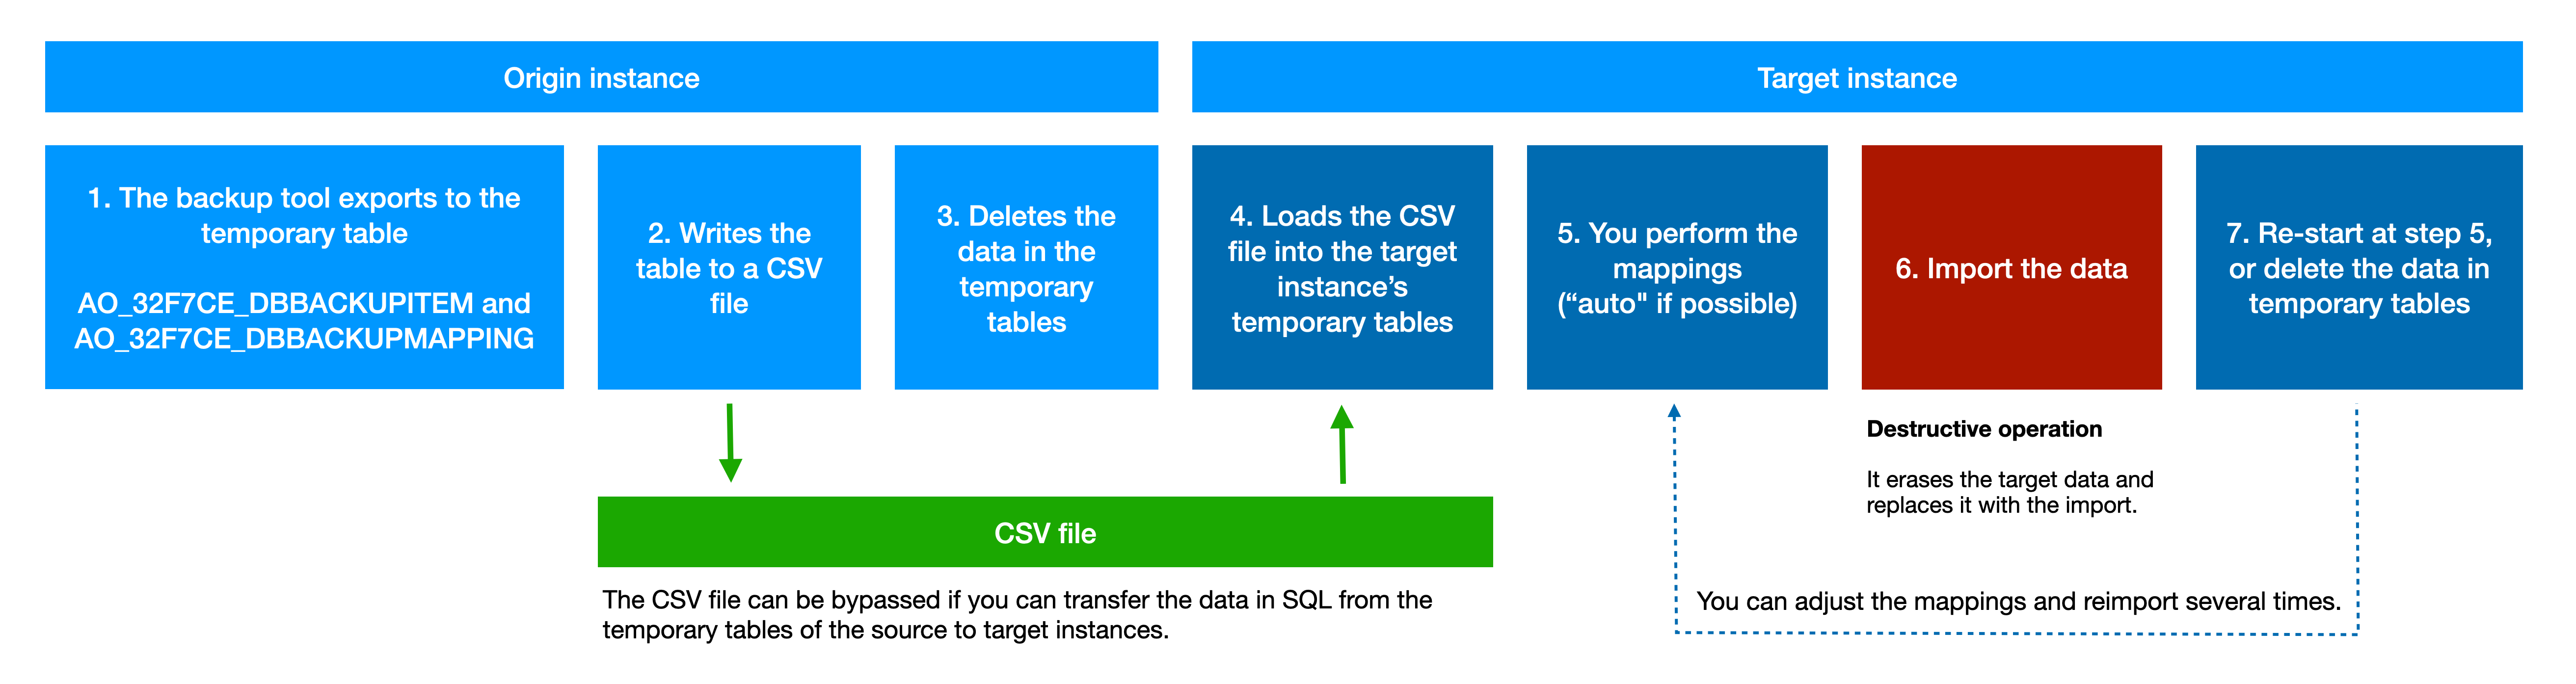
The temporary tables are AO_32F7CE_DBBACKUPITEM and AO_32F7CE_DBBACKUPMAPPING. Emptying those tables after working is important, since they contain an entire copy of the rest of your data. They can be emptied by clicking on the import name in the UI, and clicking “Delete”.
Step details
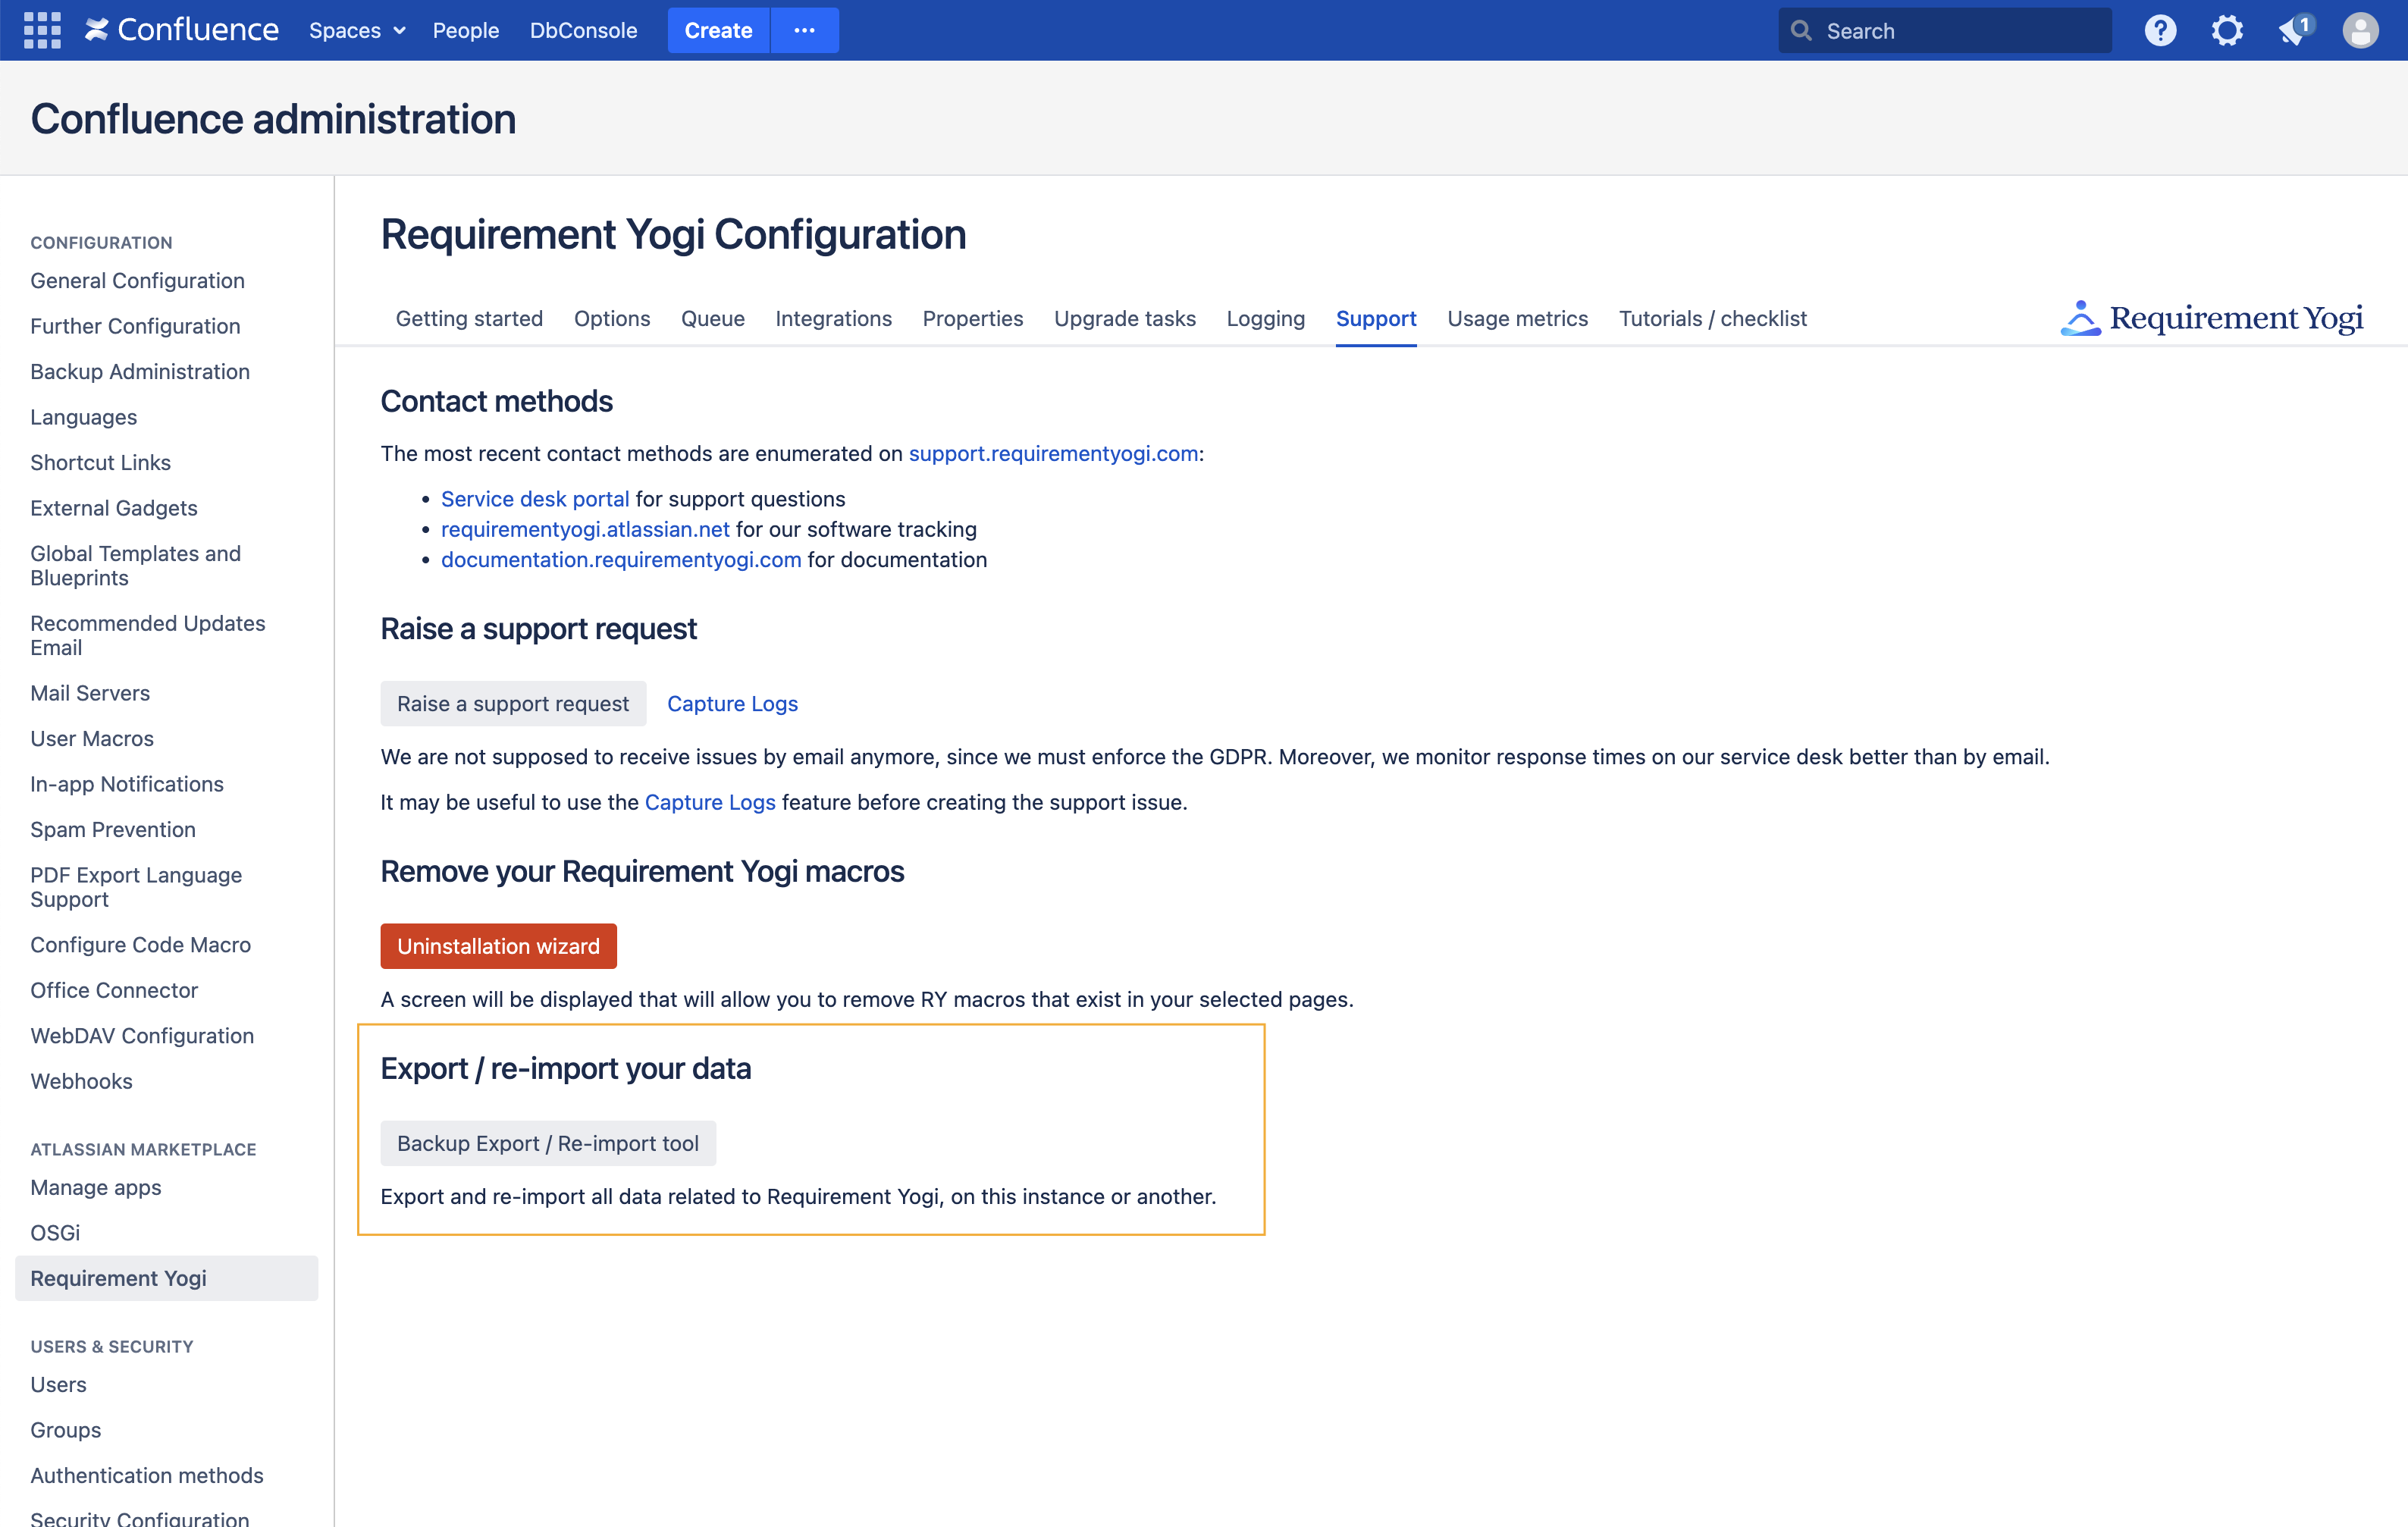
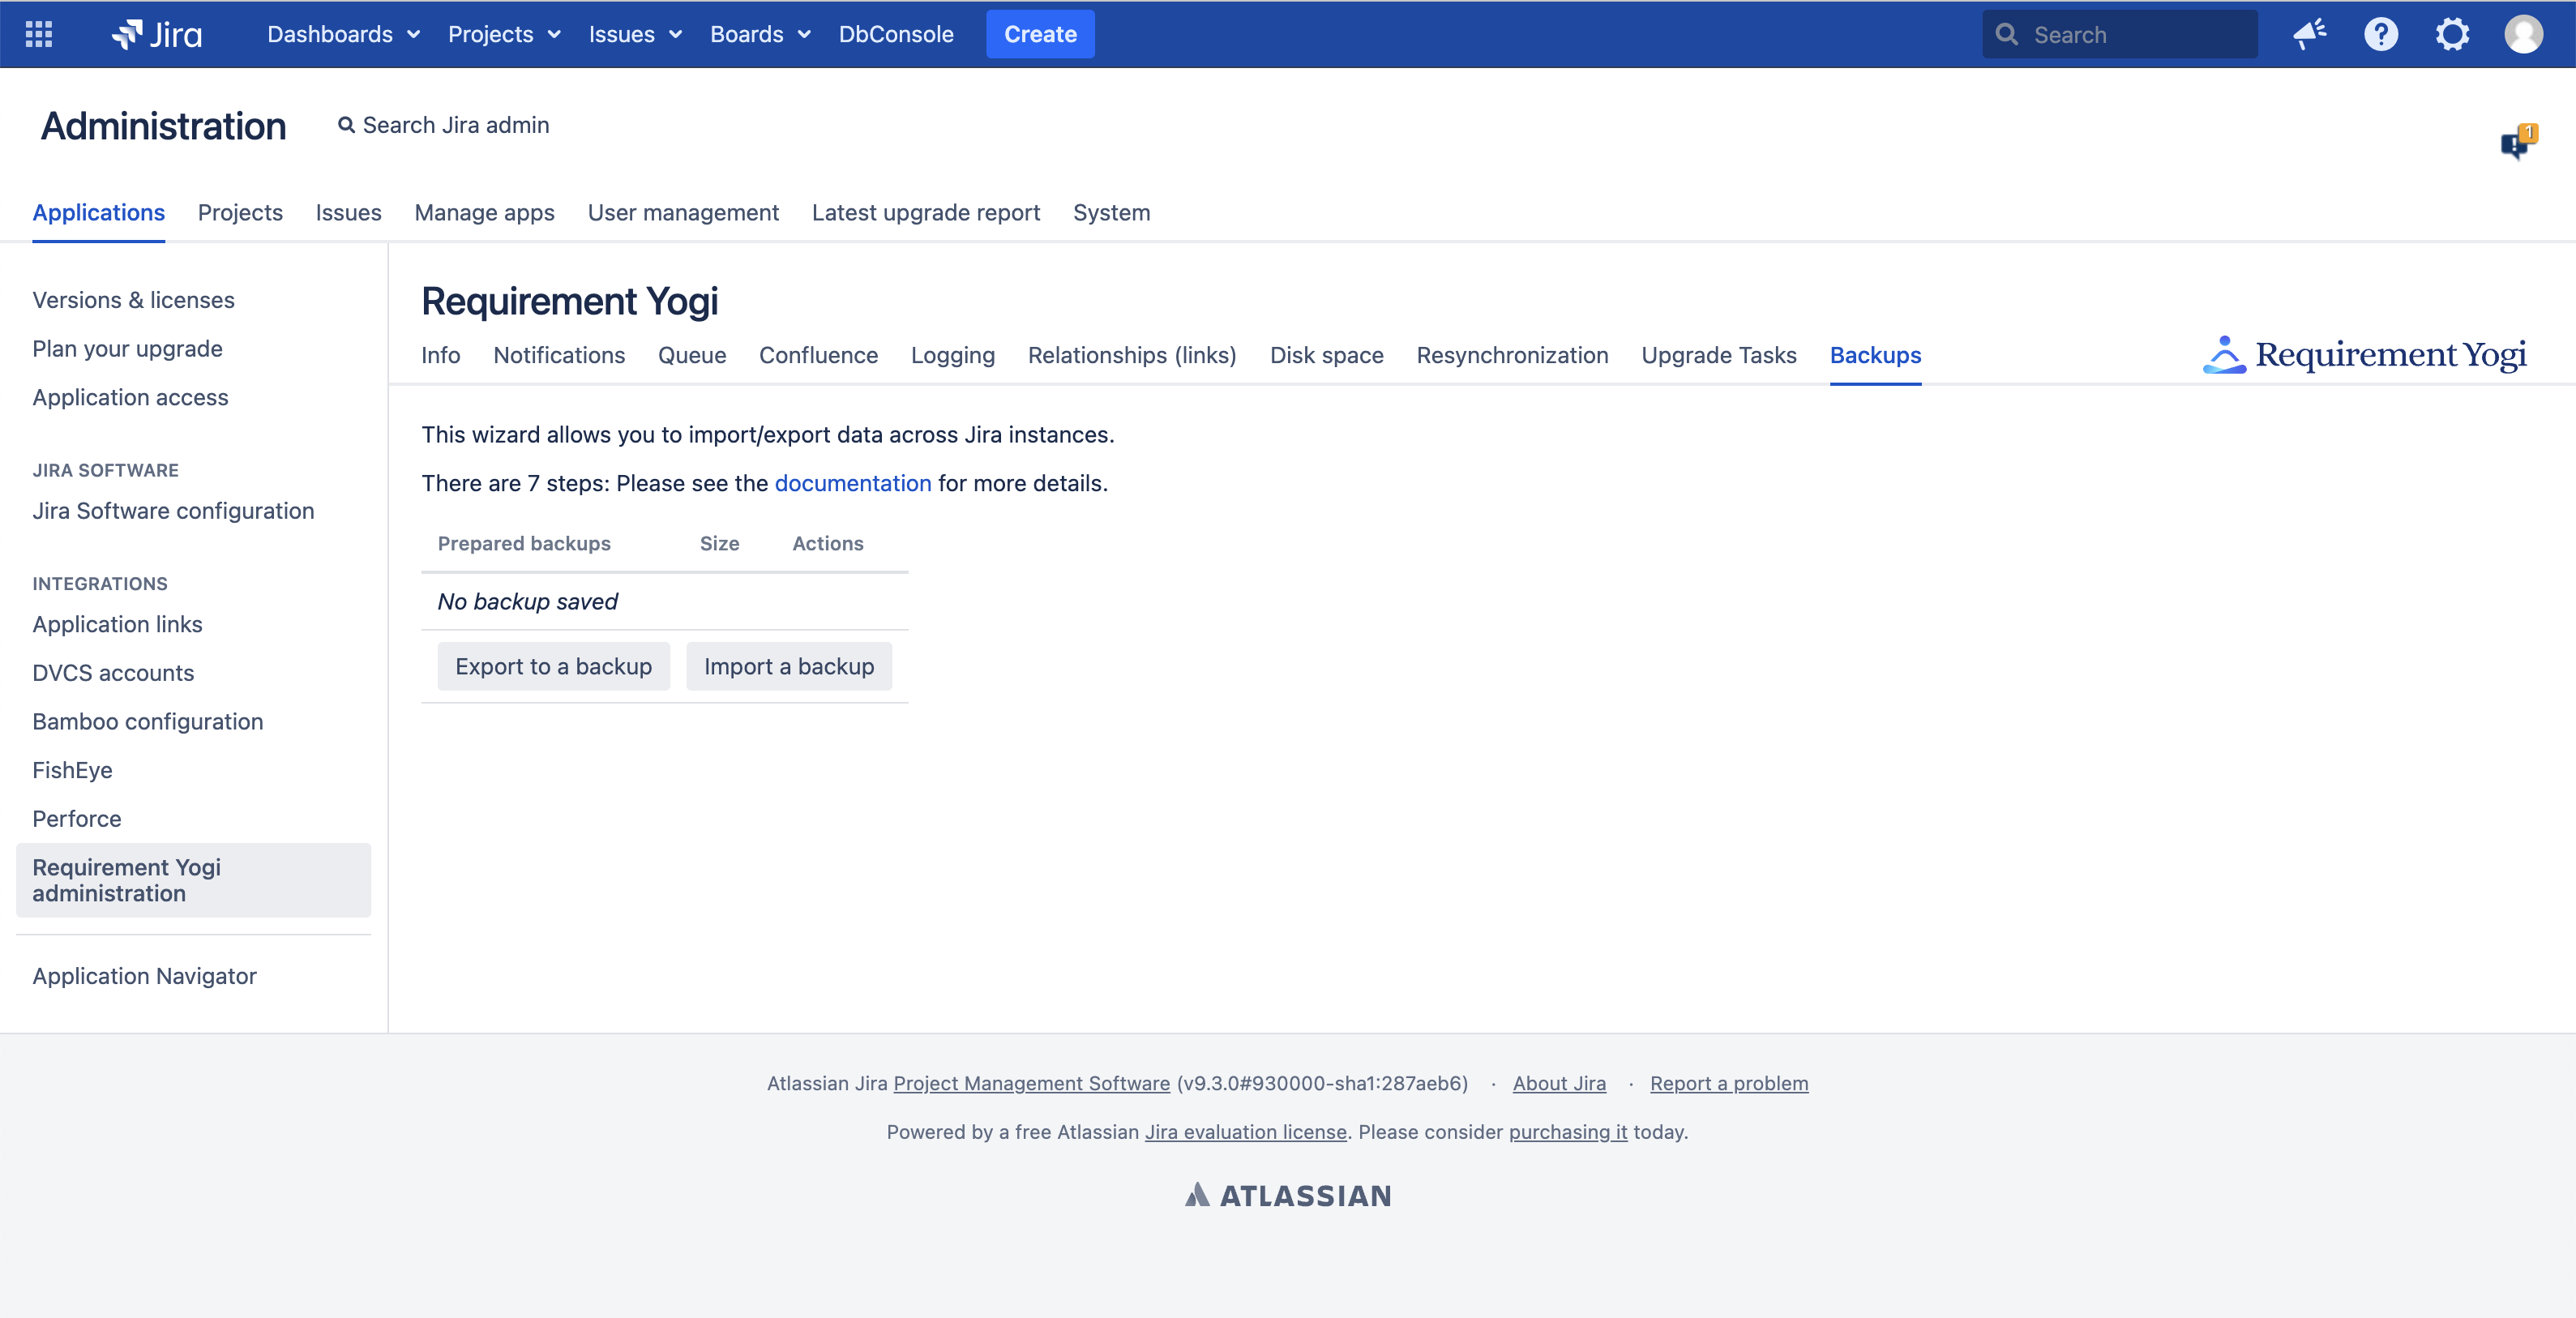
The tool is located in the administration
|
Confluence |
Jira |
|---|---|
|
|
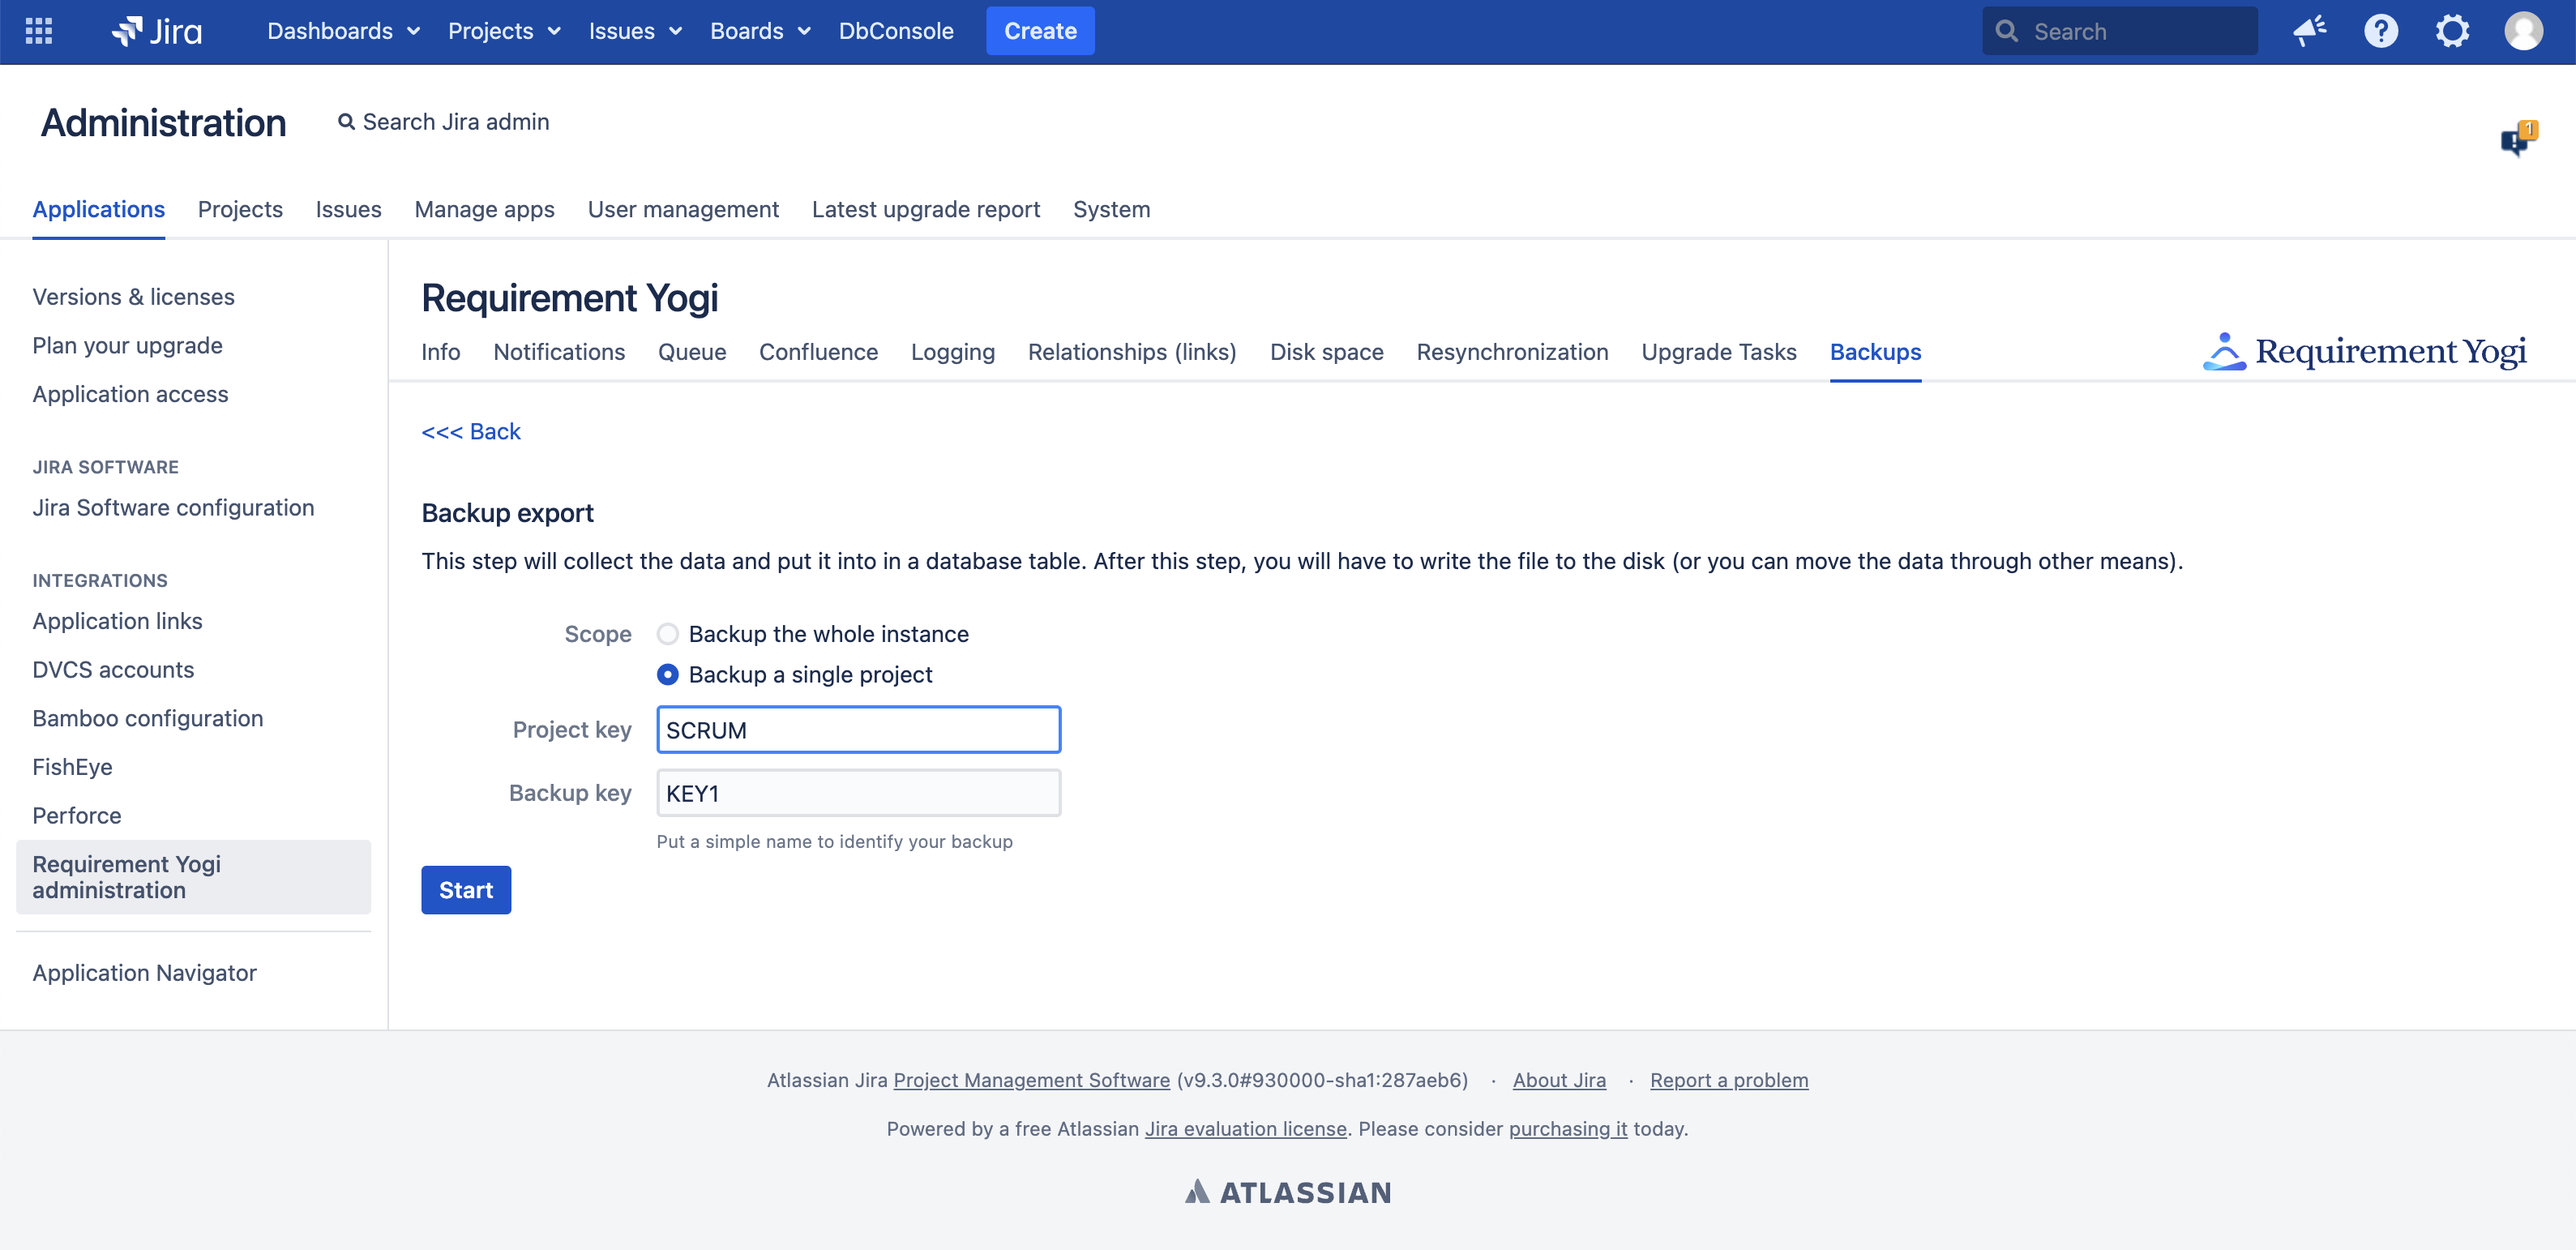
Step 1 - Export the entities to a temporary table
|
Requirement Yogi lets you choose:
|
|
|
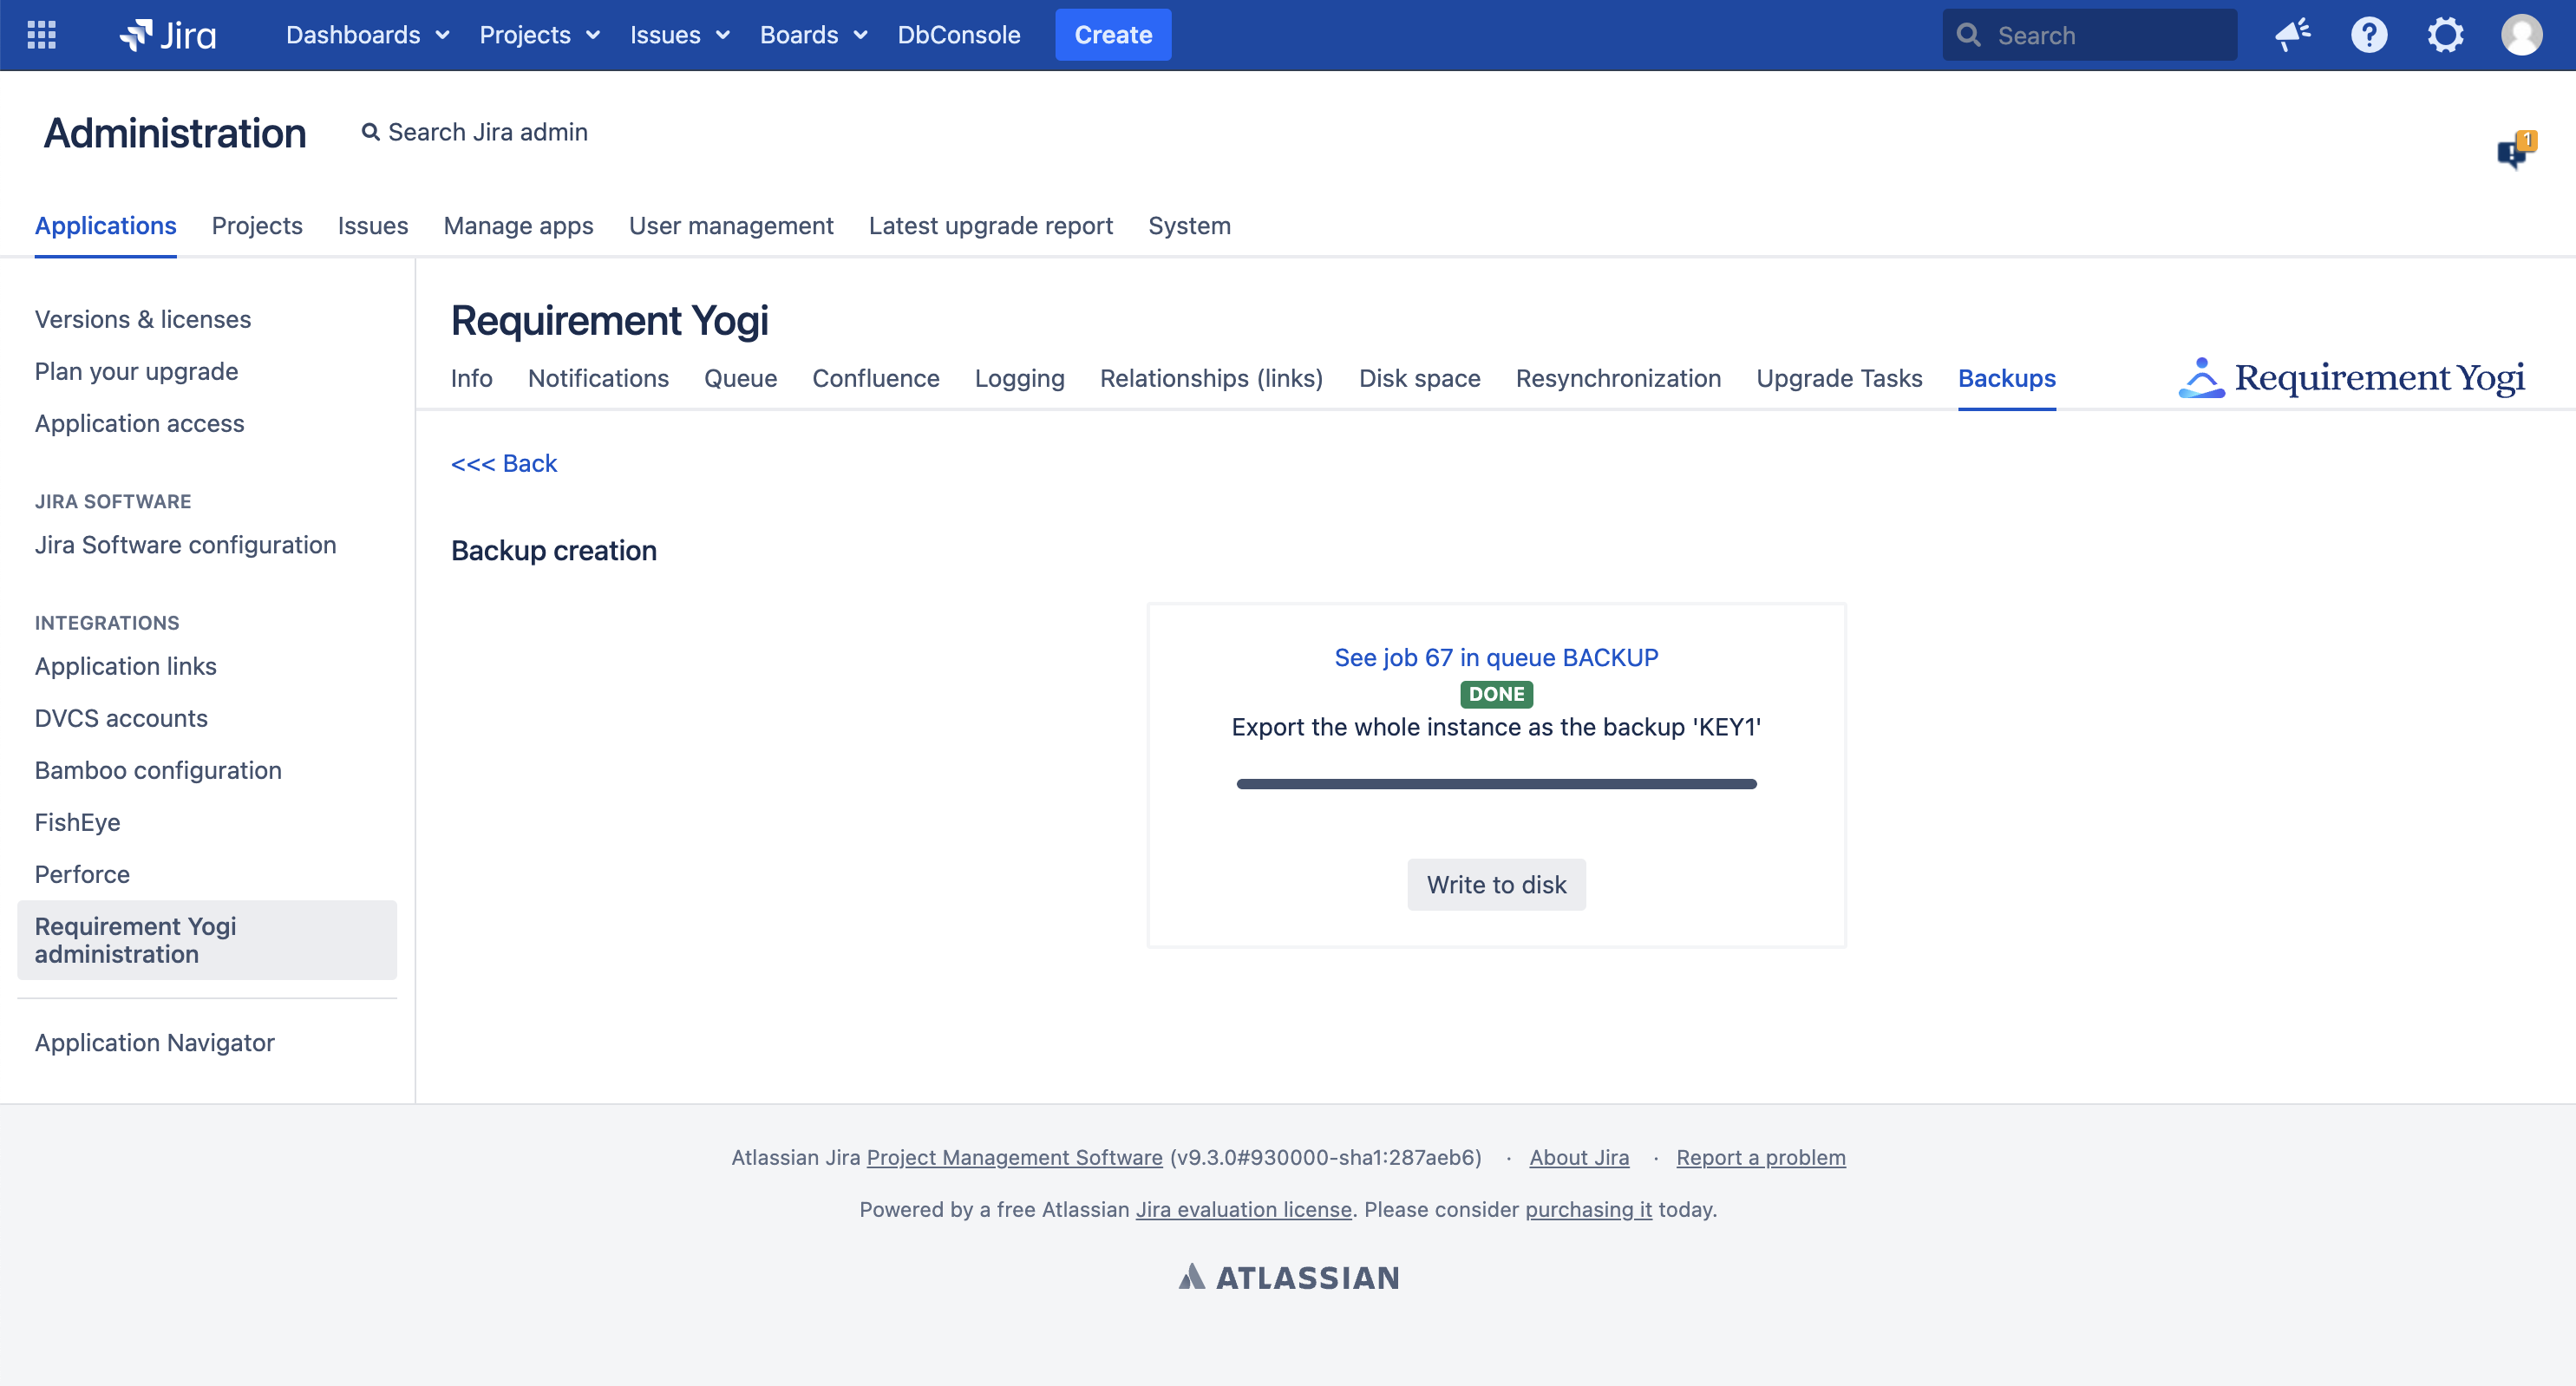
This step only copies all data into a single table, in preparation for the export. The table is as big as the entire database, therefore it will be important, later on, to empty this table. None of those long-running task should be interrupted by, for example, a Confluence restart. If it happens, please restart the step. Of course you can leave the page. If you lose the link, you can find the progress of the task in the "Queue" tab. |
|
|
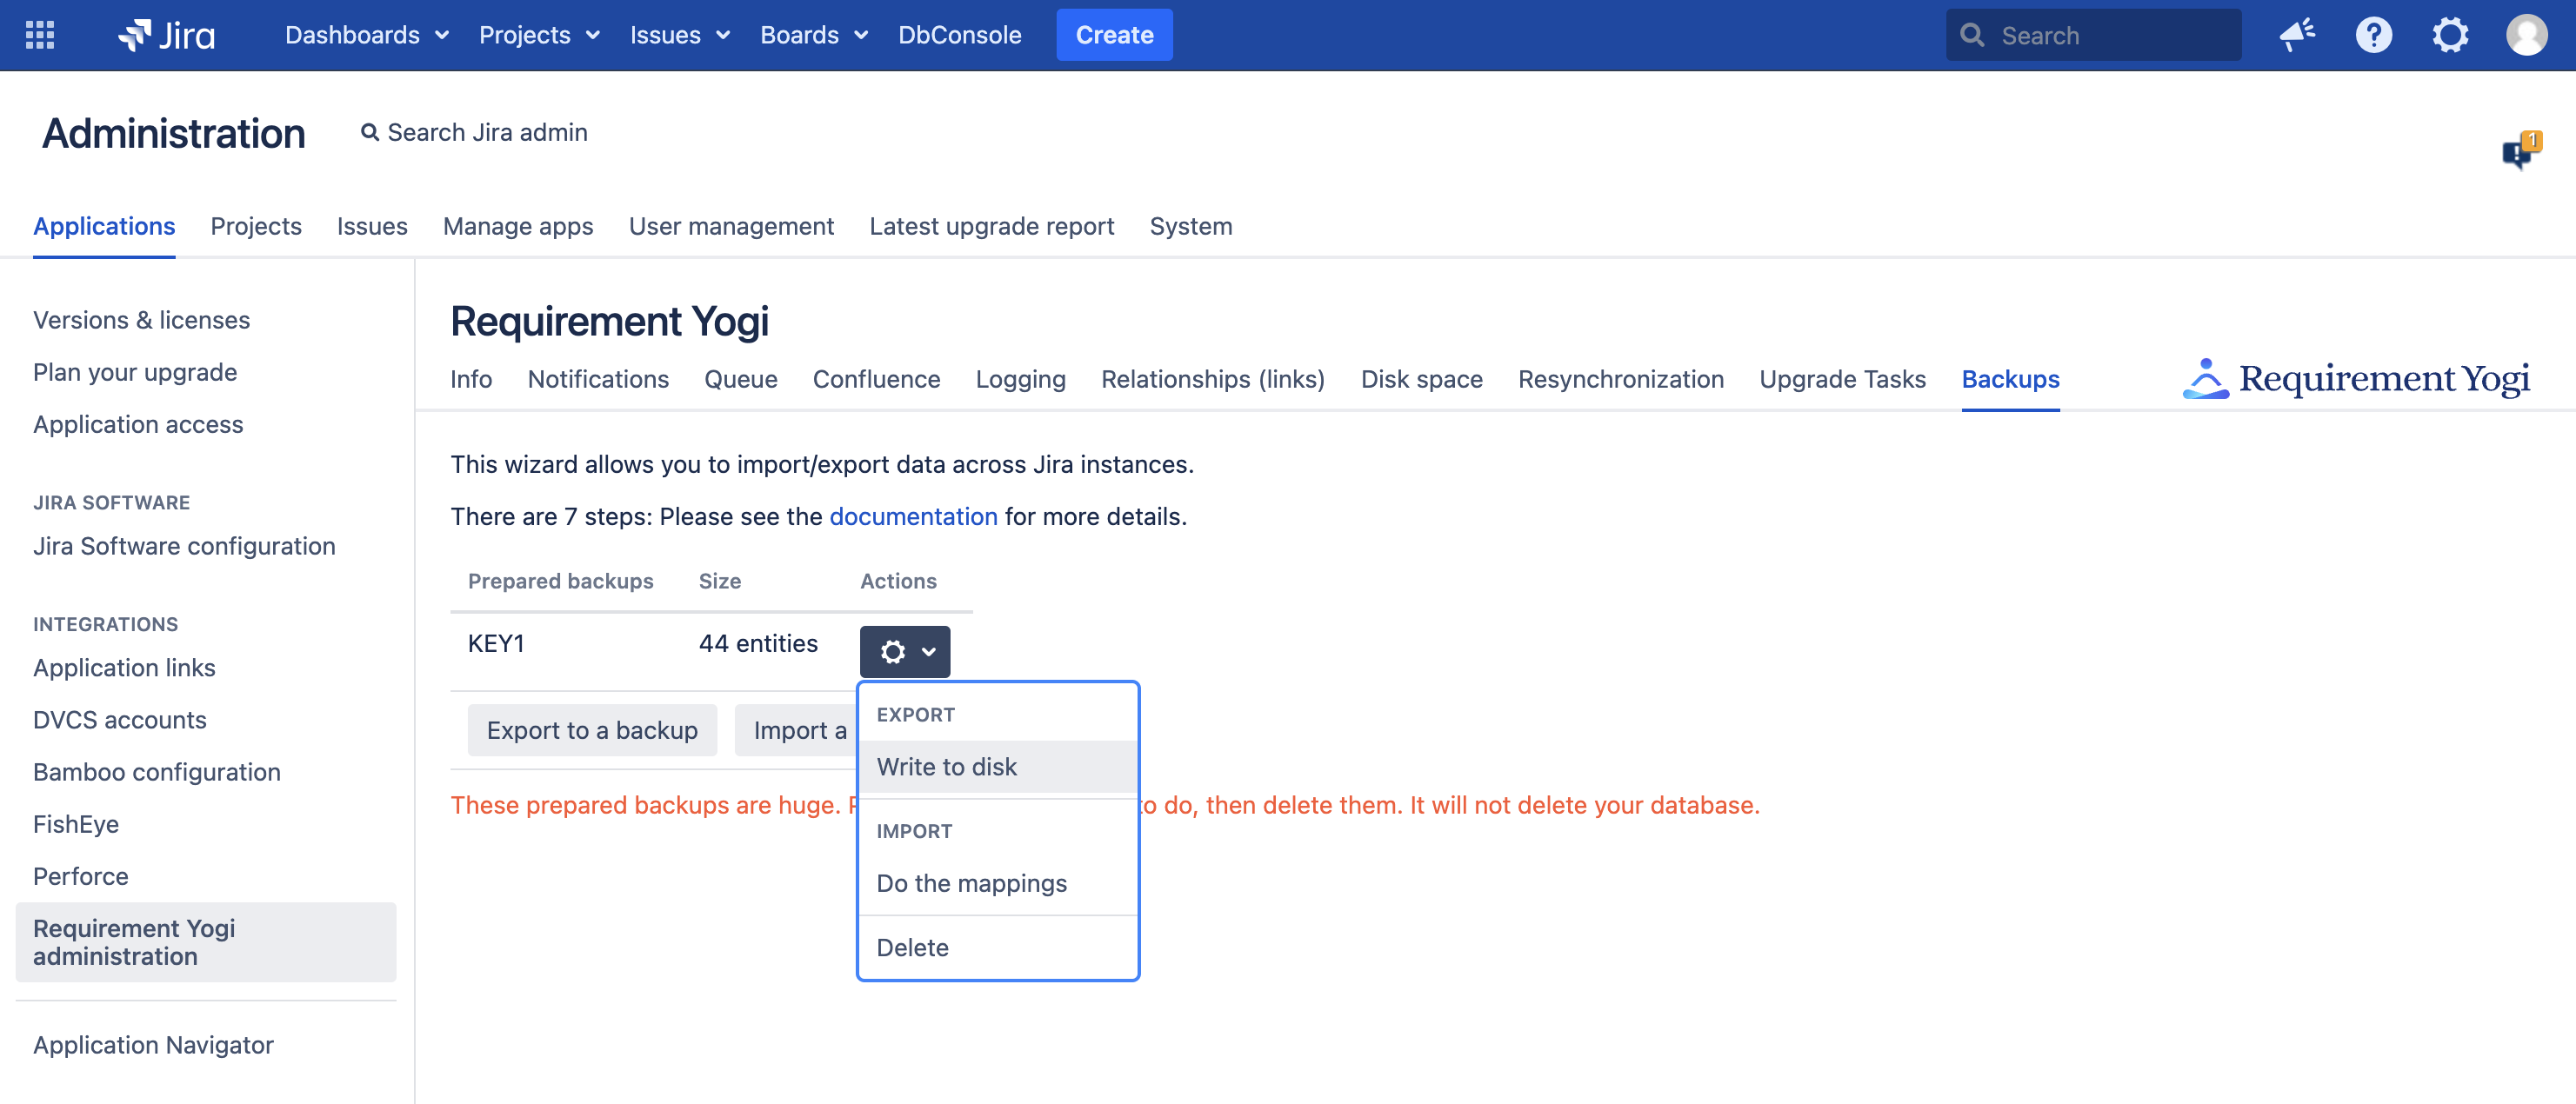
At the end, we suggest to write the file to disk. If you have lost the link to this progress screen, you can perform this operation using the main menu: |
|
Step 2 - Write to disk
Note: This step can be skipped if you prefer (or need) to copy data manually. In such situation, please copy the contents of the tables AO_32F7CE_DBBACKUPITEM and AO_32F7CE_DBBACKUPMAPPING across to the target Confluence/Jira instance, and skip to step 5.
This step will write the contents of AO_32F7CE_DBBACKUPITEM and AO_32F7CE_DBBACKUPMAPPING into a CSV file. It can be a pretty large file, which may make you decide to copy the data manually.
The file will be written in the home directory of Confluence, i.e. you need disk access to complete this operation.
This step is not necessary if you are reimporting to the same instance.
Step 3 - Delete the temporary table
Click on the backup name in the main menu, and delete it. It is not necessary to keep it around.
Step 4 - Load the file on the new instance
The file will be read from a specific folder in the home directory of Confluence, i.e. you need disk access to complete this operation. The wizard will tell you where to place the file.
Step 5 - Perform the mappings
How to reach this step directly: In the main menu, click on the cog button next to a backup, and click "Do the mappings".
This step can be extremely menial.
For each entity (space, issue, project key, user...), you will have to provide the ID of the new entity in the target database, so that Requirement Yogi can "plug" itself to those entities. Fortunately, we provide an automatic mapping, which will lookup for the ID in the database, check that the title/details of the entity match the previous names, and/or it will attempt to find the new entities (such as the issue, based on the issue title). If an automatic mapping can be found, the status will be "MAPPED_AUTO". It is still necessary to check the value and eventually map manually.
|
Here are the possible statuses (matching the database column AO_32F7CE_DBBACKUPMAPPING.STATUS):
|

|
Once all entities are mapped, you can proceed to the next step.
Step 6 - Import
This step erases all data in the scope, then imports the data.
For example, if you are importing SPACE1 and have mapped SPACE1 into SPACE2, then it will erase all Requirement Yogi data related to that space, and apply the import.
Confluence must not restart during this import. If it does, reapply the import. If you close the page, it doesn't stop the process, and you can easily come back to monitoring the progress using the "Queue" tab (or reopening the previous URL).
Step 7 - Check the data
If you are unhappy with the import (wrong page ID, wrong issue ID), then please come back to the Mapping page (step 5), fix the problem, then reapply the import.
If you are happy with the import, then don't forget to delete the temporary data (delete from the UI) and the file on the disk.