
Once a variant has been created in the administration, you will need to assign pages to it.
There are several ways to assign a page to a variant:
-
On the Confluence page where requirements are defined
-
On the Administration page.
Assign pages individually to a variant
|
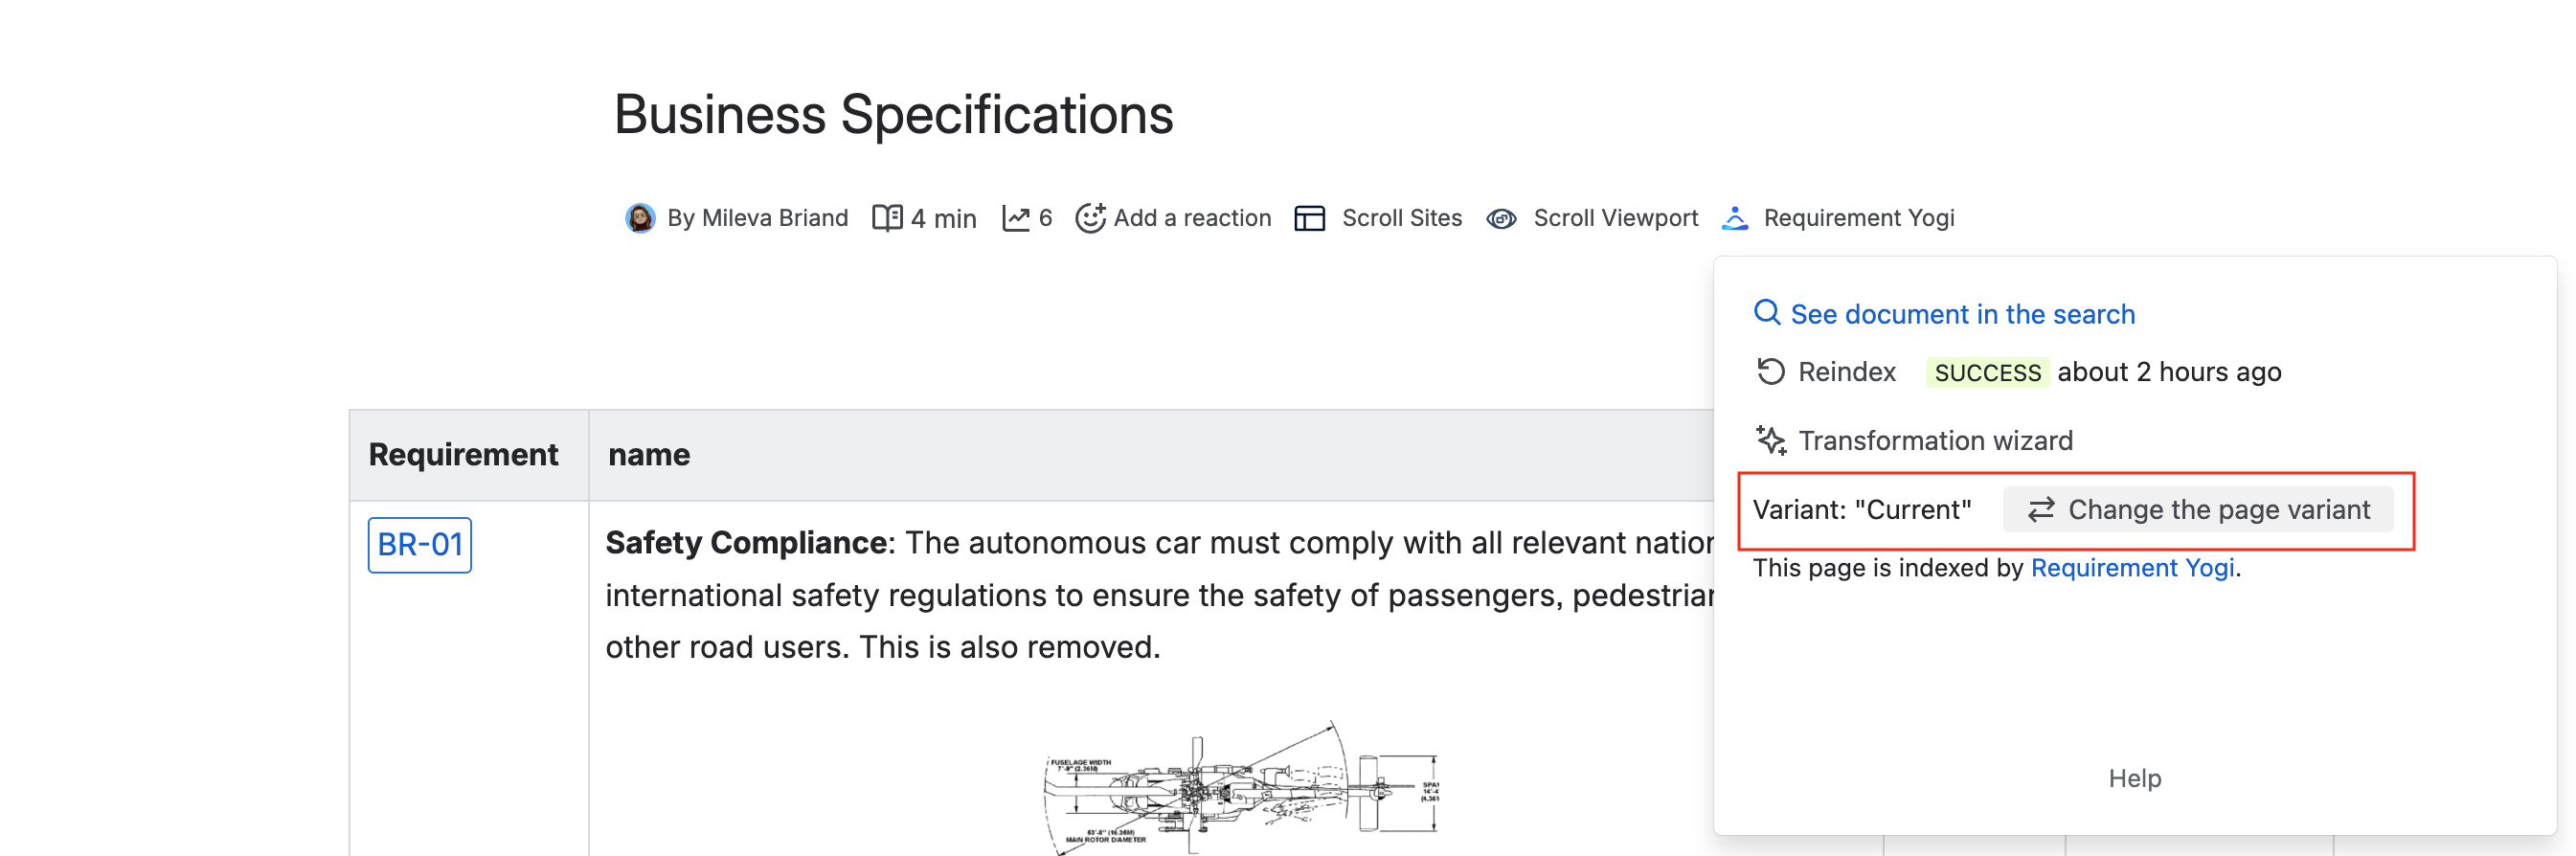
Before having any variant created, all your pages will be in ‘Current’ by default. You can see that information in the Byline.
|
|
|
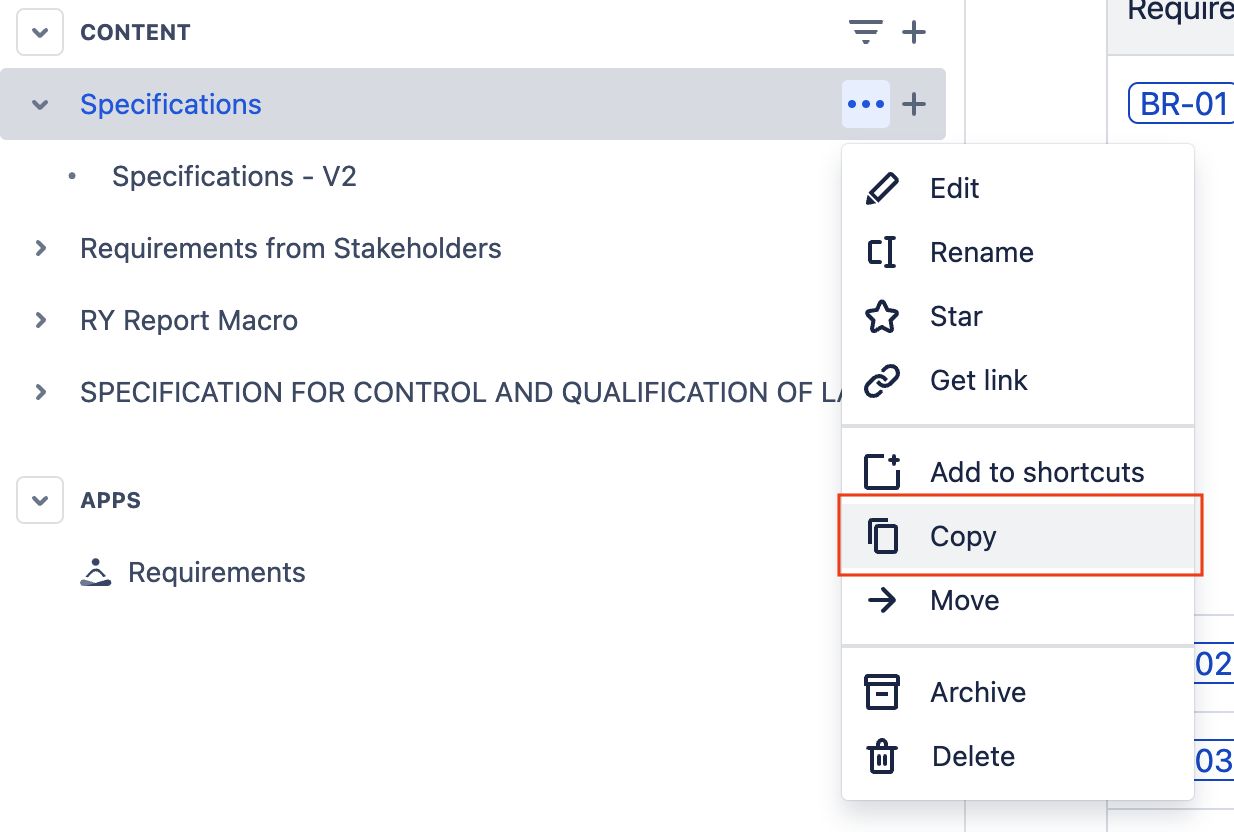
The easiest way to create a variant, is to duplicate your current page. Make sure you give it a different name, by adding the name of the variant for example. |
|
|
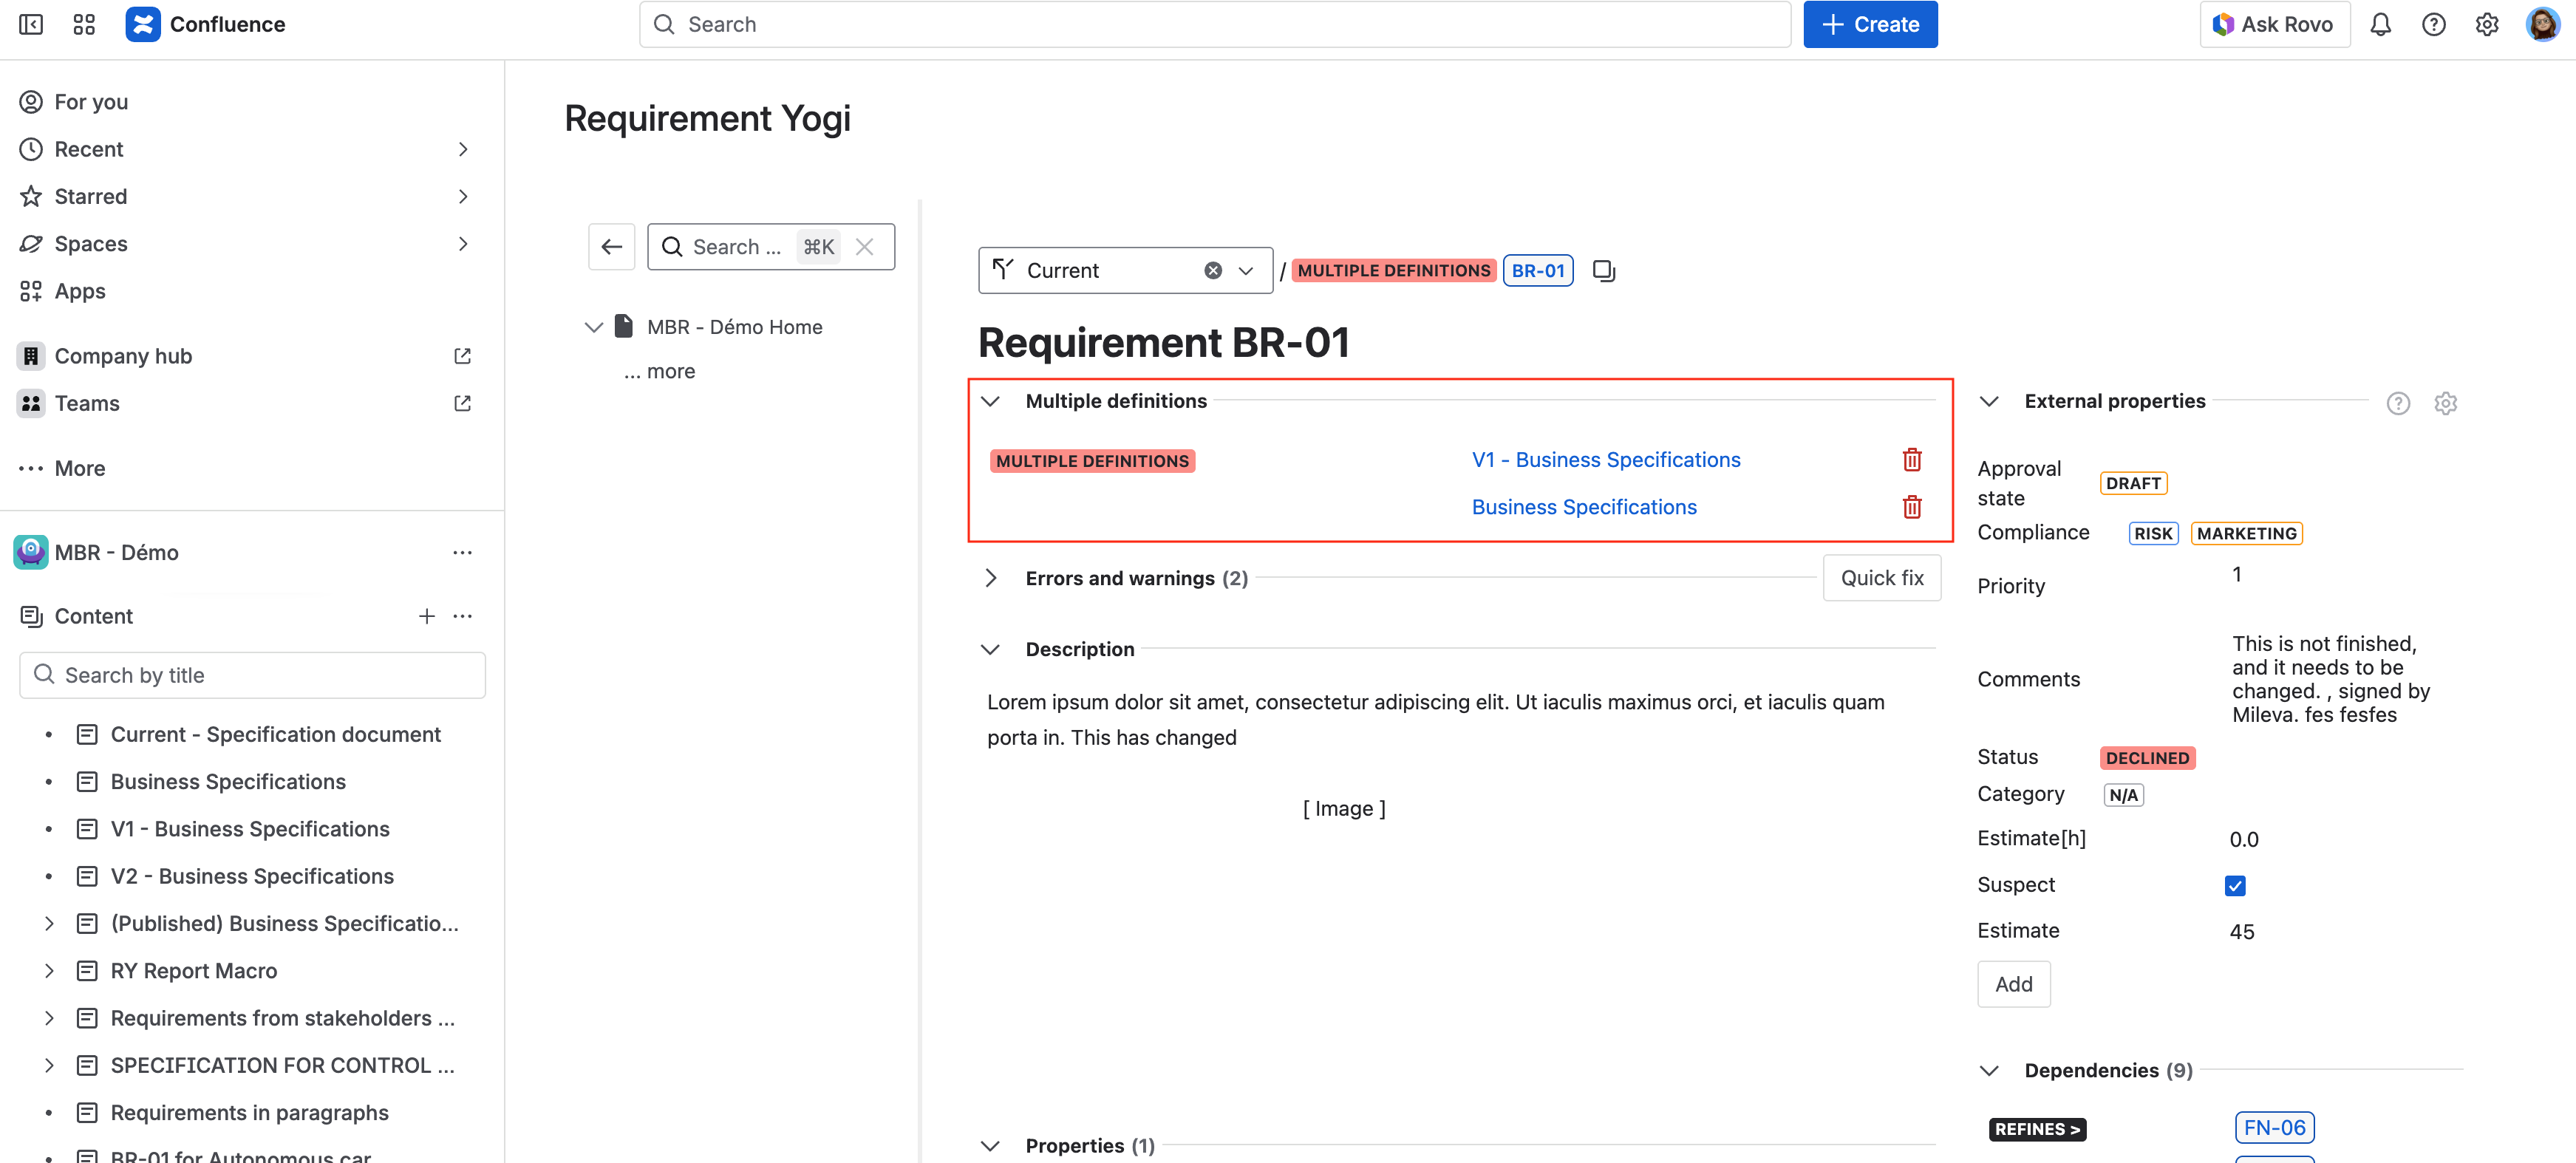
It is normal to see a multiple definitions error on your requirements because the duplicated page is also in 'Current', for now. You will then need to assign your duplicated page to the correct variant. |
|
|
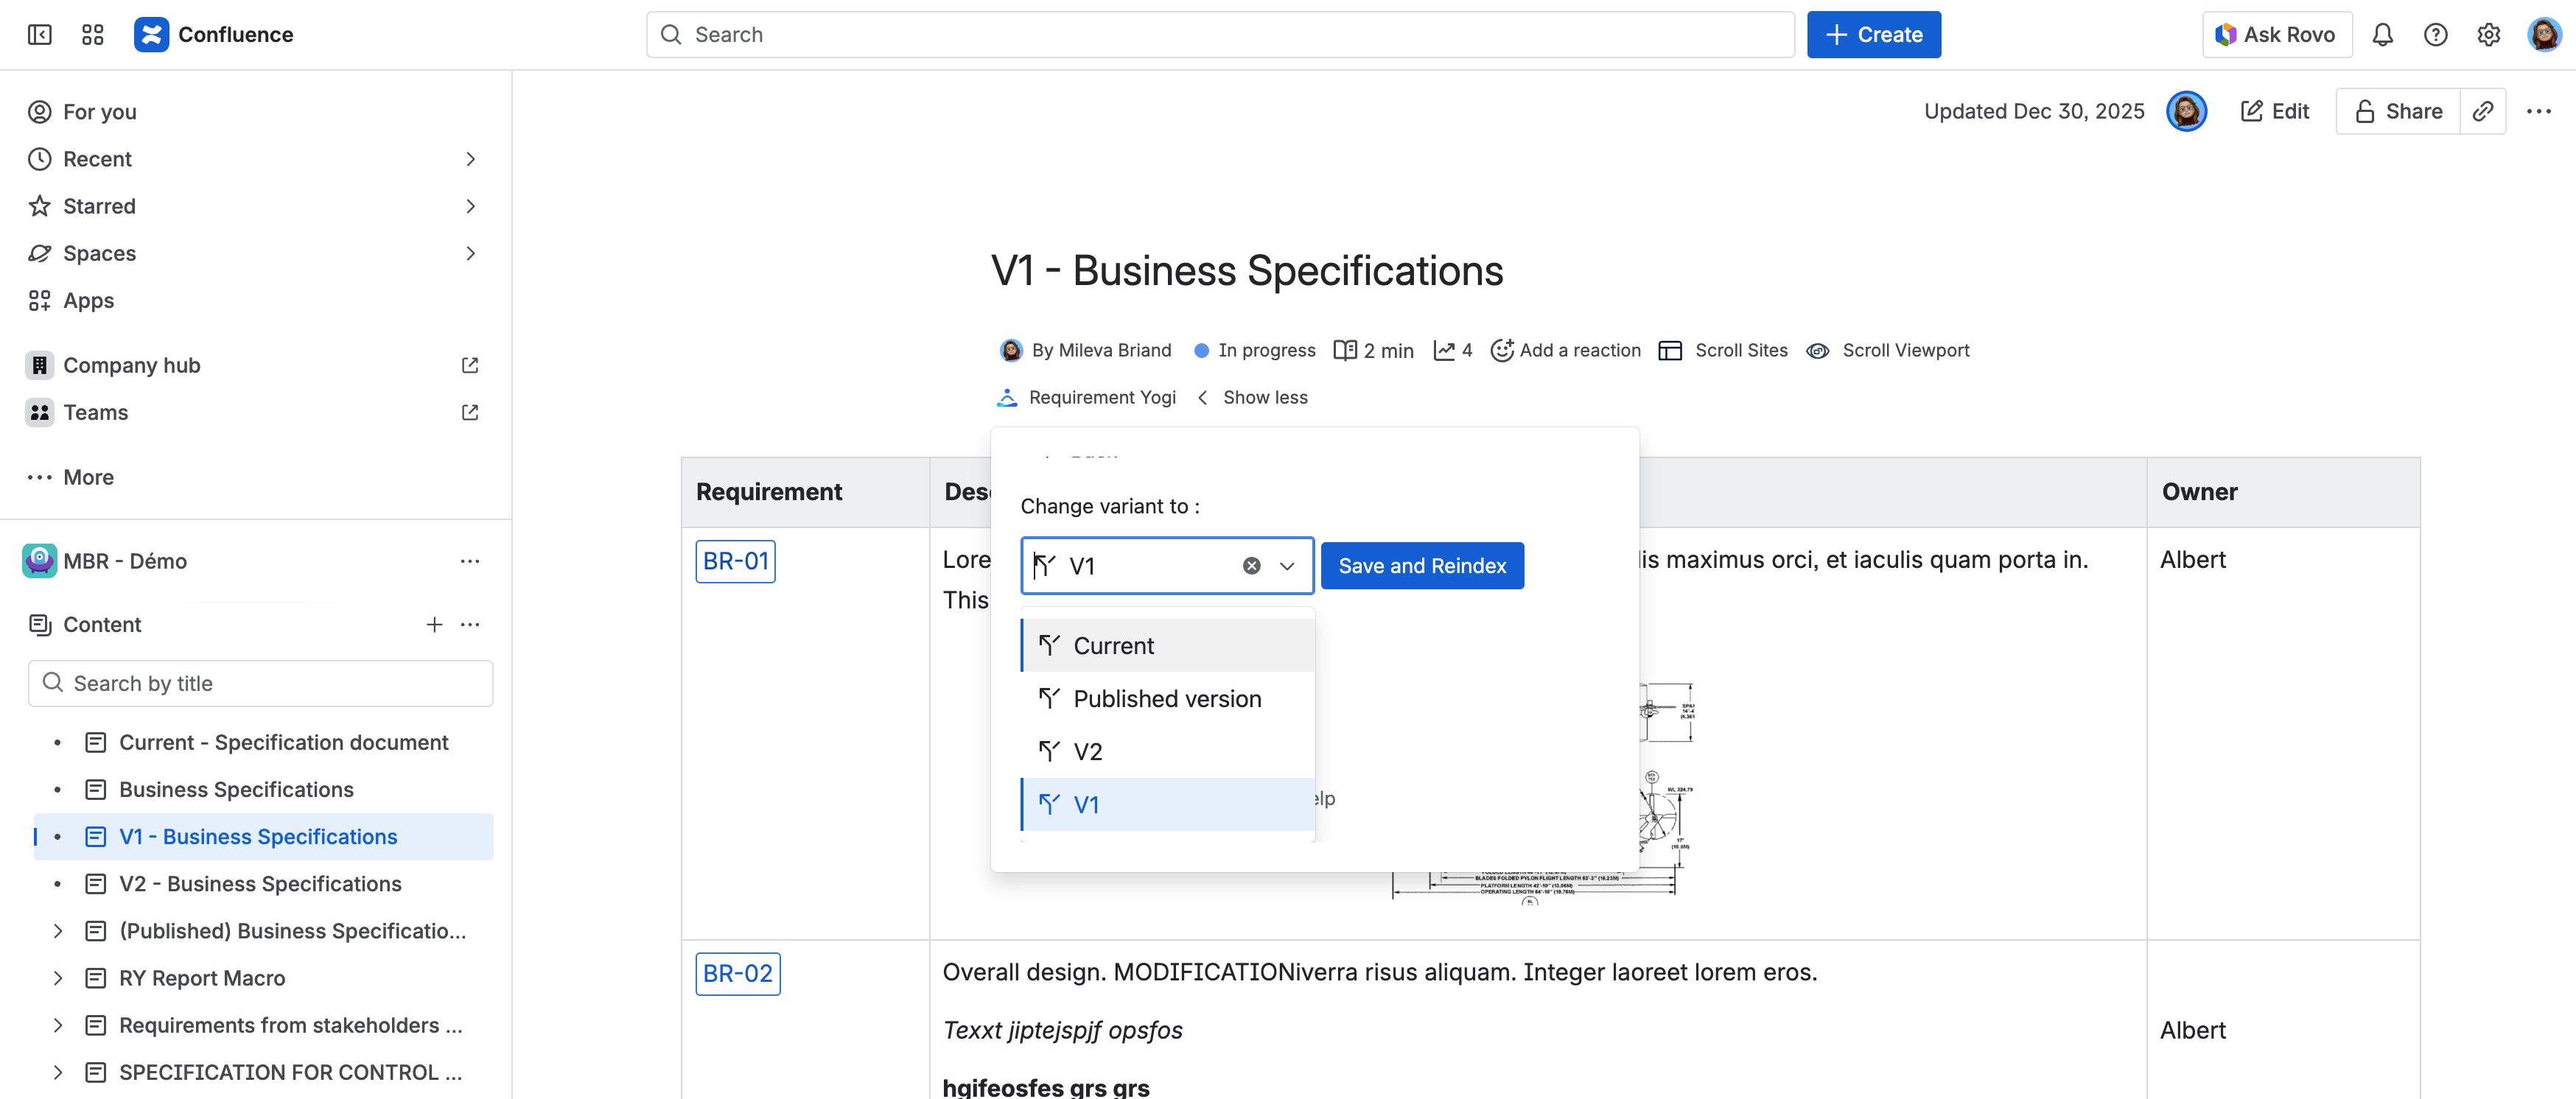
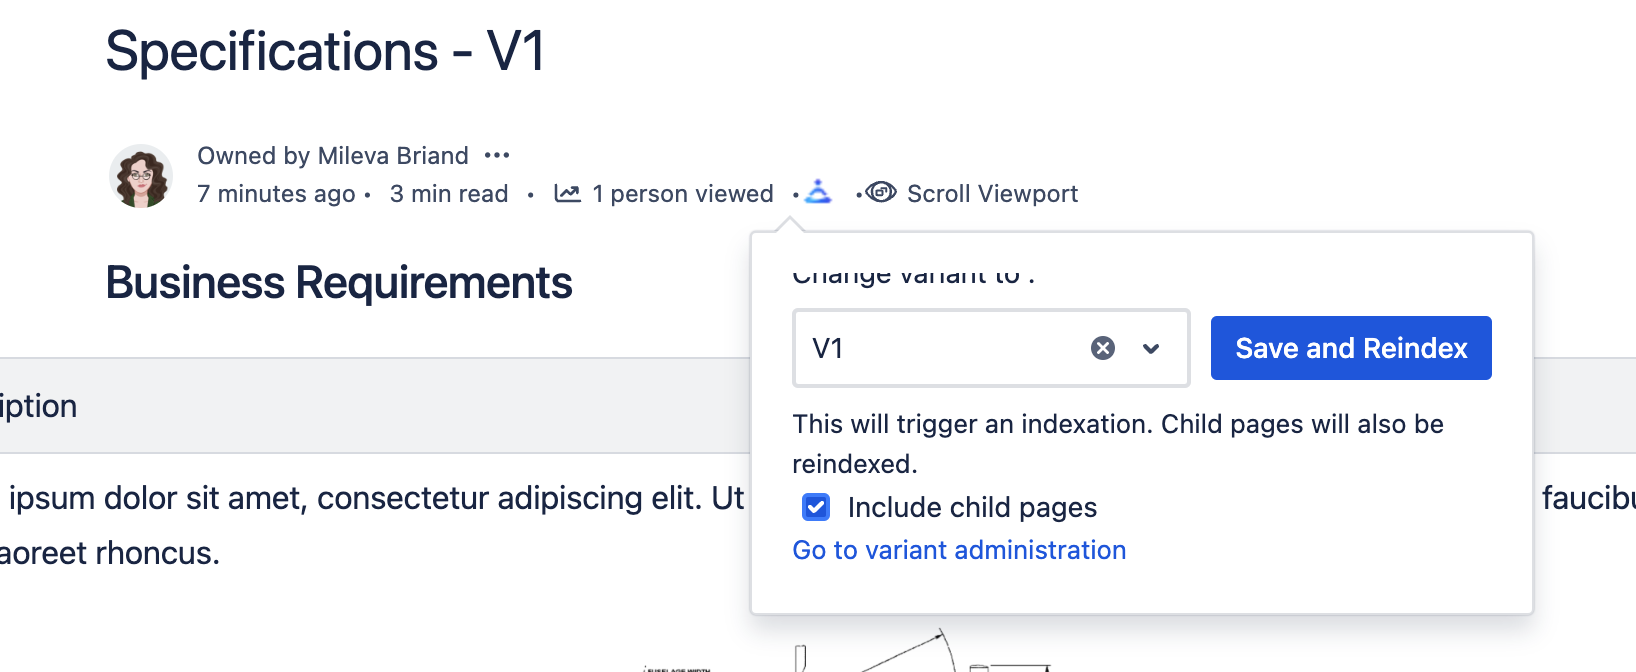
To assign the page, go into the byline and click on: “Change the page variant”. You will then see this dropdown. Select the desired variant and click on Save and re-index. |
|
|
If your page has children pages, you will also be able to include them in the variant. Rick ‘Include child pages’ and save. |
|
If your page requirements are listed as dependencies of other requirements, the dependencies will have to be edited to point at the new variant.
Bulk assign pages to a variant in the Baselines tab
When clicking on the Assign pages button, a dialog is displayed:
When opening the dialog a list of page of your space are displayed as a tree (first level, then you can expand to see the children)
-
You can filter the pages
-
By typing the name
-
By using the CQL syntax
-
-
The list of variants associated to the displayed pages are listed.
-
You need to check the boxes next to the pages you want to assign. If you want to assign child pages automatically, make sure to tick the ‘Include children’.
-
Then click on the variant name and see your pages will now show the new variant they are assigned to.
The process may take some time, you can close the dialog, the processing is done in background.
