To use all Jira connected features, make sure you download the Requirement Yogi for Jira app first.
If you didn't already connect your Confluence and Jira instances please follow Installation in Jira.
Linking requirements to Jira issues allows you and your users to take Requirement Yogi to the next step.
From an issue, you can quickly navigate to your product specifications, and from the traceablity matrix, you can easily see the global advancement of your project by checking the Jira issues status.
If you are looking for a quick tutorial, please check out our video for a quick dive into this integration:
Link requirements to Jira issues
1. Requirement Links are visible in the sidebar
|
Open the Requirement Yogi panel |
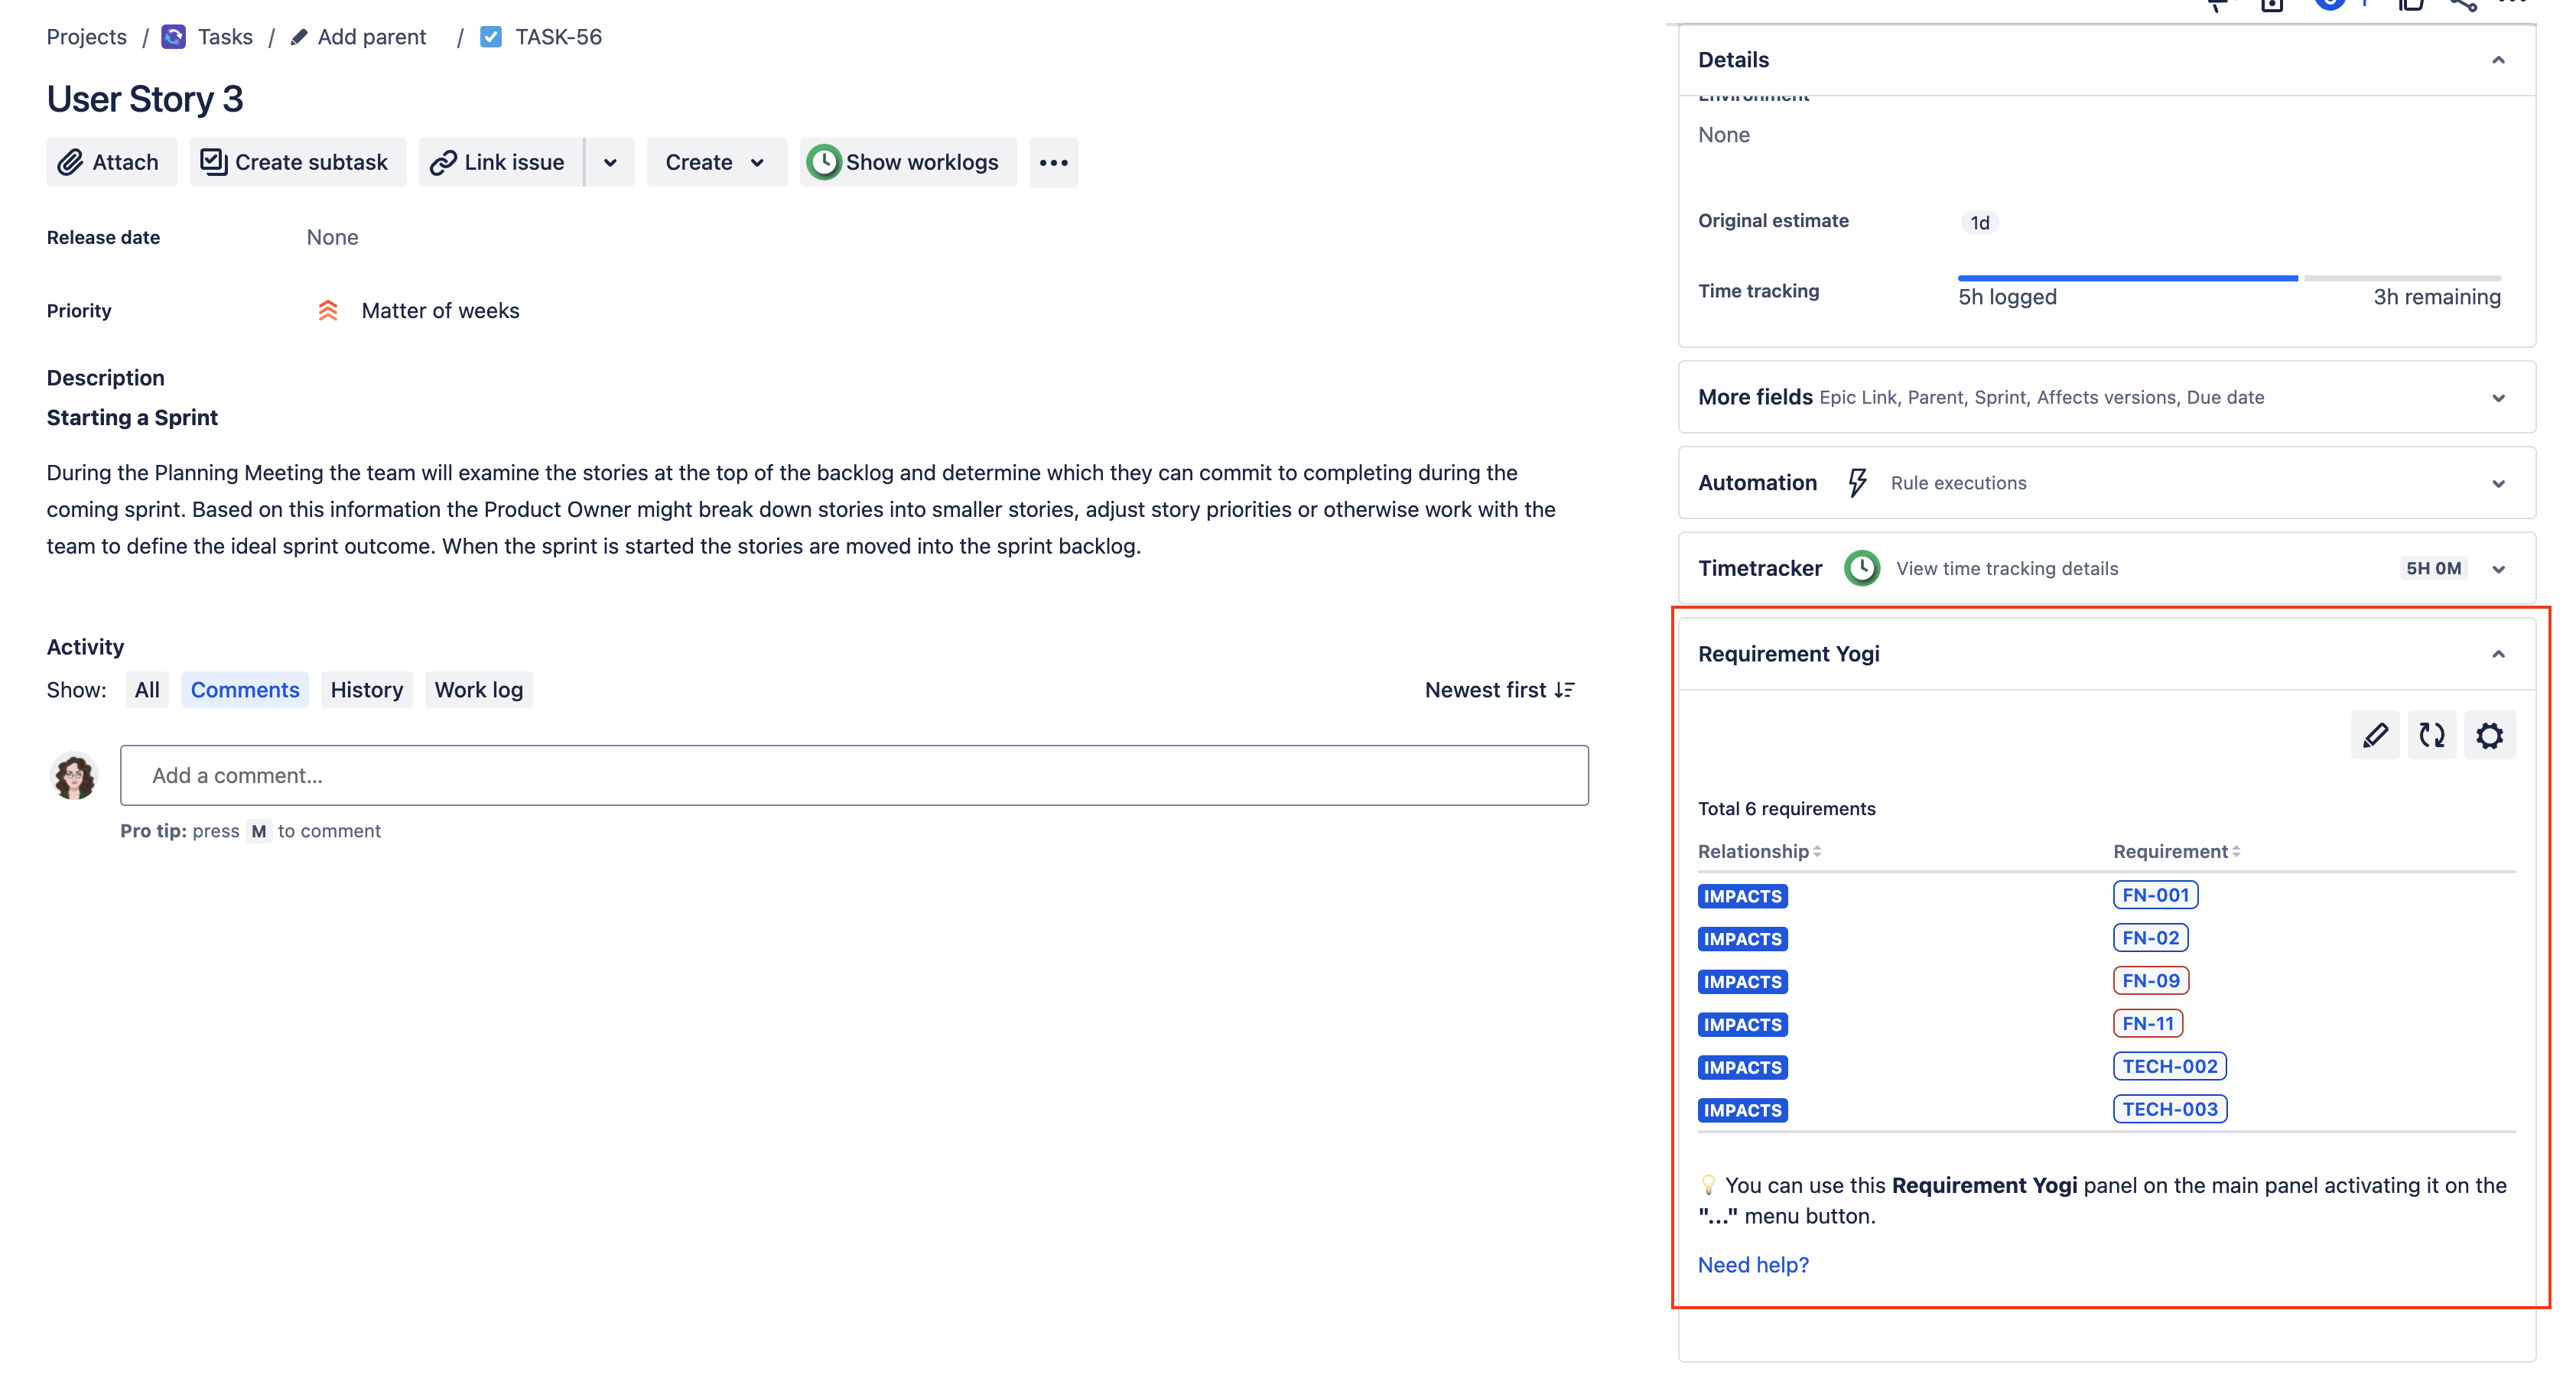
|
|
Click on the "Edit" icon to add or remove requirements You need to have permission to edit the issue to add or remove requirements |
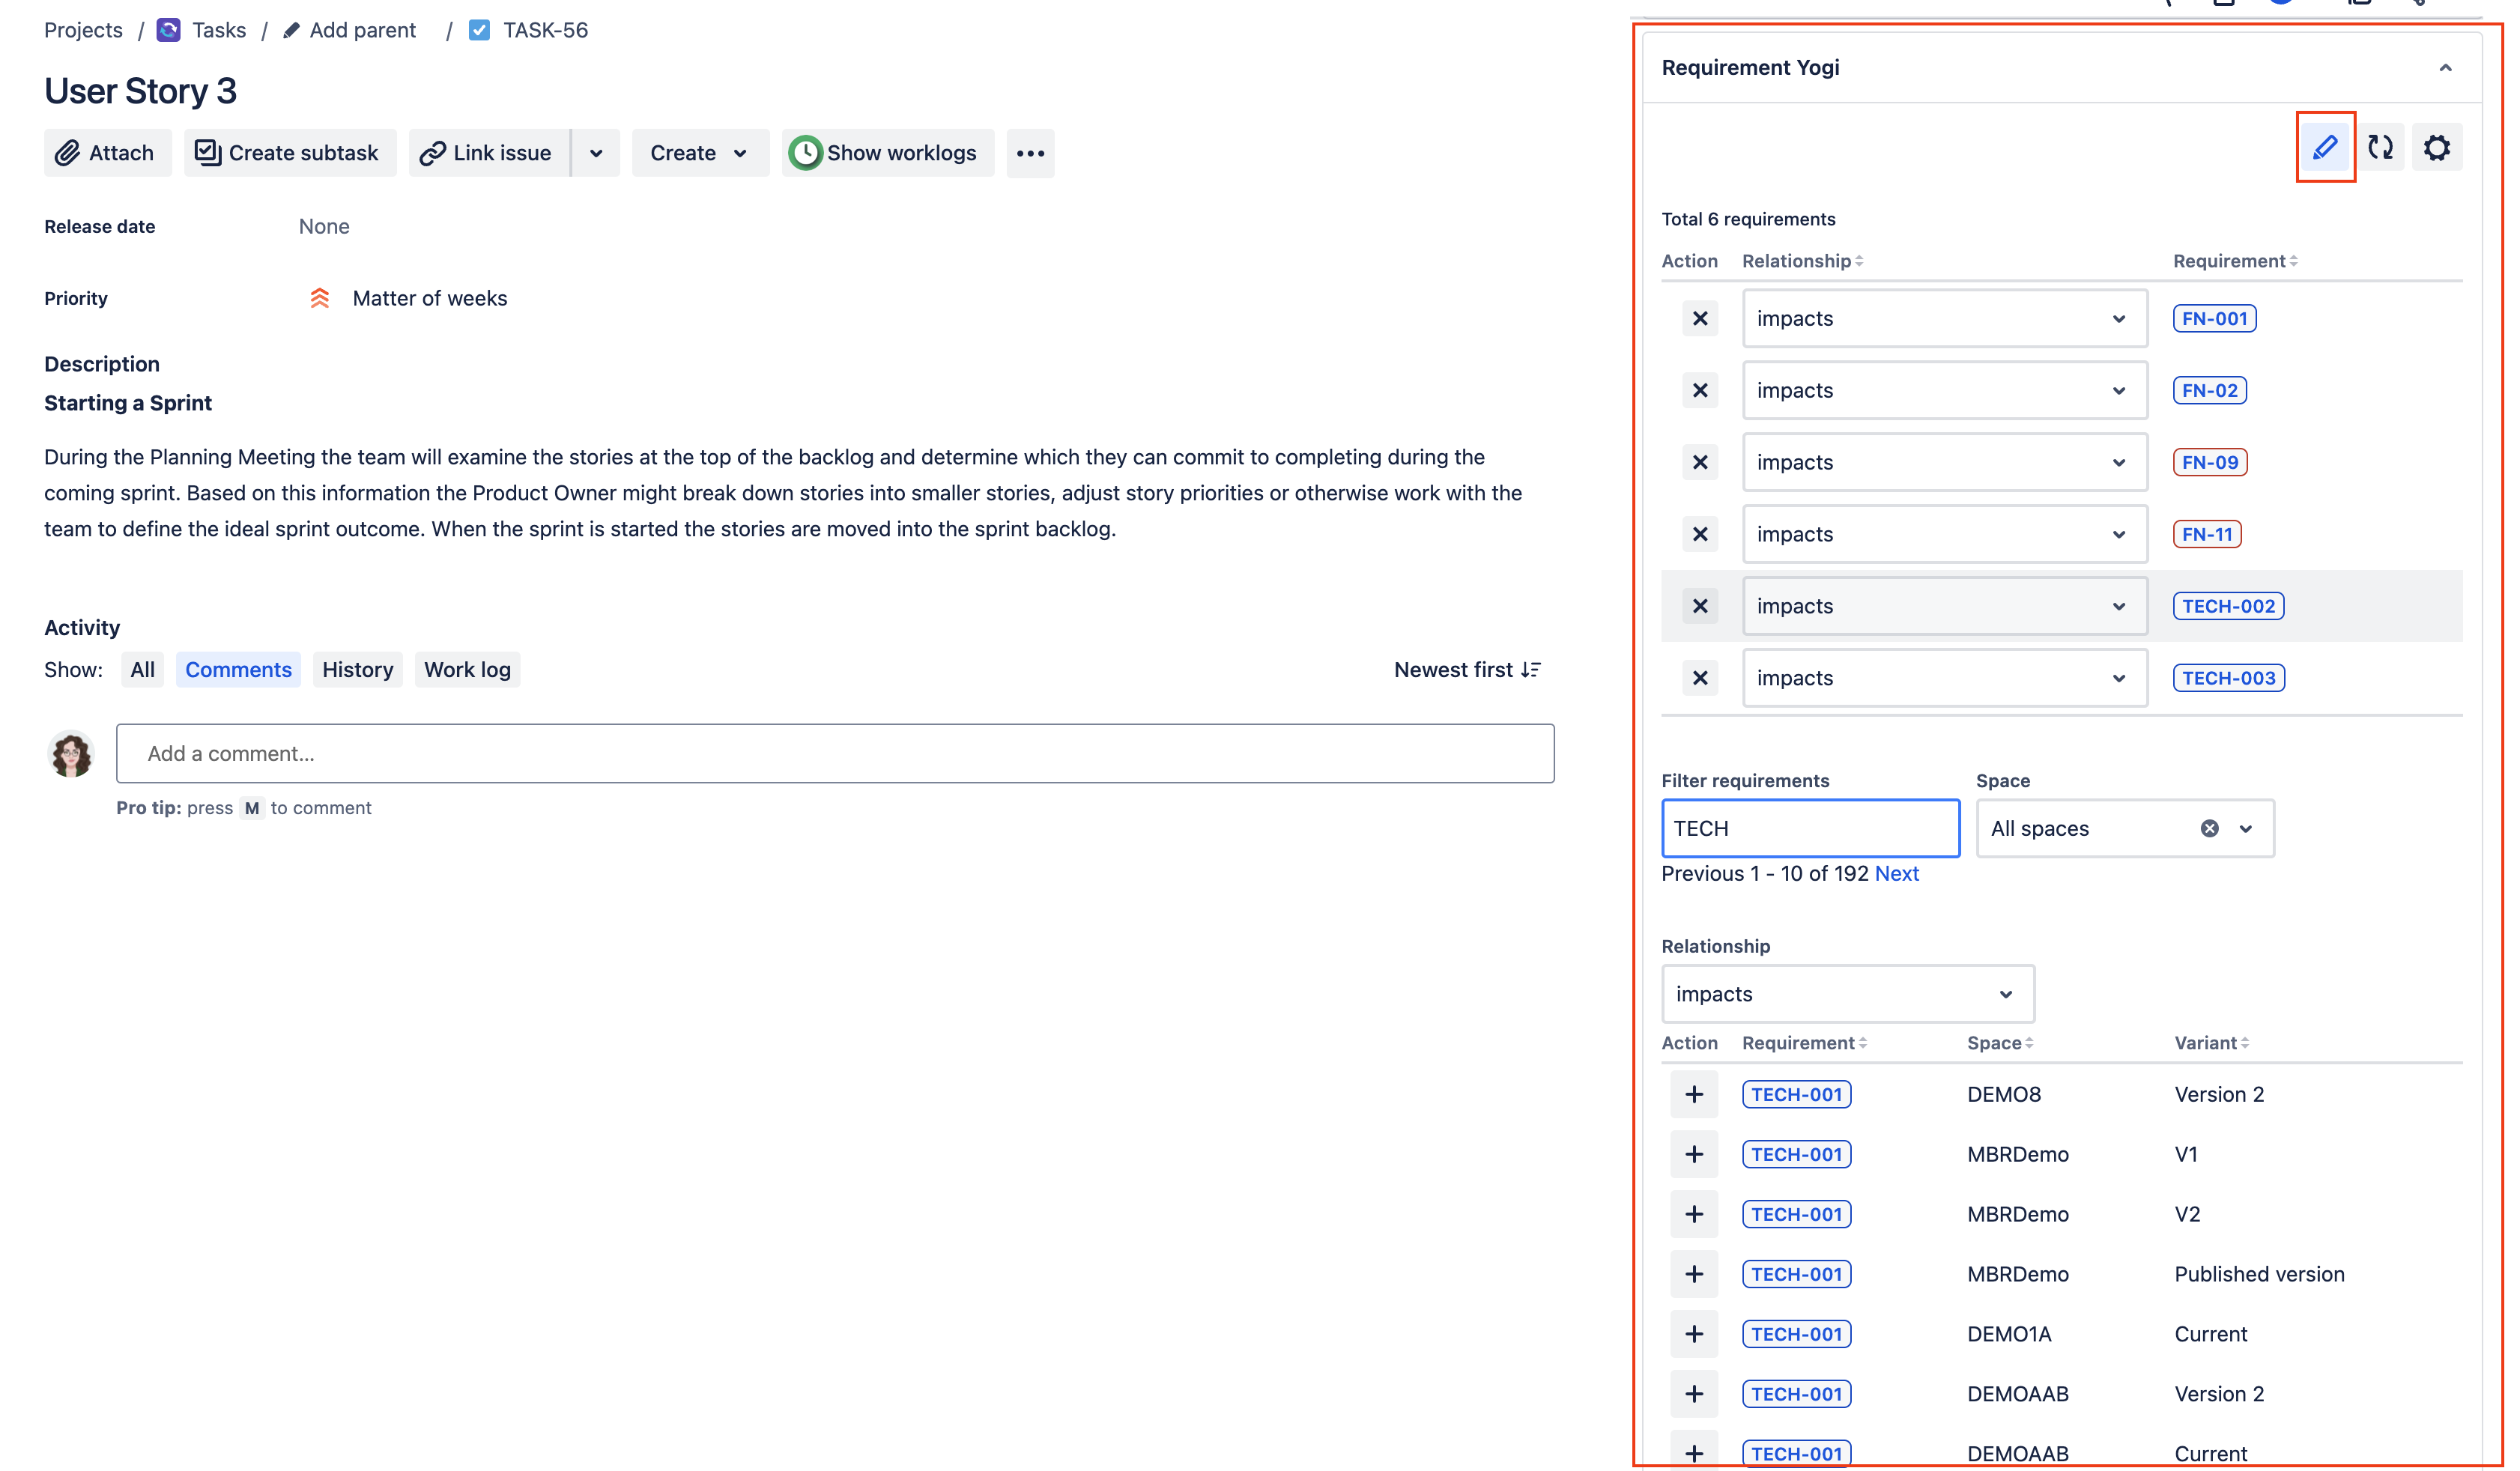
|
2. Requirement Links are visible as a section in the issue NEW
|
In the Jira issue, click on the |

|
|
Now you can see your requirements directly in the Issue, as a list. |
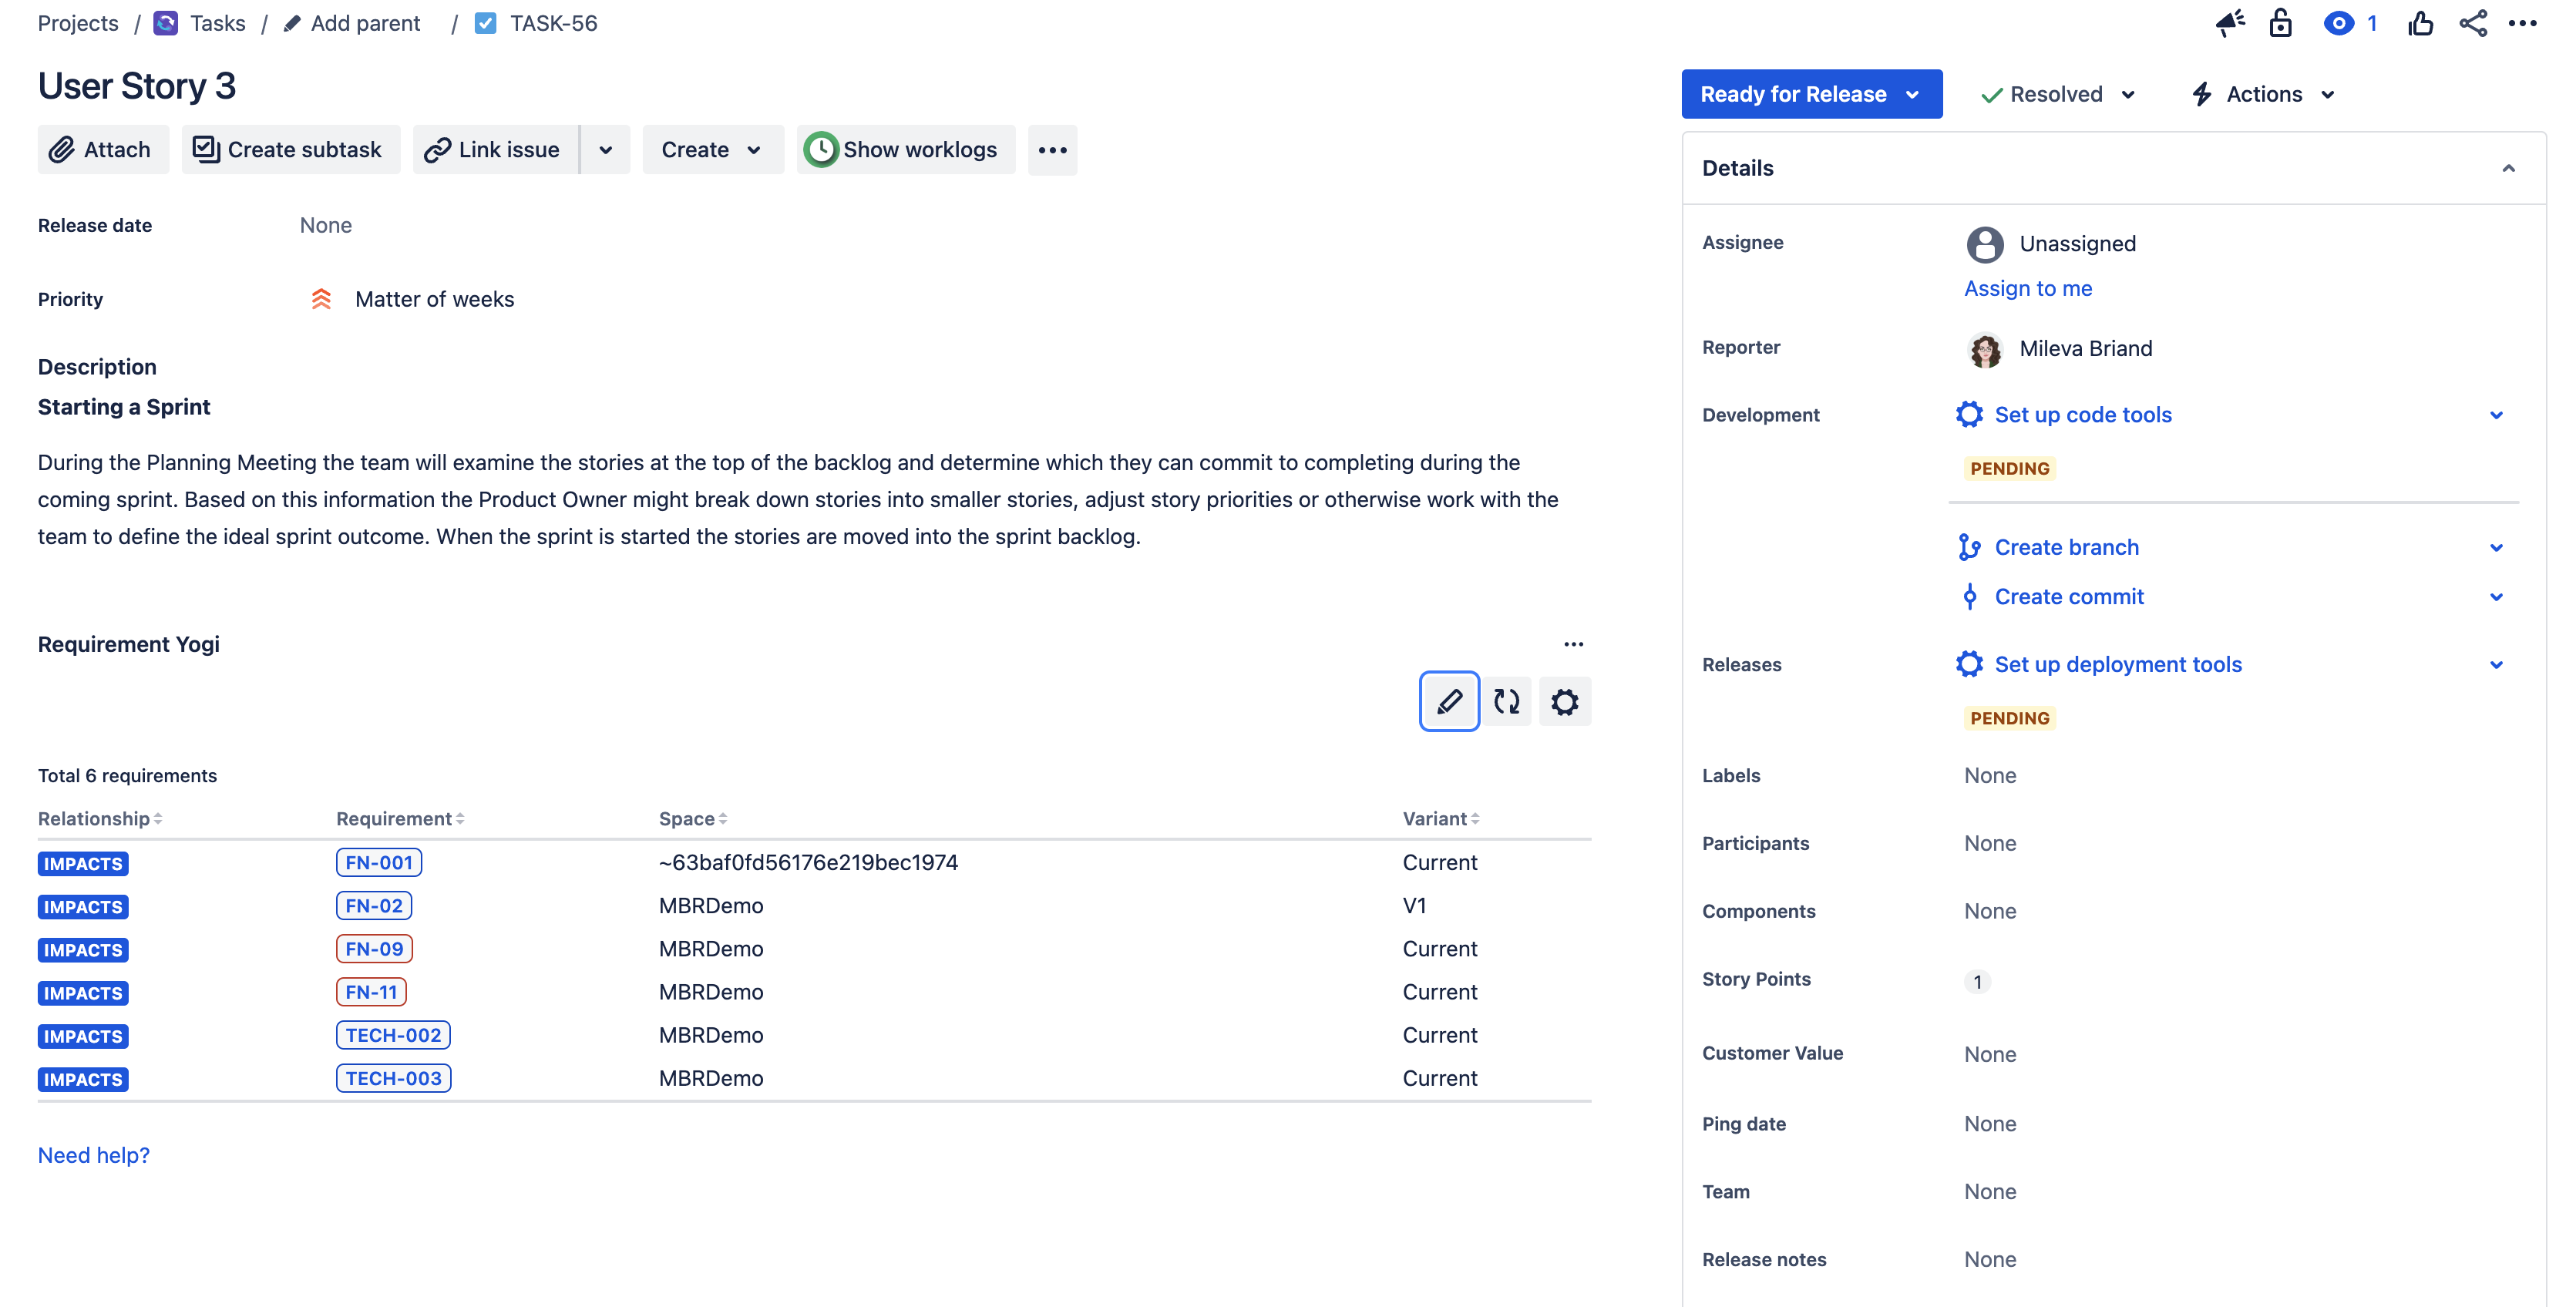
|
|
Click on edit to access the content. You need to have permission to edit the issue to add or remove requirements |
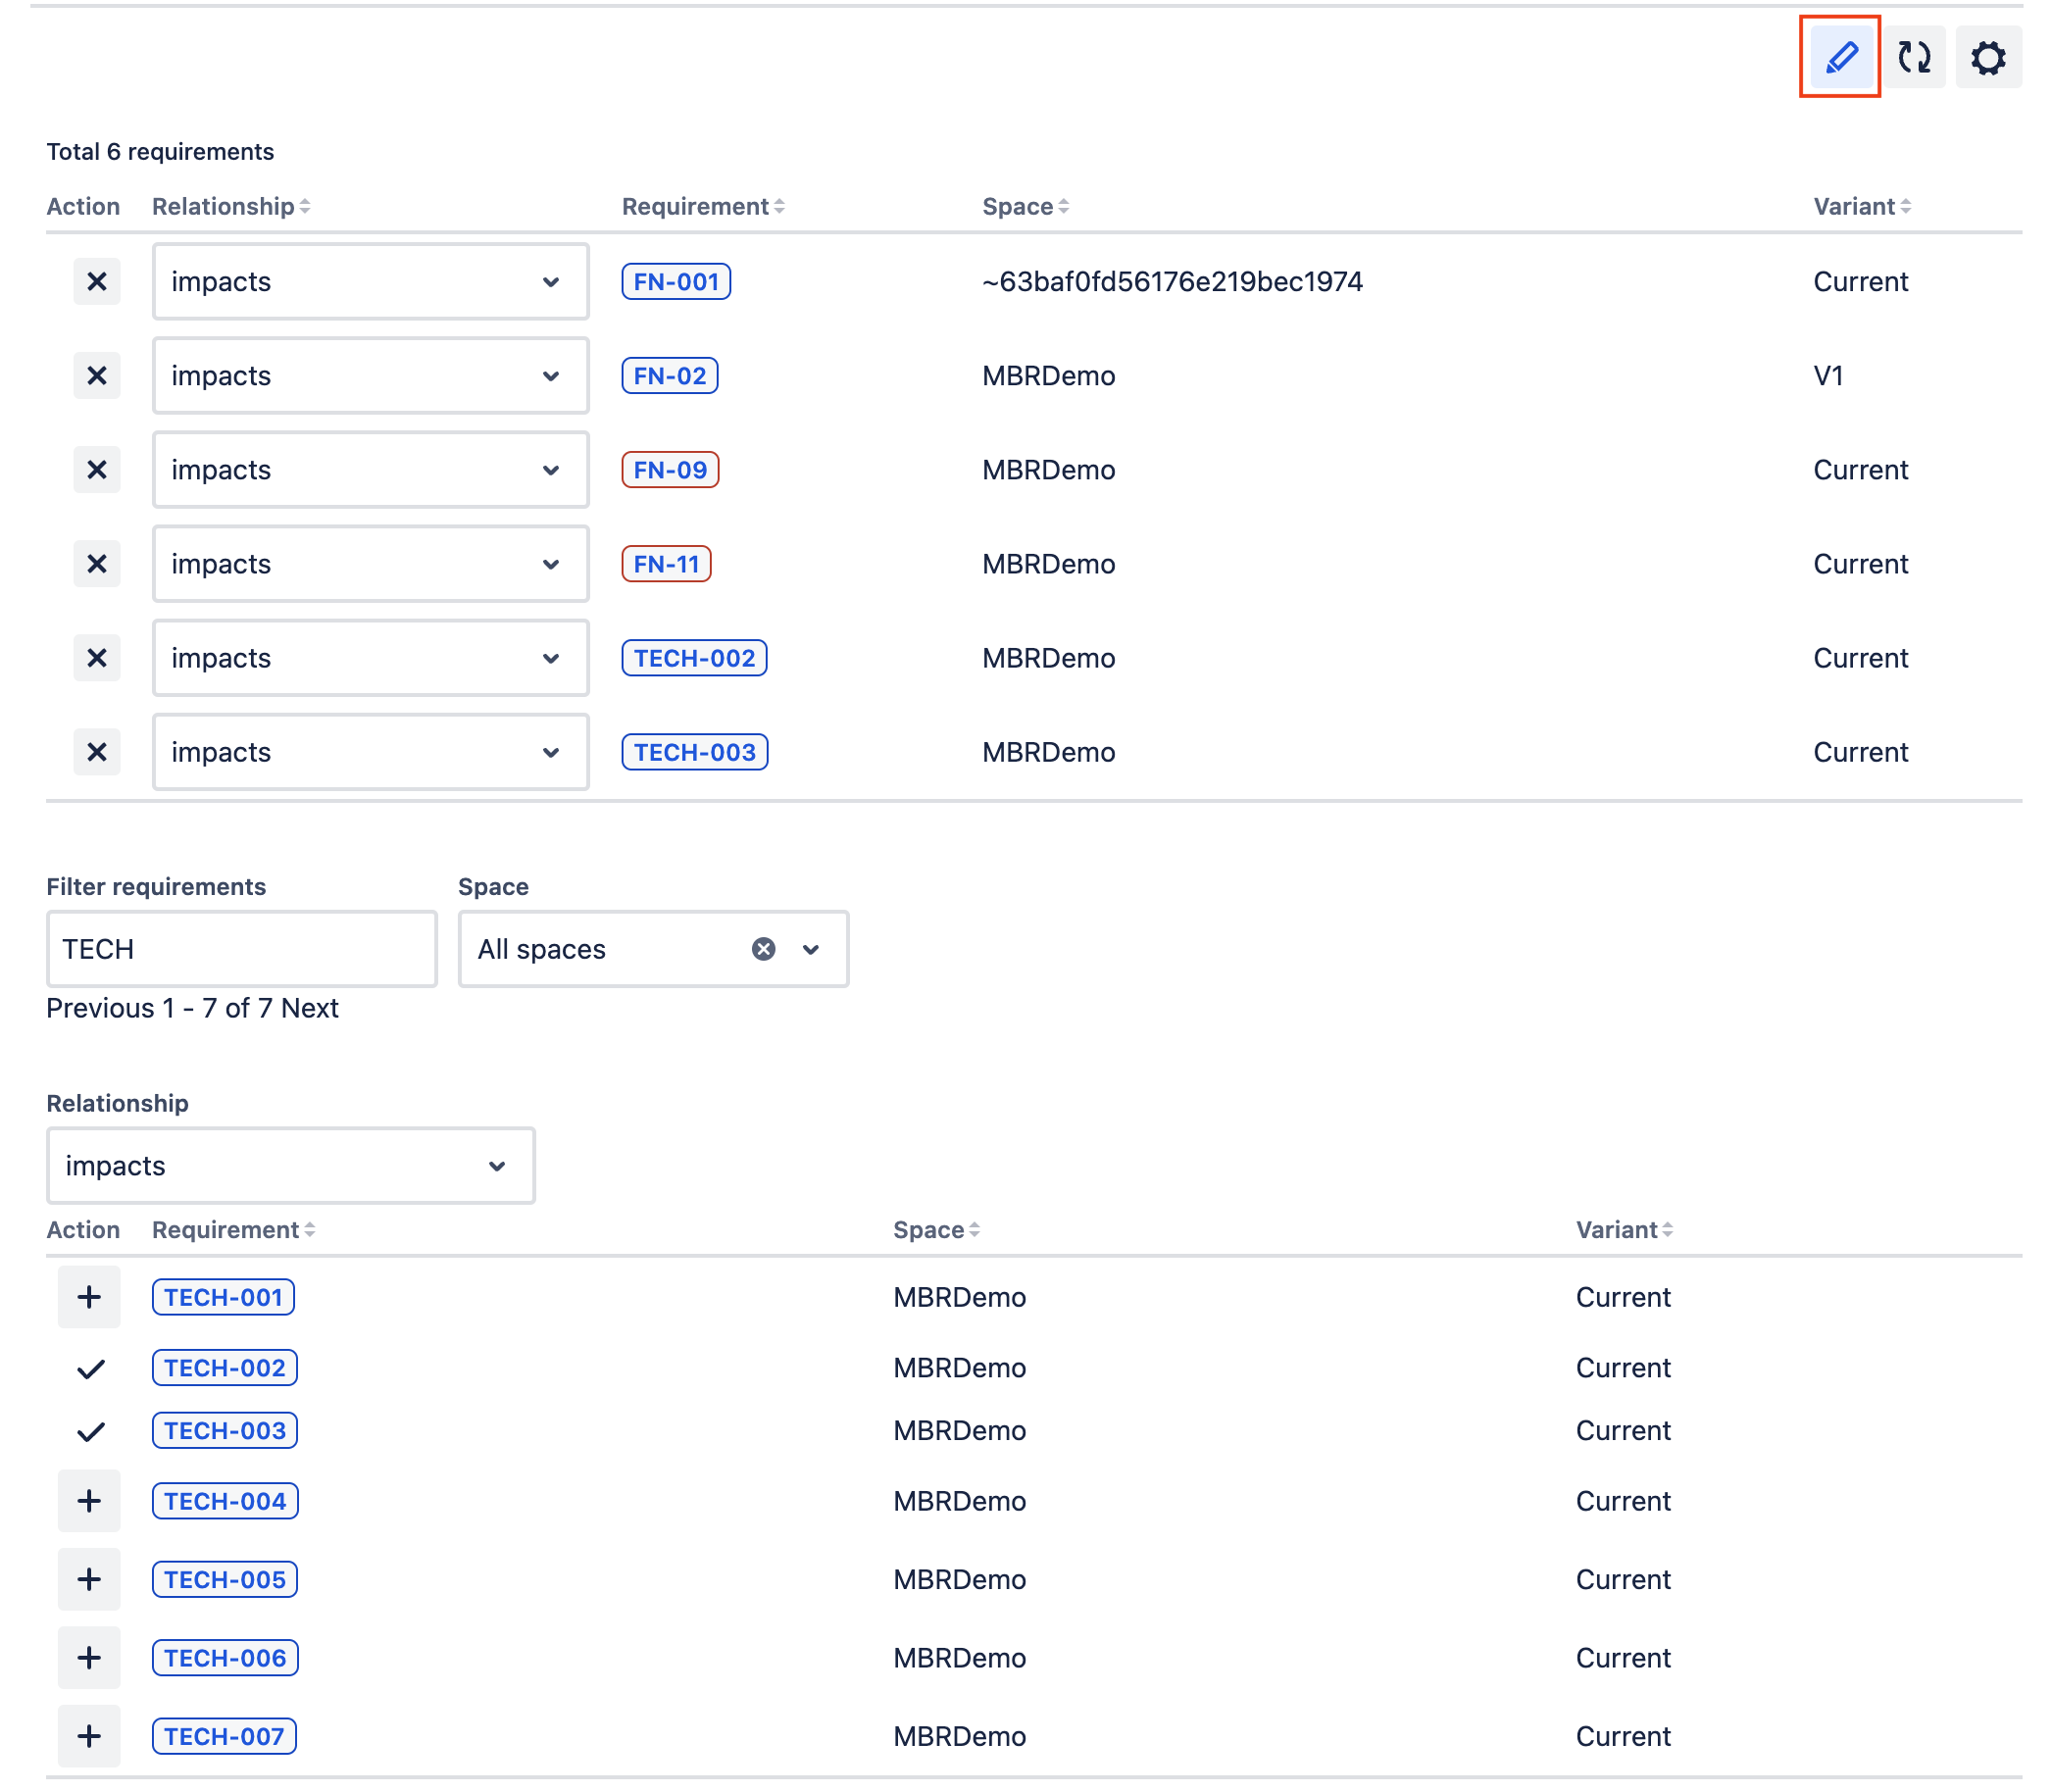
|
|
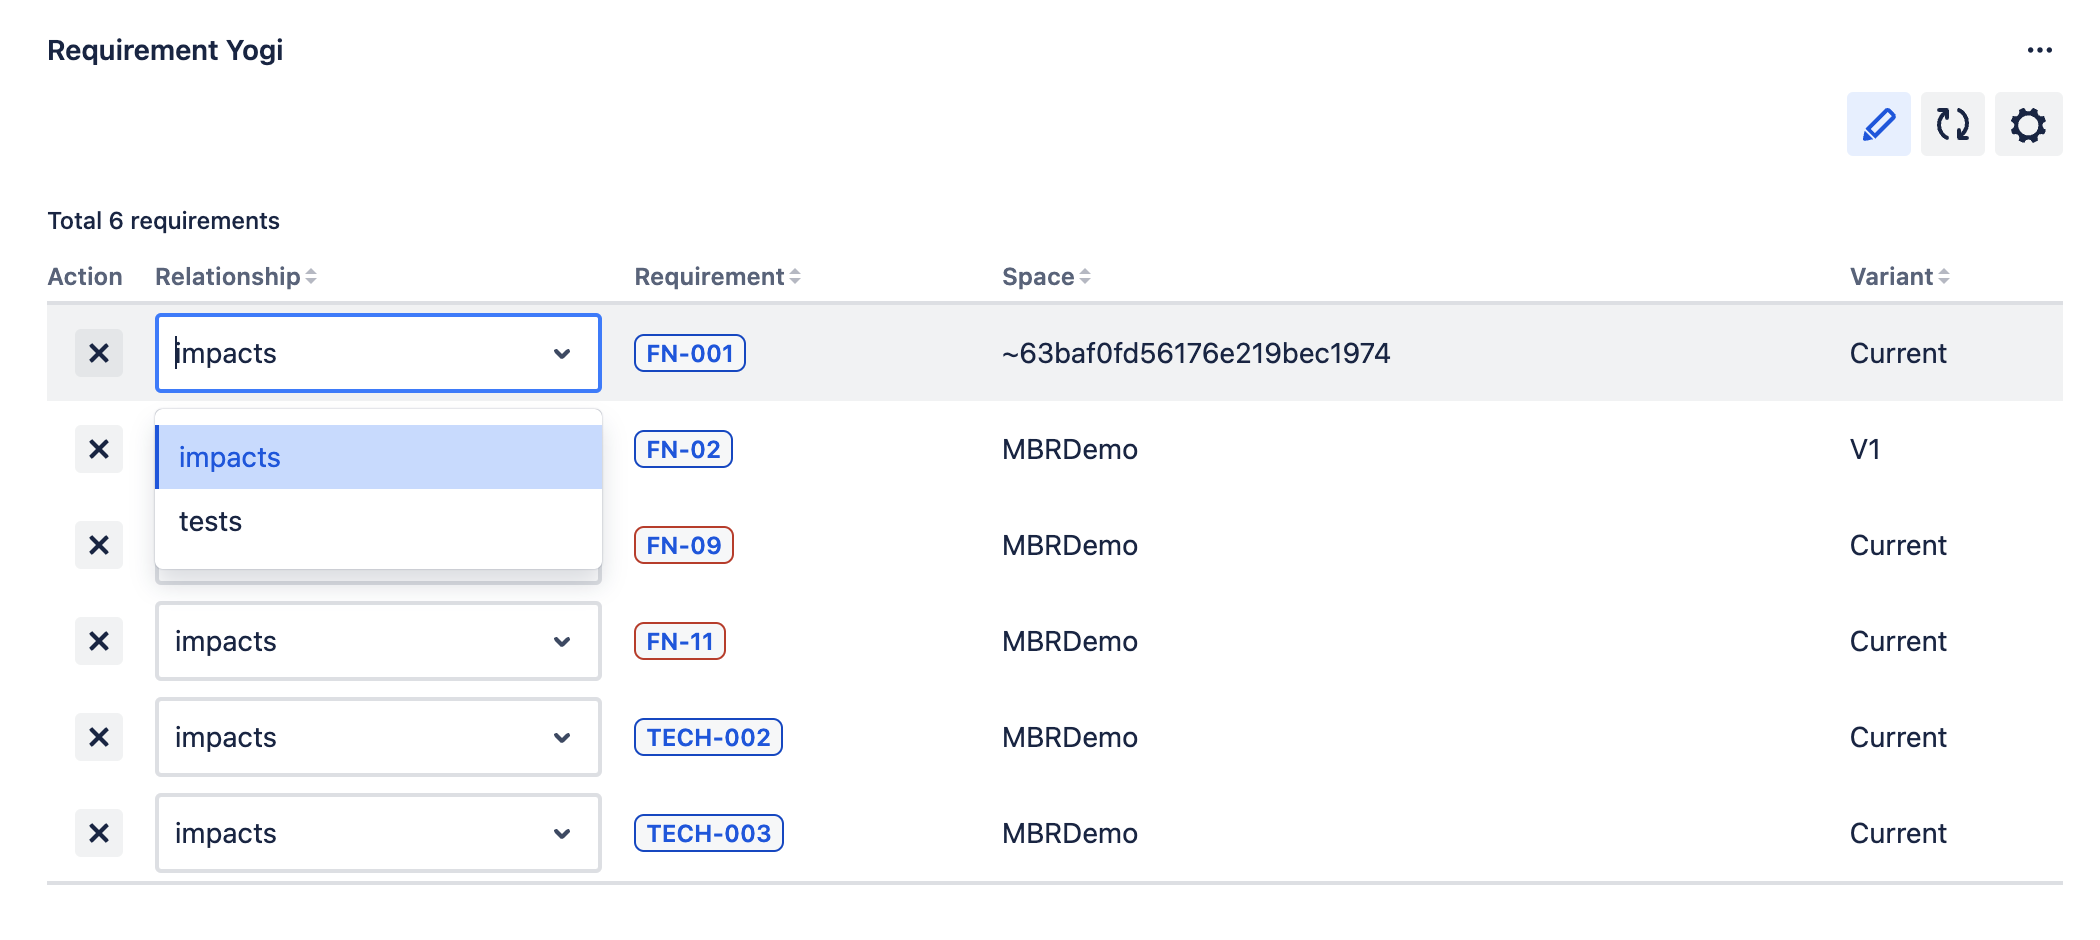
|
|
Add new requirement links
|
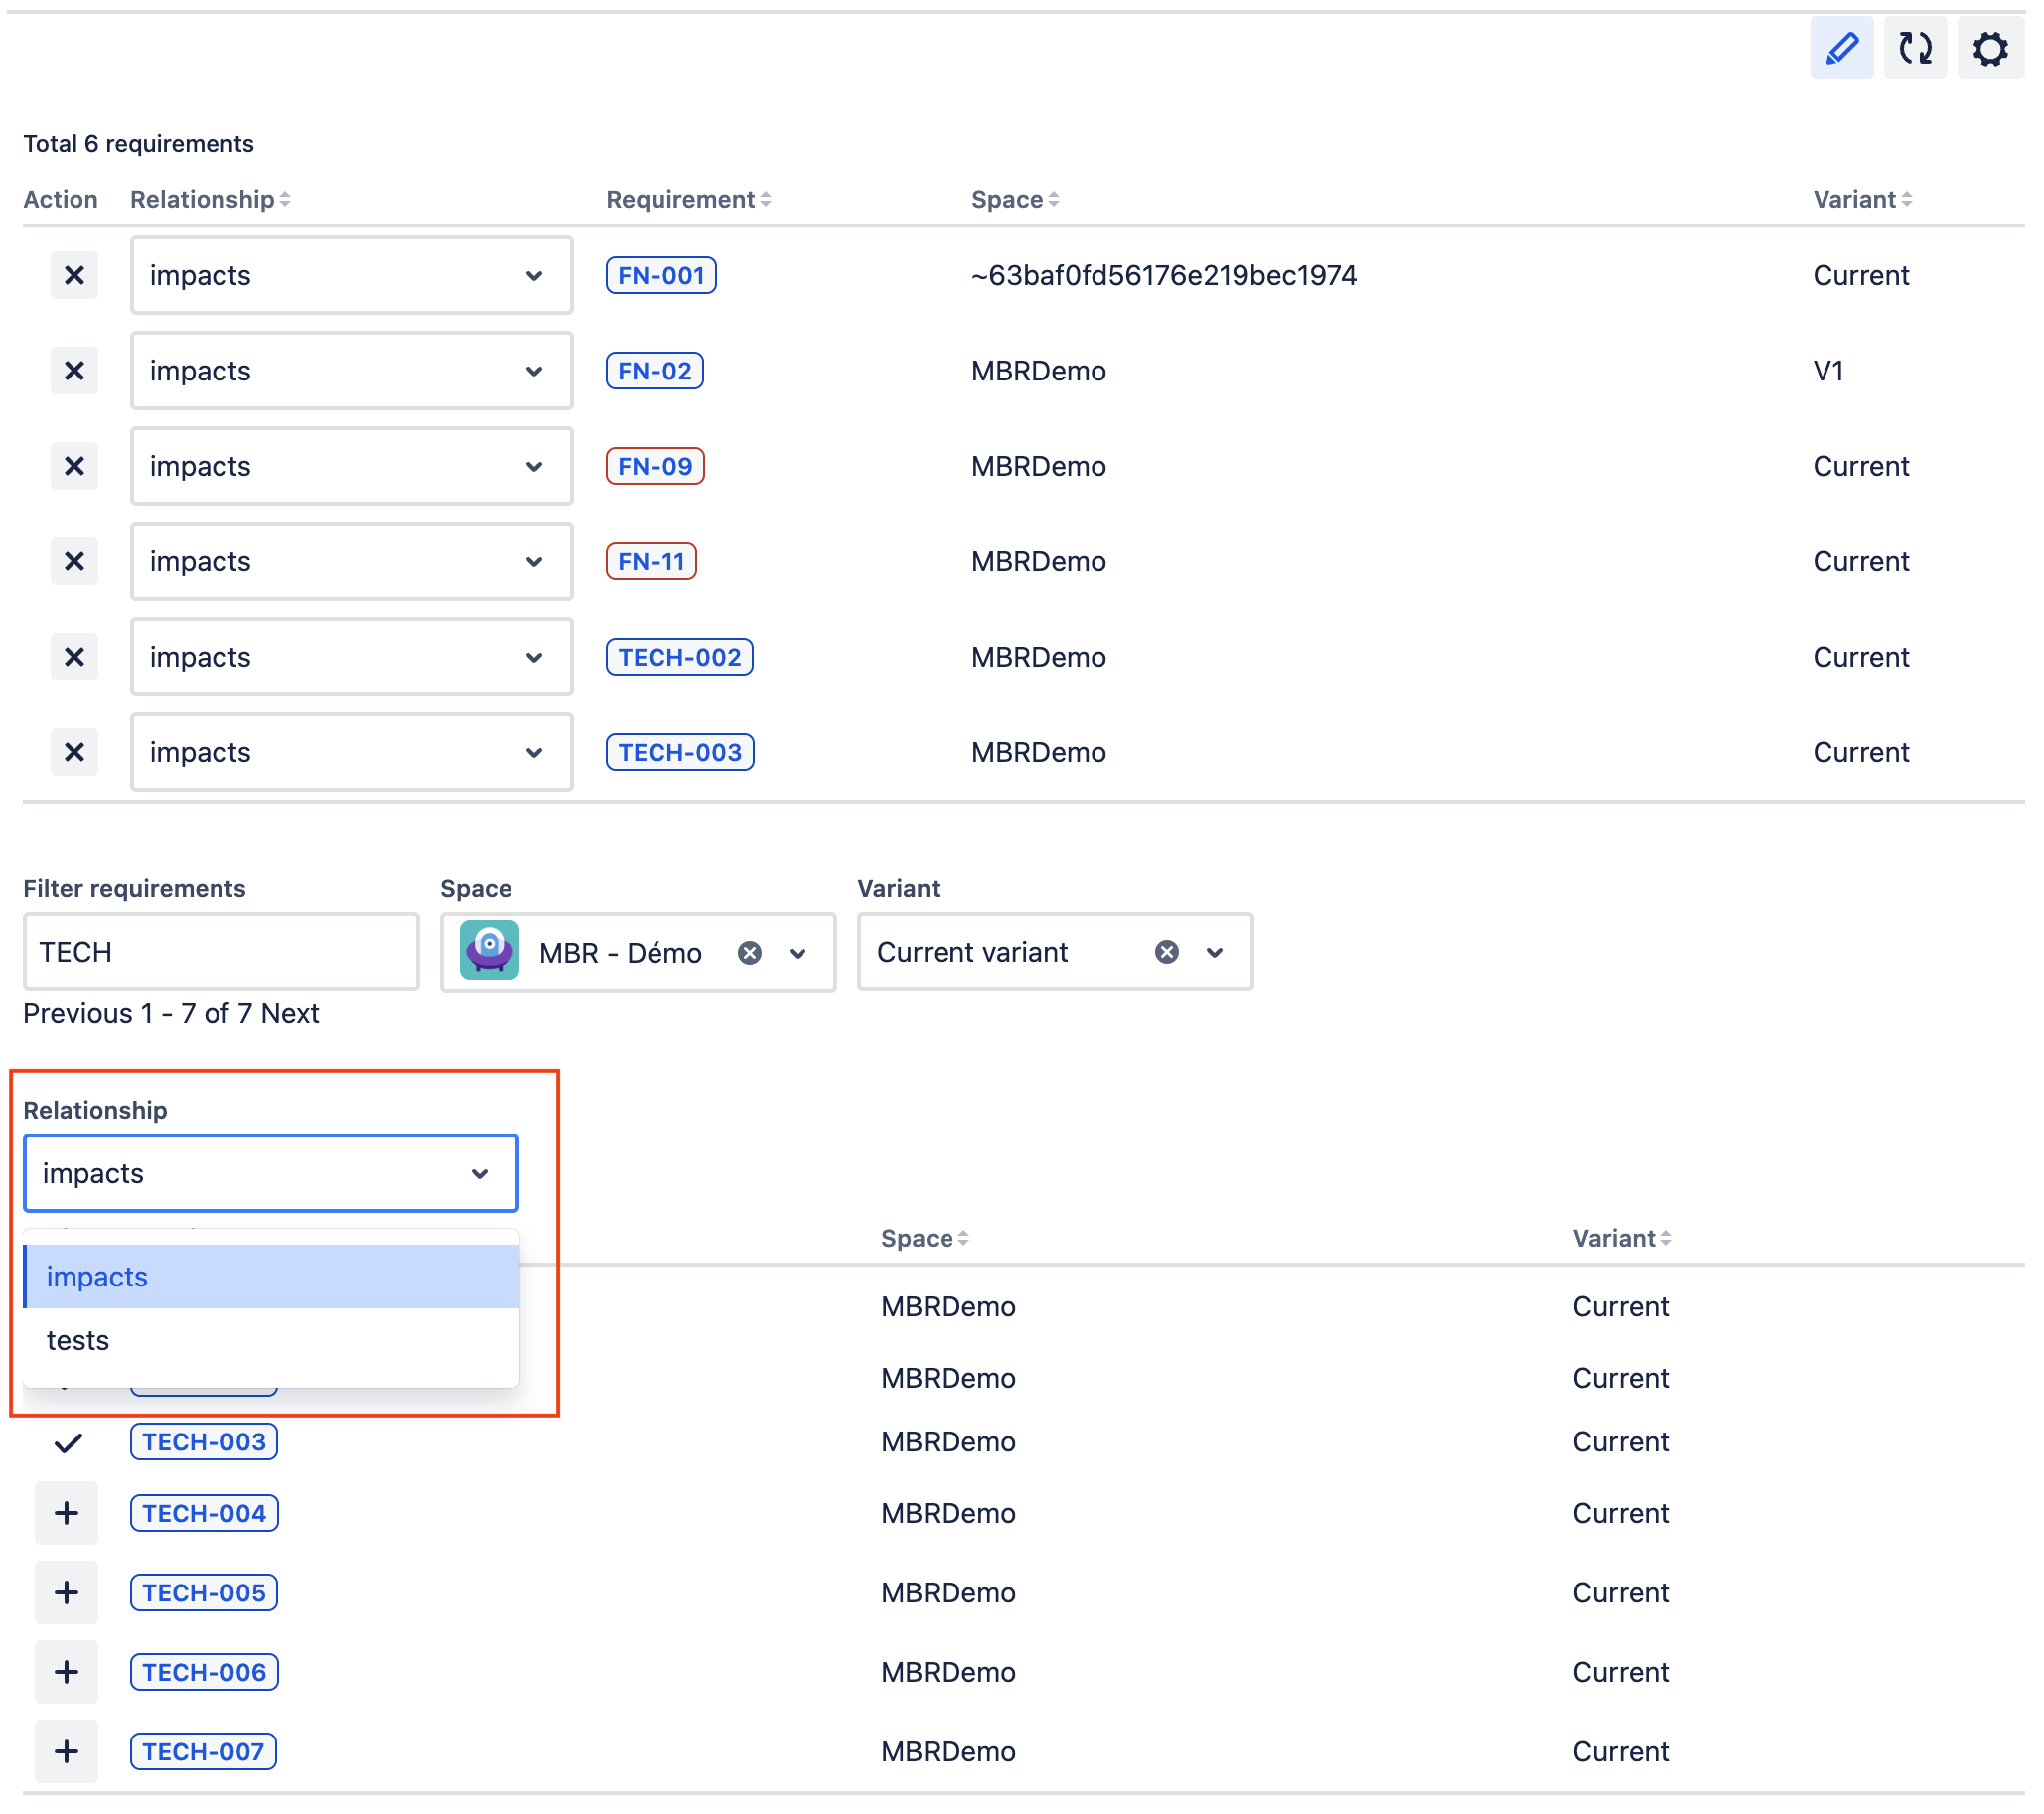
|
What does it look like in Confluence?
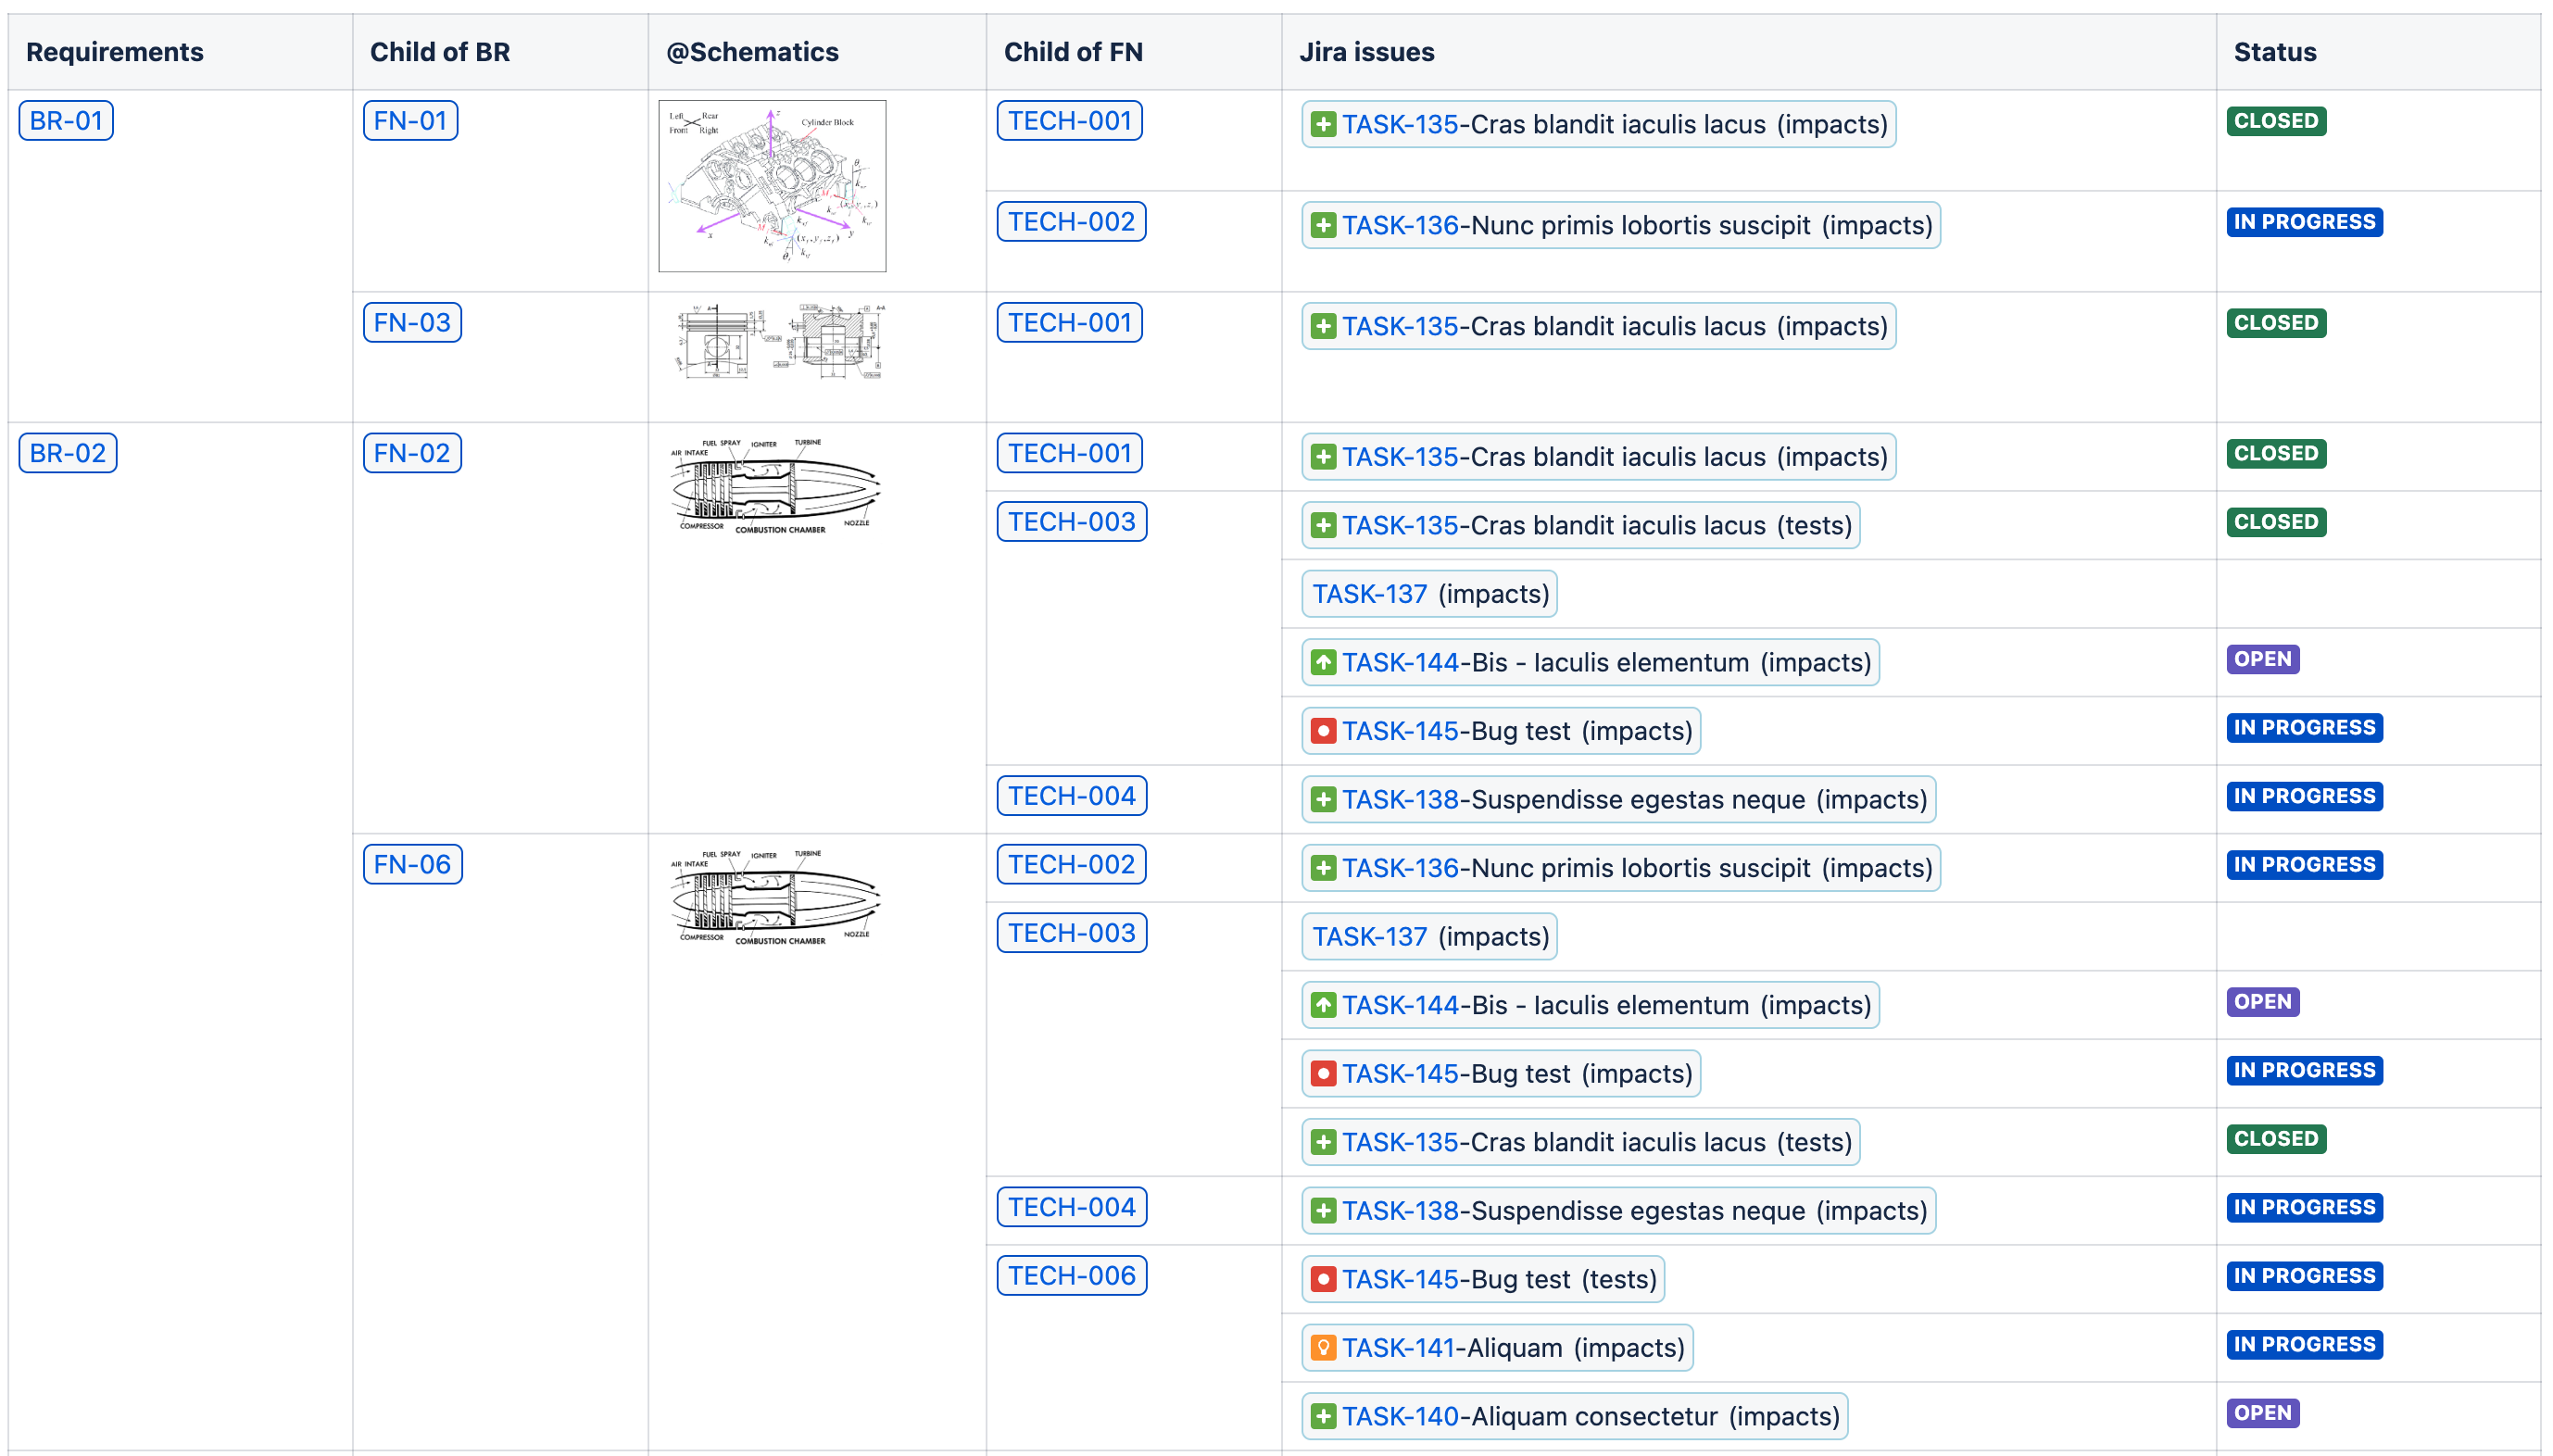
Once you have added a requirement to an issue, you can see the issue status in Confluence when displaying the requirement in the detailed view.
You can also add columns with Jira issues in the traceability matrix. It is possible to filter with relationships.
You can also search for requirement linked to specific issues using the search syntax.
|
Requirement detail → List |
Requirement detail → Dependency Graph |
Traceability Matrix |
|---|---|---|
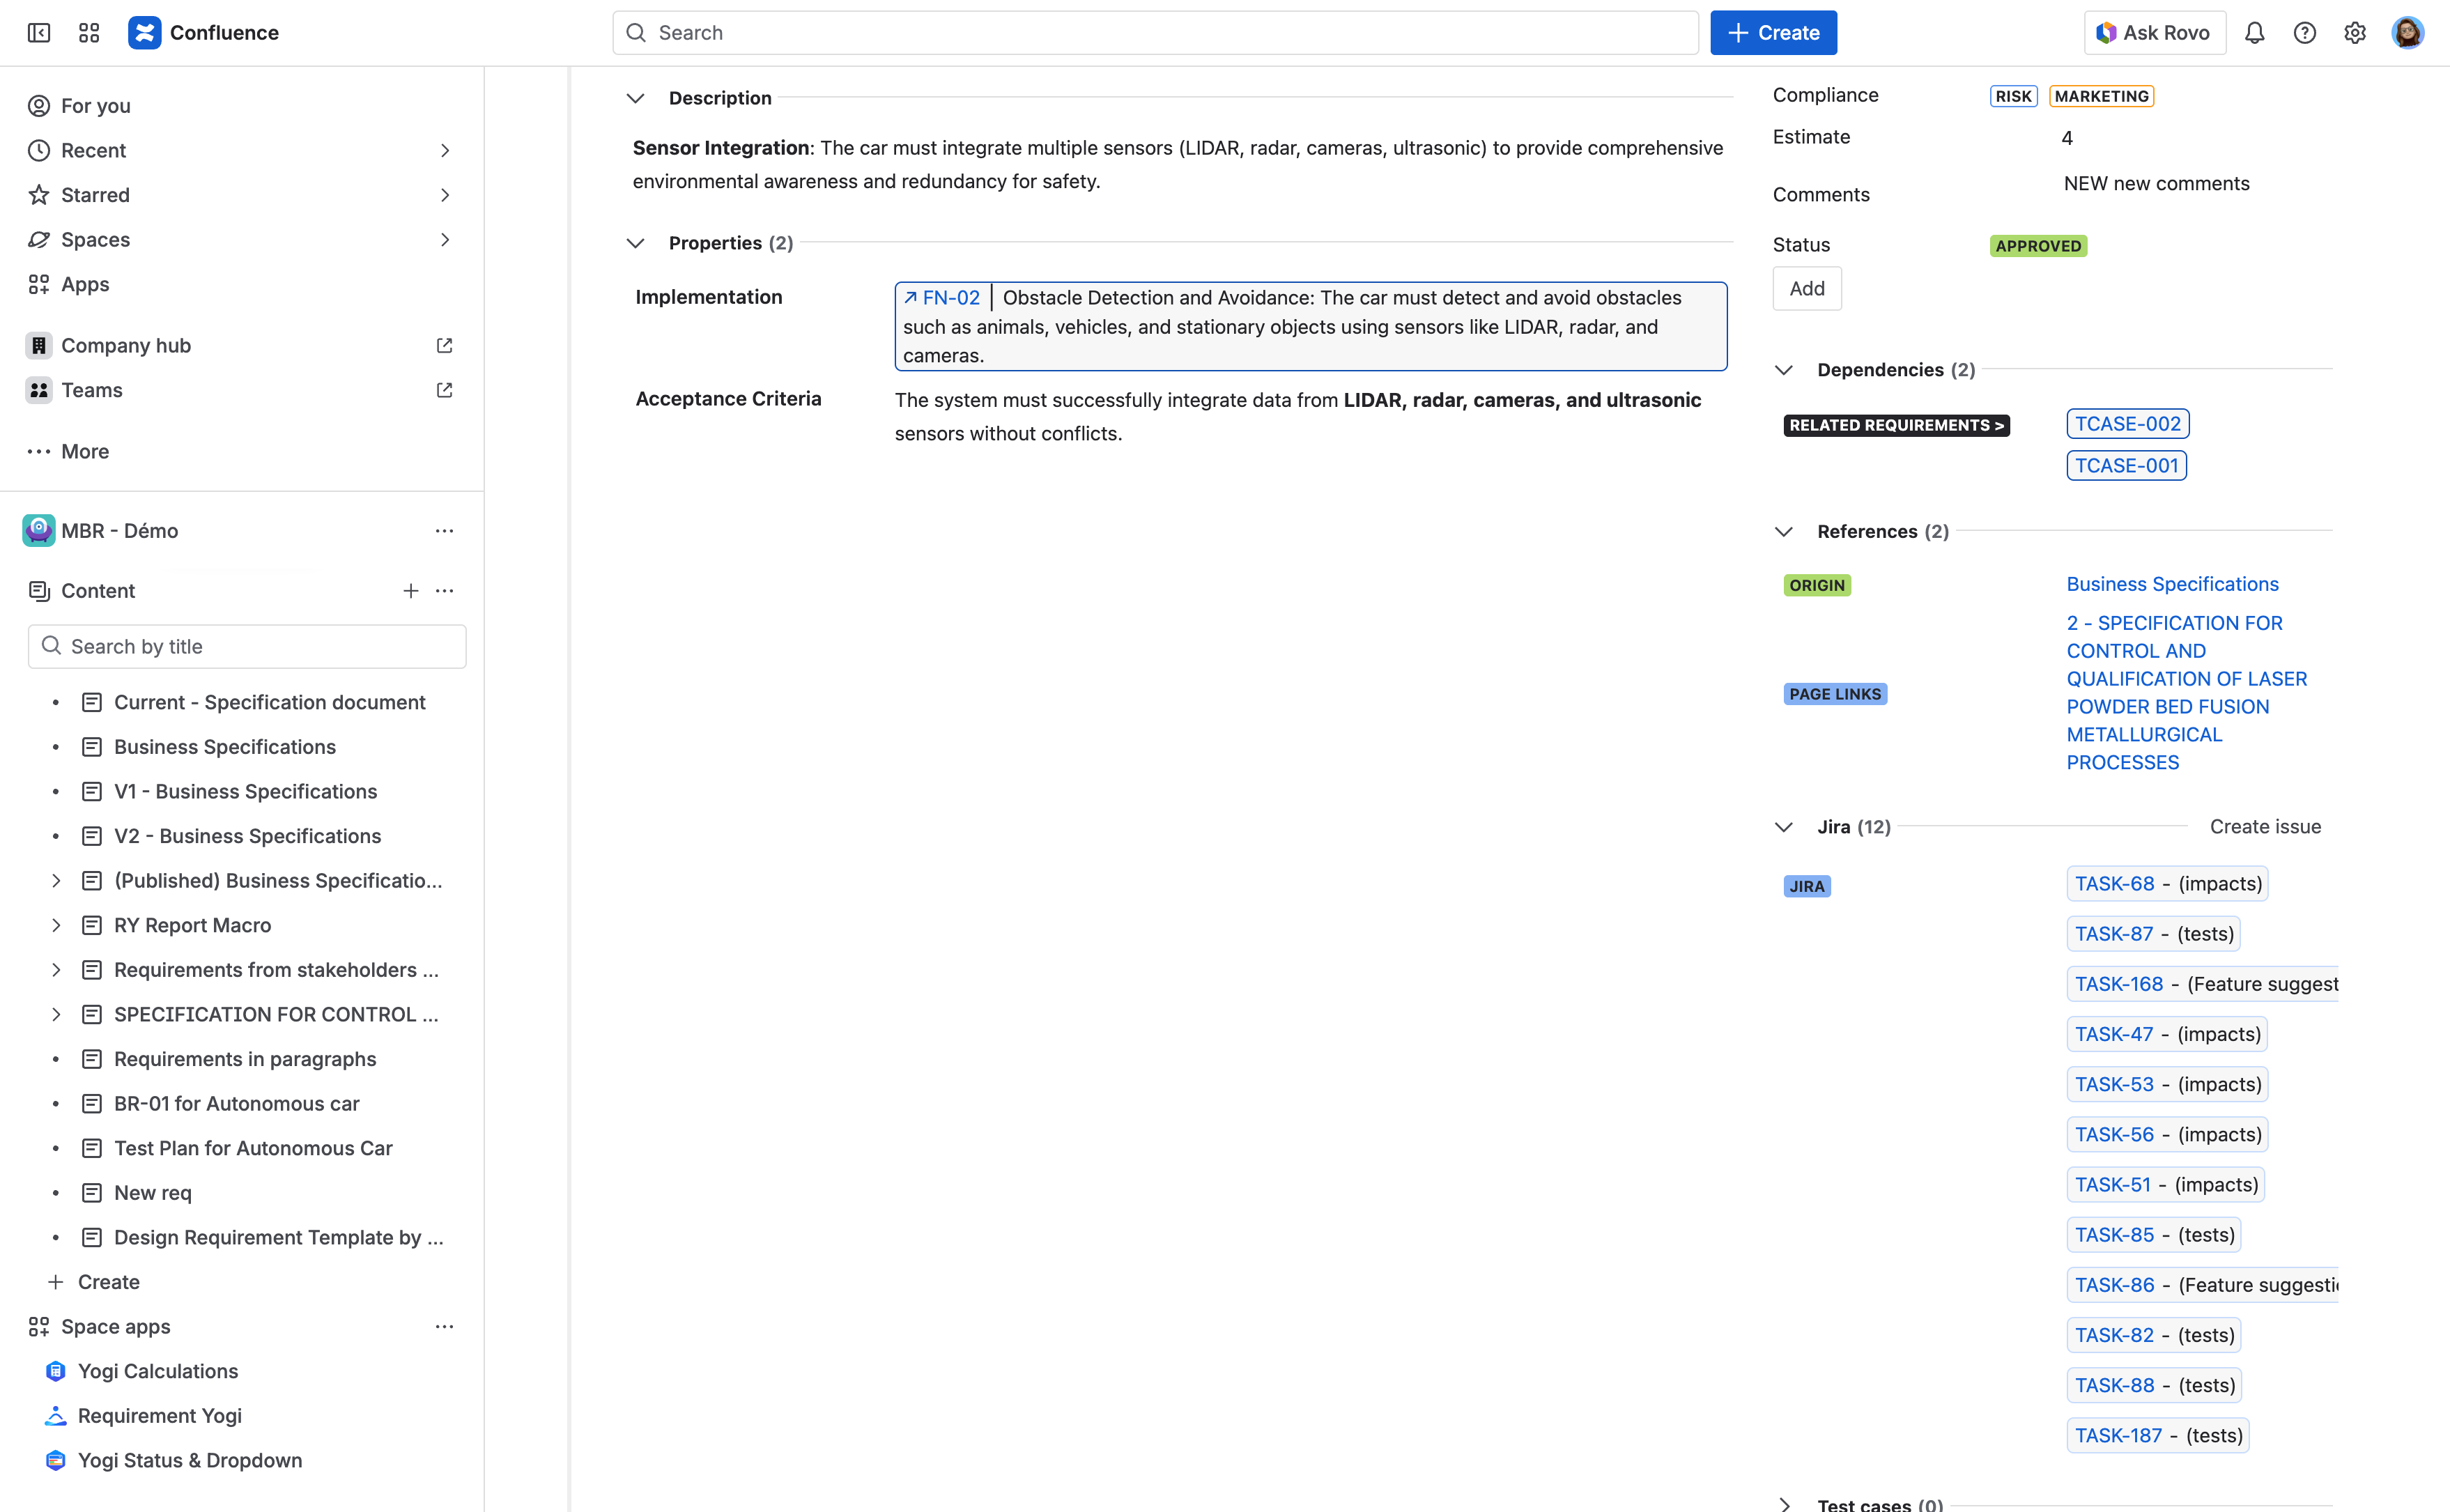
|
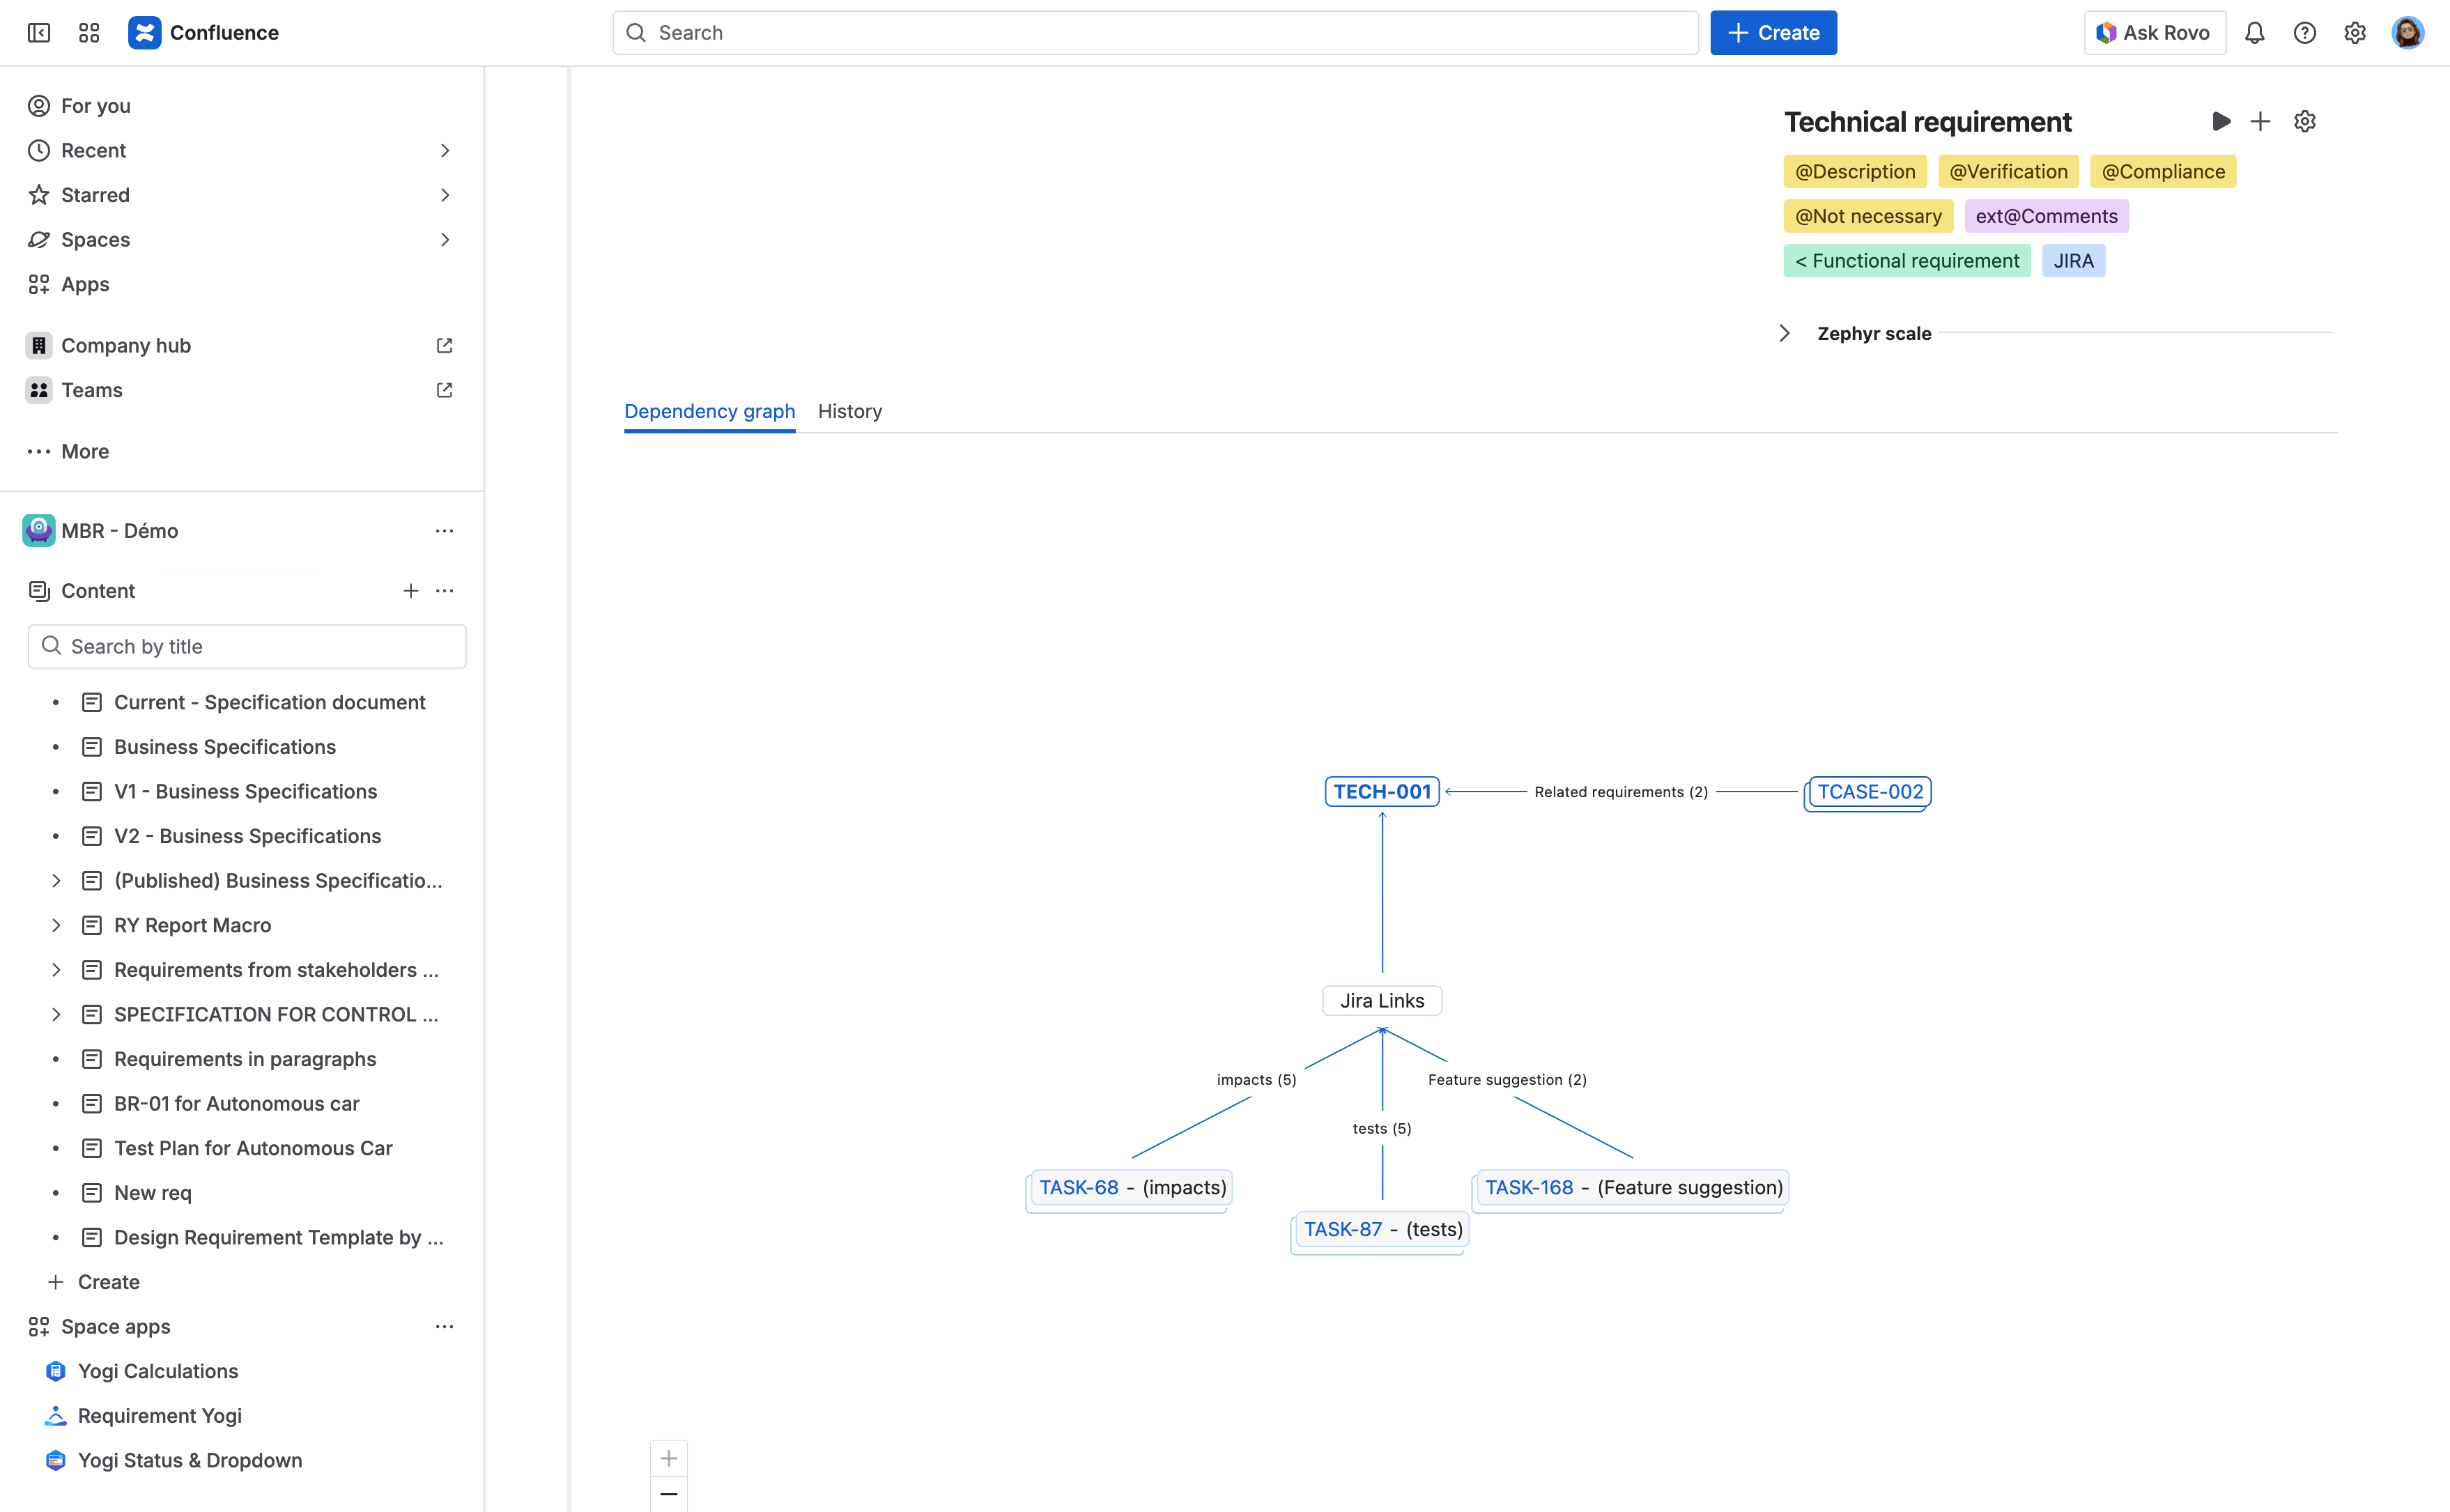
|
|
How to administrate Requirement to Jira issue relationships
⚠️ You need to be an administrator.
|
Click on the cog button to go in the RY for Jira administration. |
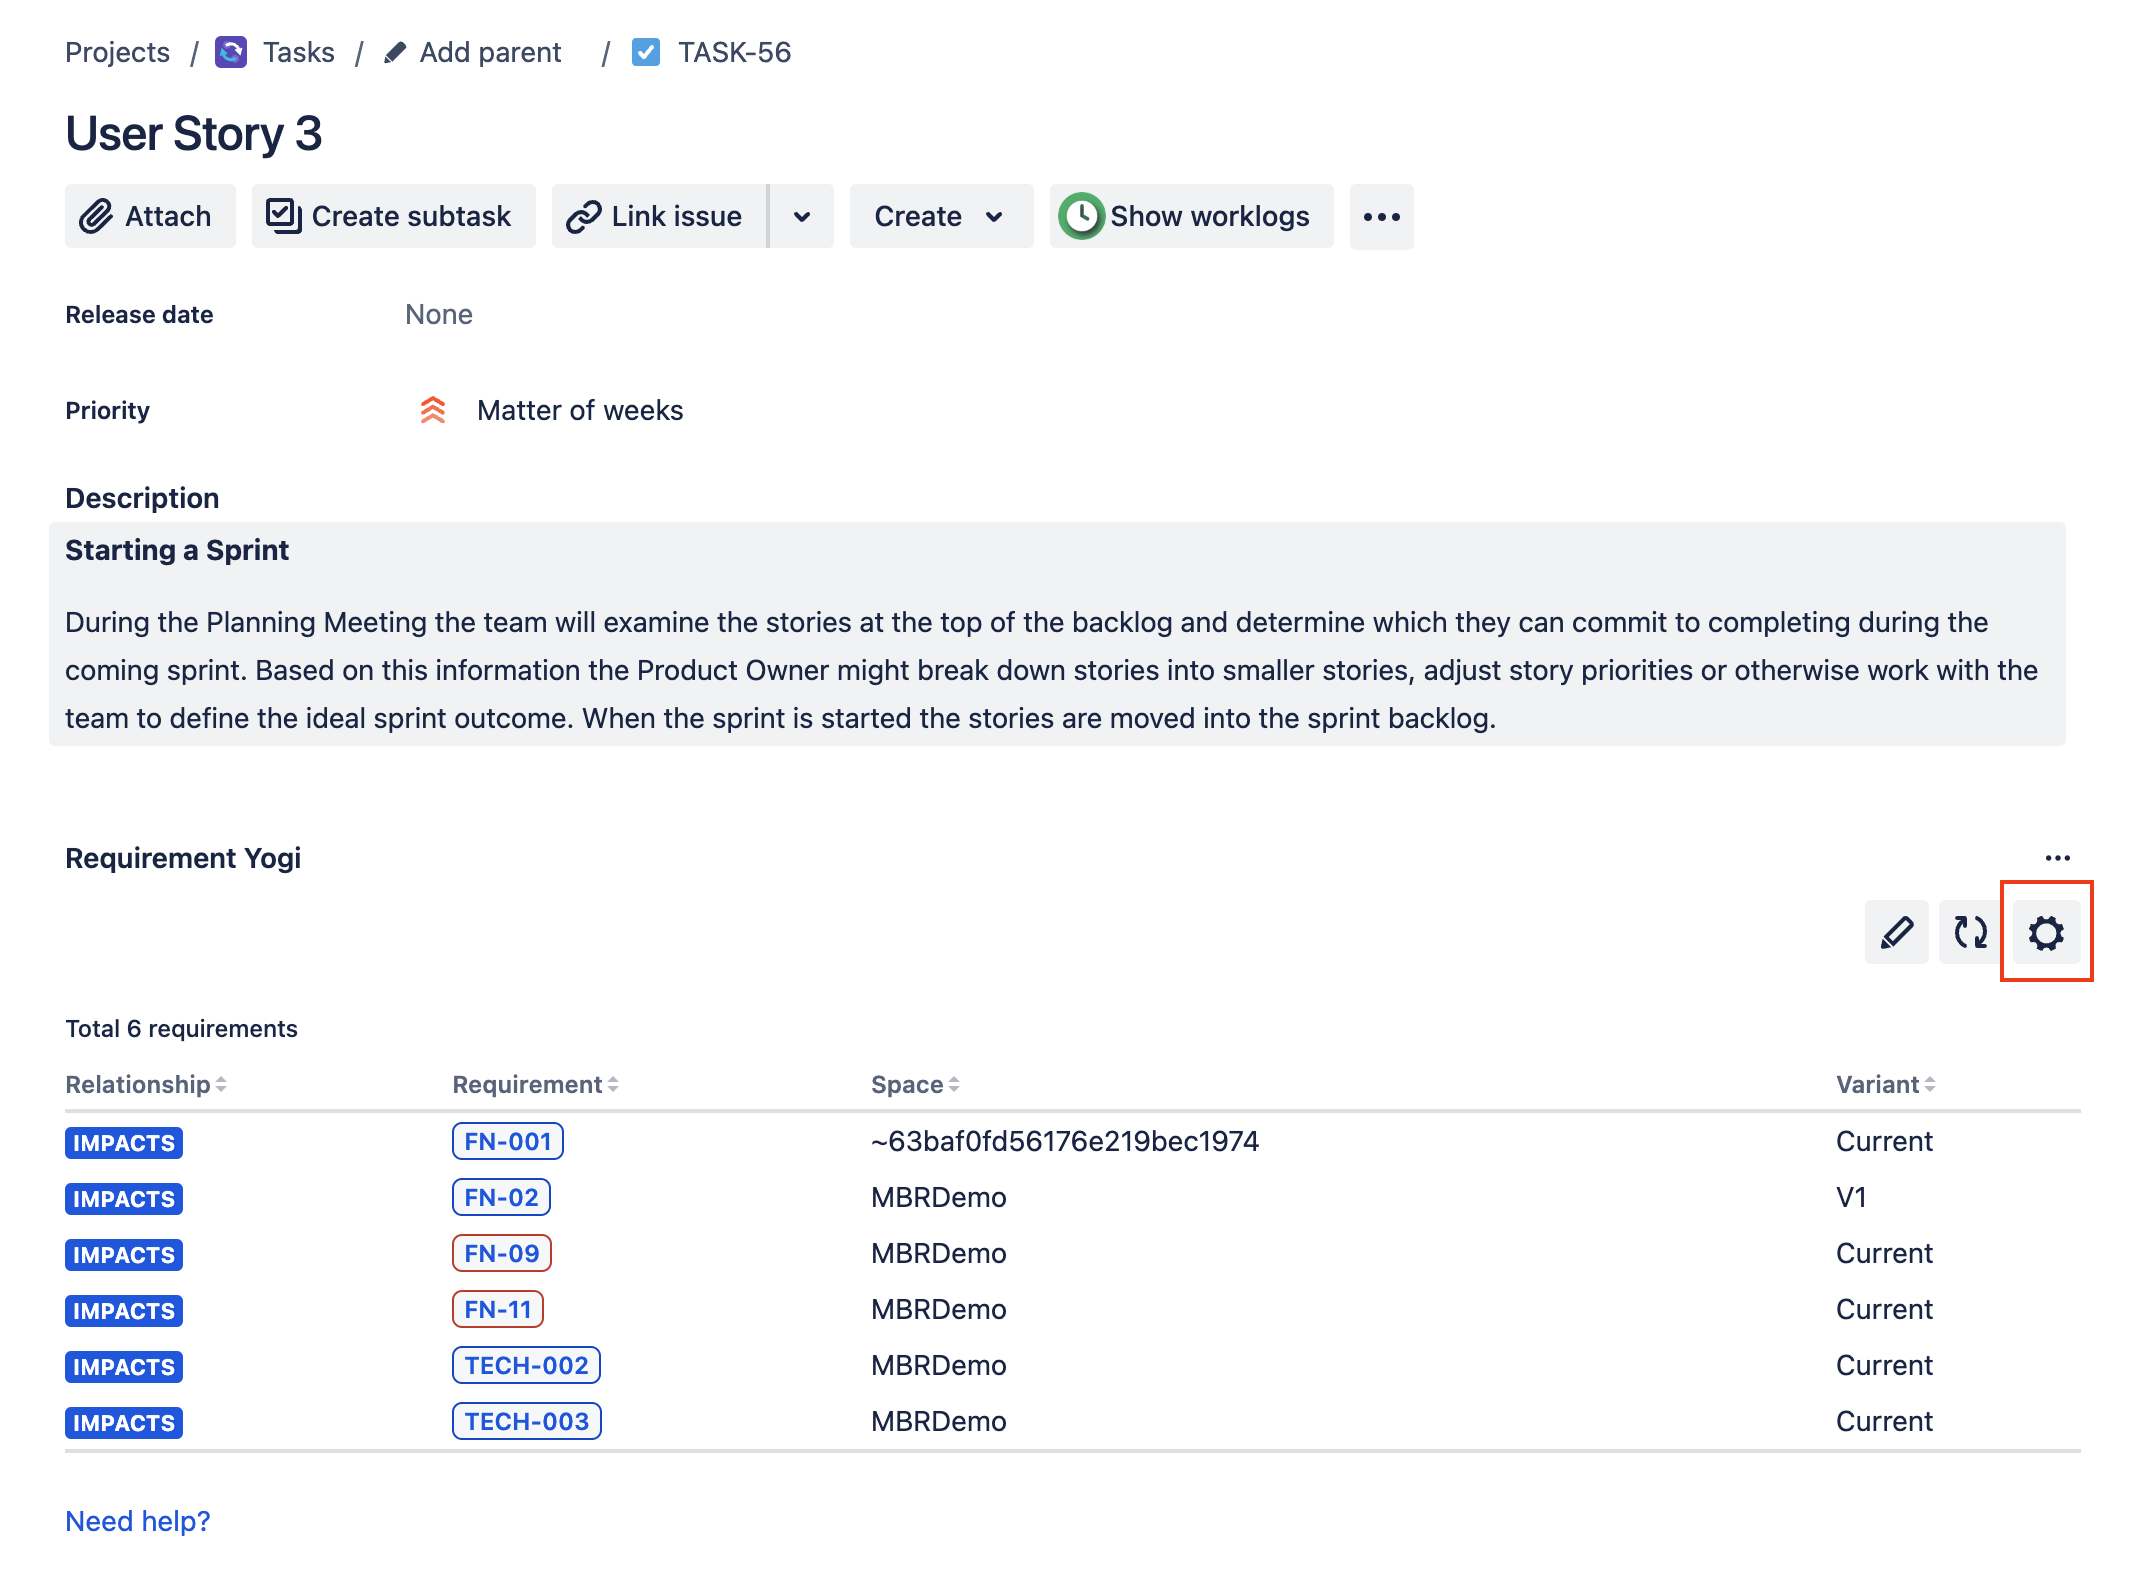
|
|
Go to the Relationships tab:
|
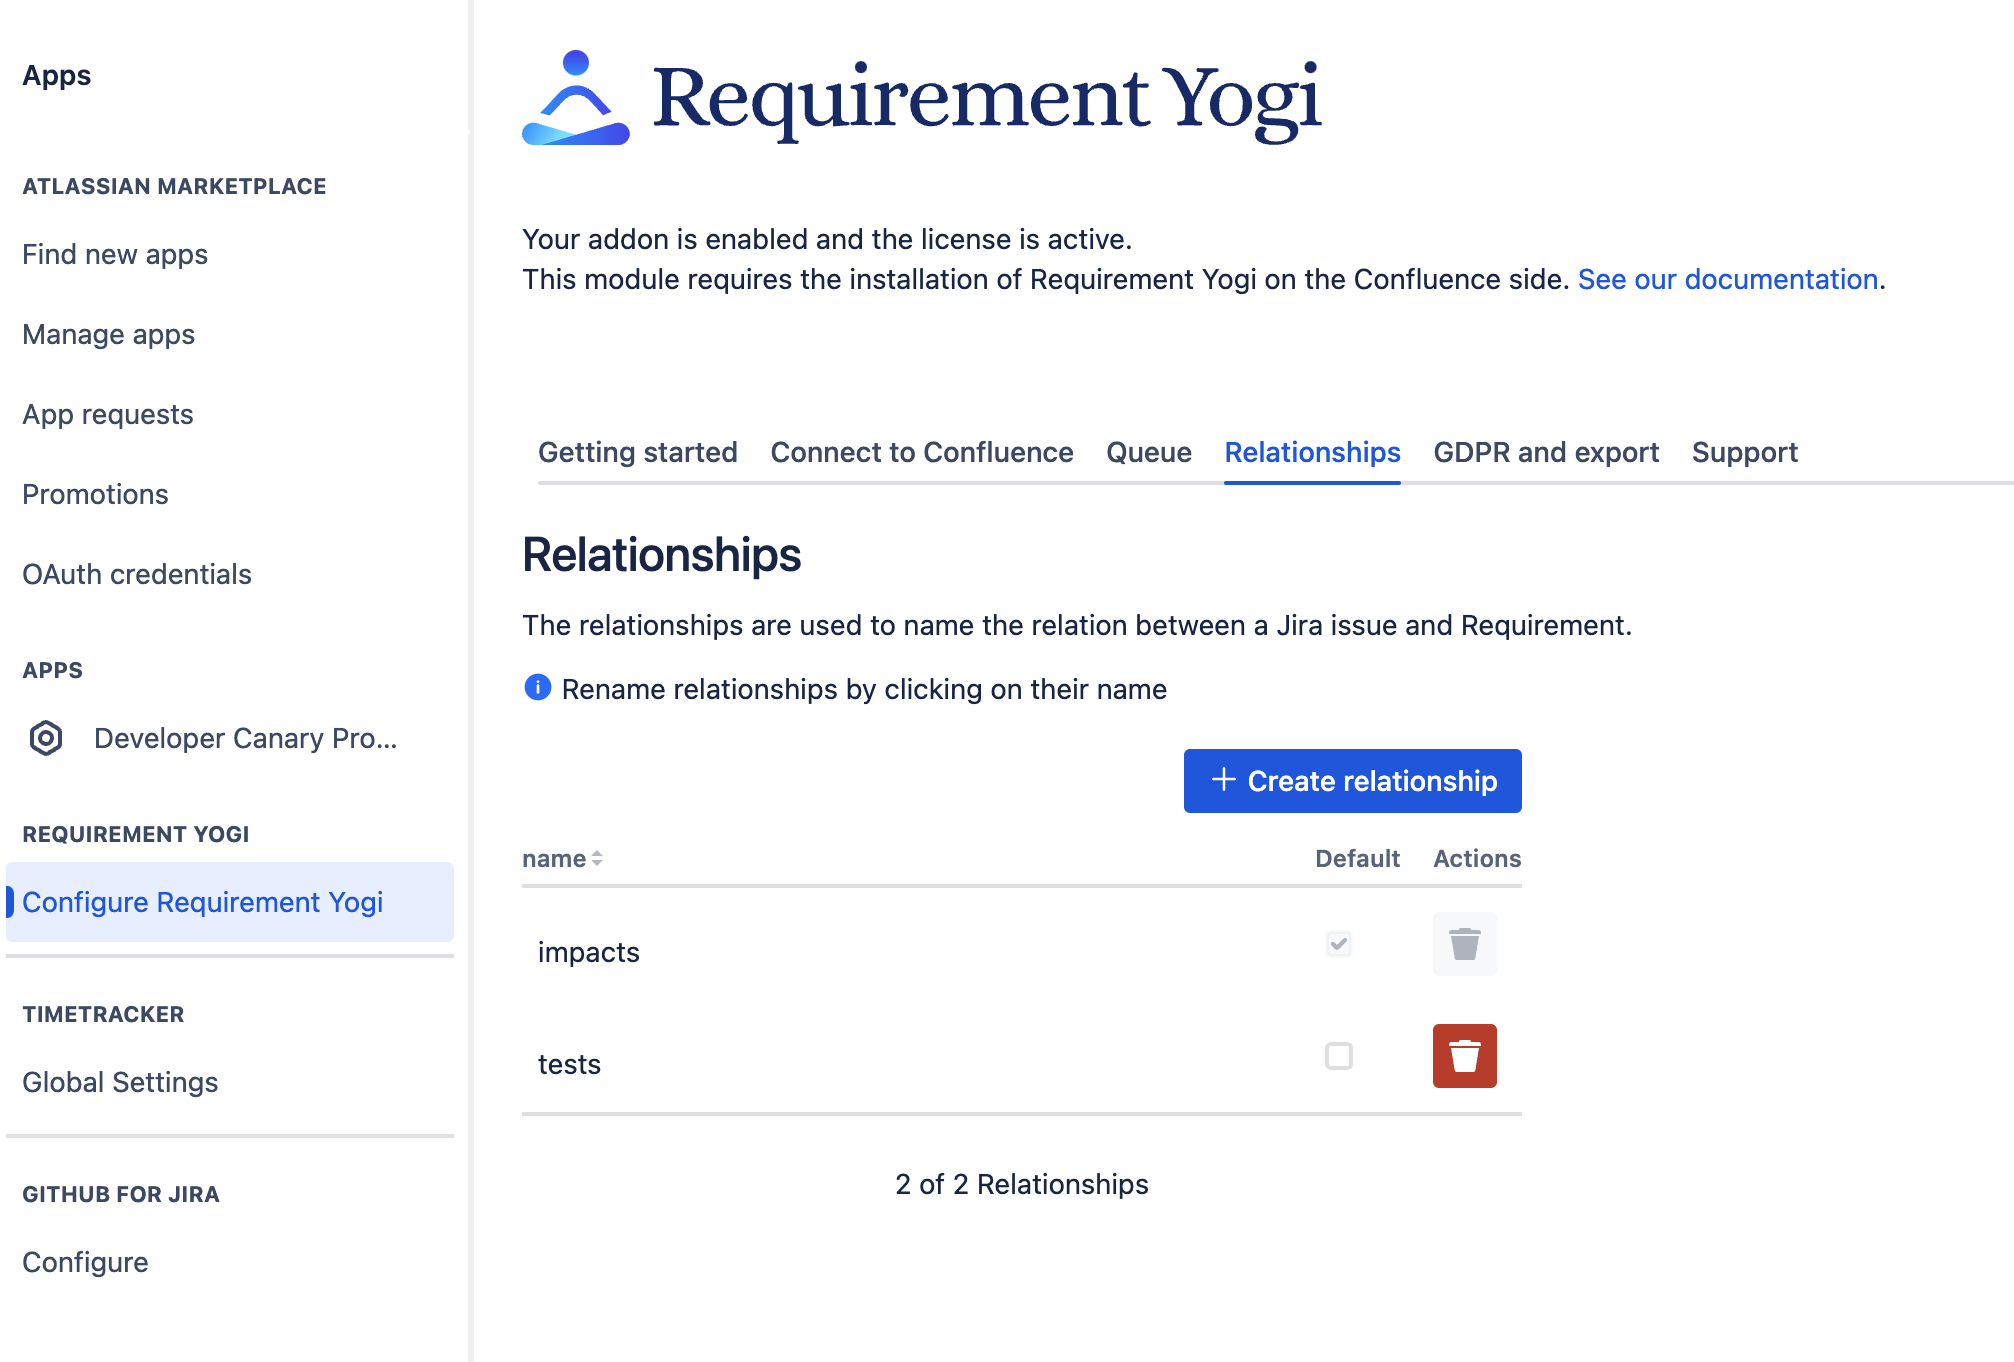
|
You can also create requirements directly from Jira issues. Check out this documentation for more information: Create Jira issues from Requirements .


