
NEW This is still a beta feature, so please feel free to share your feedback with our team! (support.requirementyogi.com)
Requirement Yogi lets you create Jira issues directly from your Confluence requirements. You can create an issue from a single requirement or select multiple requirements in the Search tab and create their issues in bulk.
Each new Jira issue is automatically linked to its source requirement using the relationship selected in the creation form.
This allows you to:
-
Create issues in context: Start from a requirement detail or from the requirement popup in Yogi tabs.
-
Create issues efficiently: Select multiple requirements and create up to 2,000 Jira issues in one bulk operation.
-
Keep issue content consistent: Apply the same project, issue type, relationship, and field configuration to several issues.
-
Reuse requirement data: Insert requirement keys, descriptions, properties, external properties, and calculations into issue summaries and descriptions.
-
Preview the result: Review the issue content before starting the operation.
-
Reuse configurations: Save the form as a template for future issue creation.
Before you begin
To create Jira issues from requirements:
-
Requirement Yogi for Jira must be installed and configured.
-
You must have permission to read the Confluence space containing the requirements.
-
You must have permission to update the requirements.
-
You must have the Create issues permission in the selected Jira project.
1. Choose how to start
You can open the issue creation form from a single requirement or from a selection of requirements.
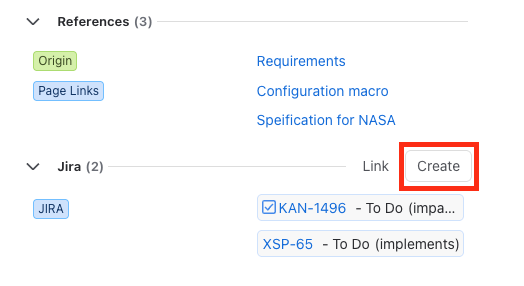
1 to 1 - From the requirement detail
-
Open a requirement in Requirement Yogi.
-
Click Create Issue.
The form creates one Jira issue and links it to the open requirement.
1 to 1 - From the popup in Yogi tabs
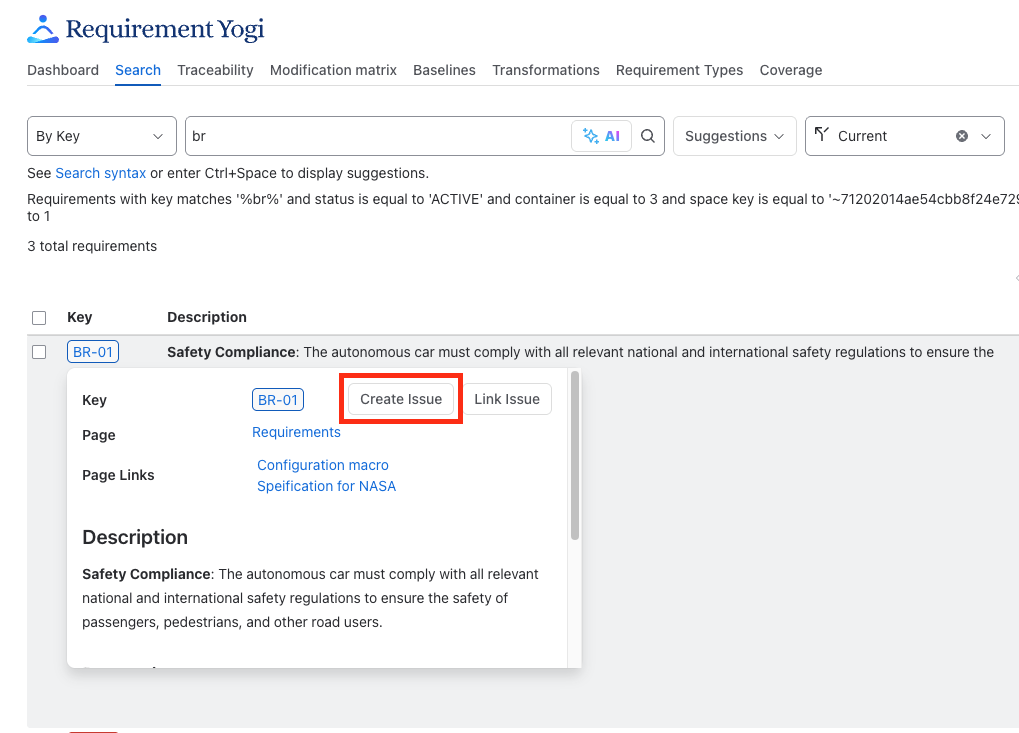
In Requirement Yogi tabs, click a requirement to open its popup, then click Create Issue.
The form creates one Jira issue and links it to the requirement displayed in the popup.
From multiple requirements in the Search tab
-
Open Requirement Yogi from your Confluence space.
-
Go to the Search tab.
-
Search for the requirements from which you want to create Jira issues.
-
Select the requirements in the results table.
-
Click Create Issues in the floating action bar.
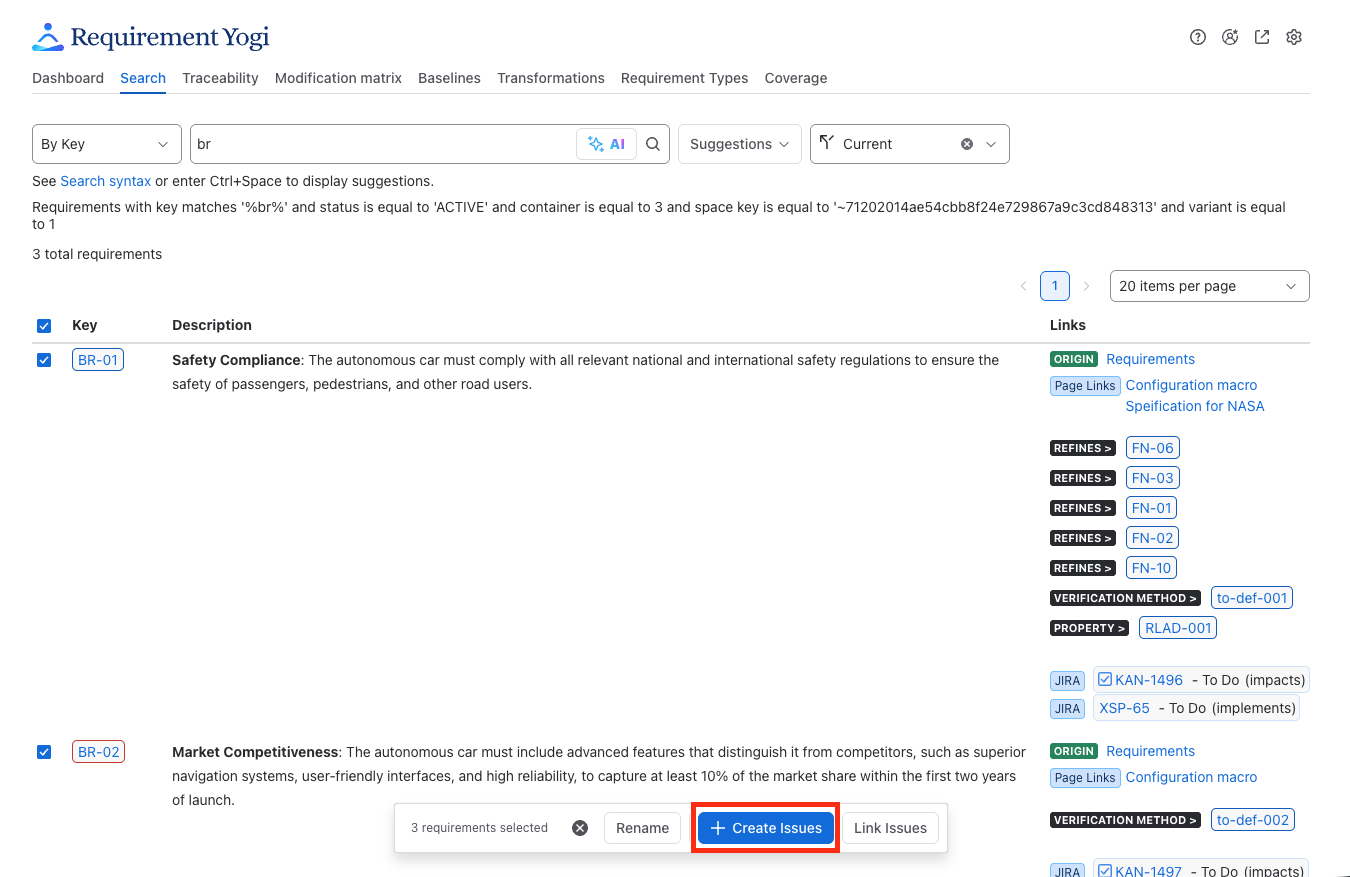
One Jira issue and one requirement-to-issue link will be created for each selected requirement. For example, selecting four requirements creates four Jira issues and four links.
2. Configure the Jira issues
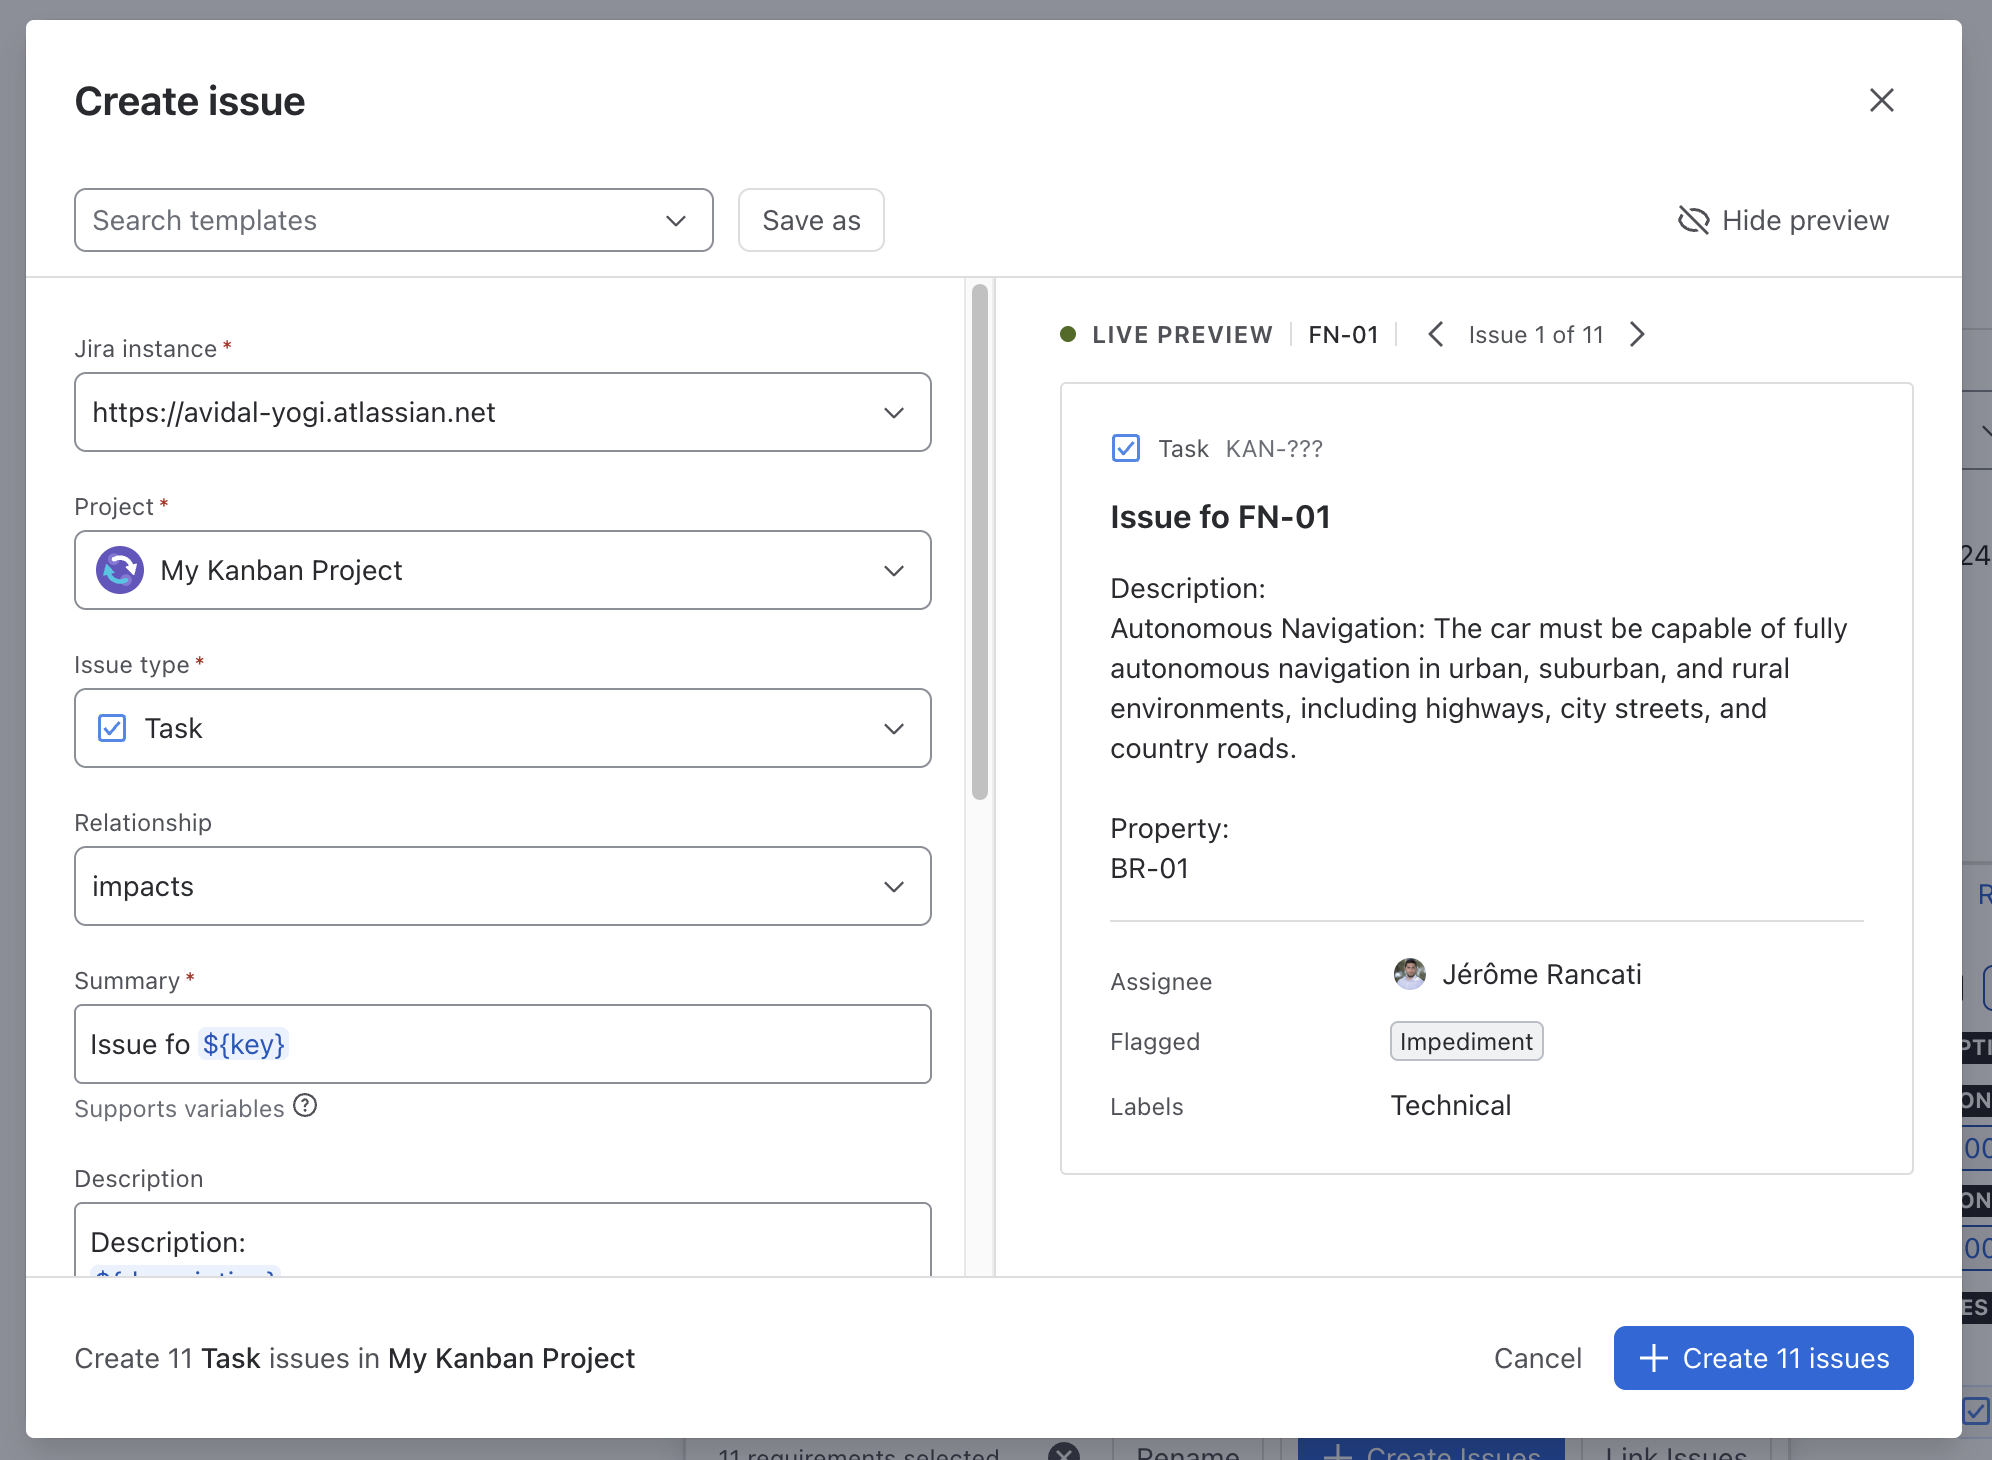
The same creation form is used for individual and bulk issue creation.
Complete the form:
-
Select the Jira instance.
-
Select the Project in which the issues will be created.
-
Select the Issue type.
-
Select the Relationship that will link each new Jira issue to its source requirement.
-
Complete the Jira fields.
Requirement Yogi currently supports basic Jira fields whose field type is text, date, or user. The available fields depend on the selected Jira project and issue type.
Use requirement data in the summary and description
The Summary and Description fields support variables. Each variable is evaluated for the source requirement, allowing every generated issue to contain its own requirement data.
Wrap an expression in ${...} to use it as a variable.
|
Data |
Example |
|---|---|
|
Requirement key |
|
|
Requirement description |
|
|
Property |
|
|
External property |
|
|
Calculation |
|
Variables support the existing Requirement Yogi calculation syntax. This includes calculations based on requirement properties, external properties, and linked requirements.
Provide a default value
Add a colon followed by a default value inside the variable:
${@Property:Default value}
The default value is used when the property cannot be found or has no value for the source requirement.
For example:
${@Refines:None}
Troubleshoot invalid variables
If a variable is invalid, it is displayed in red. Move the pointer over the variable to see a tooltip explaining the error.
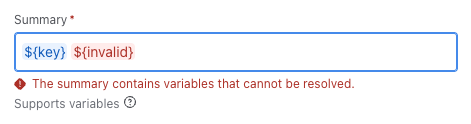
Correct invalid variables before creating the issues.
3. Preview the issues
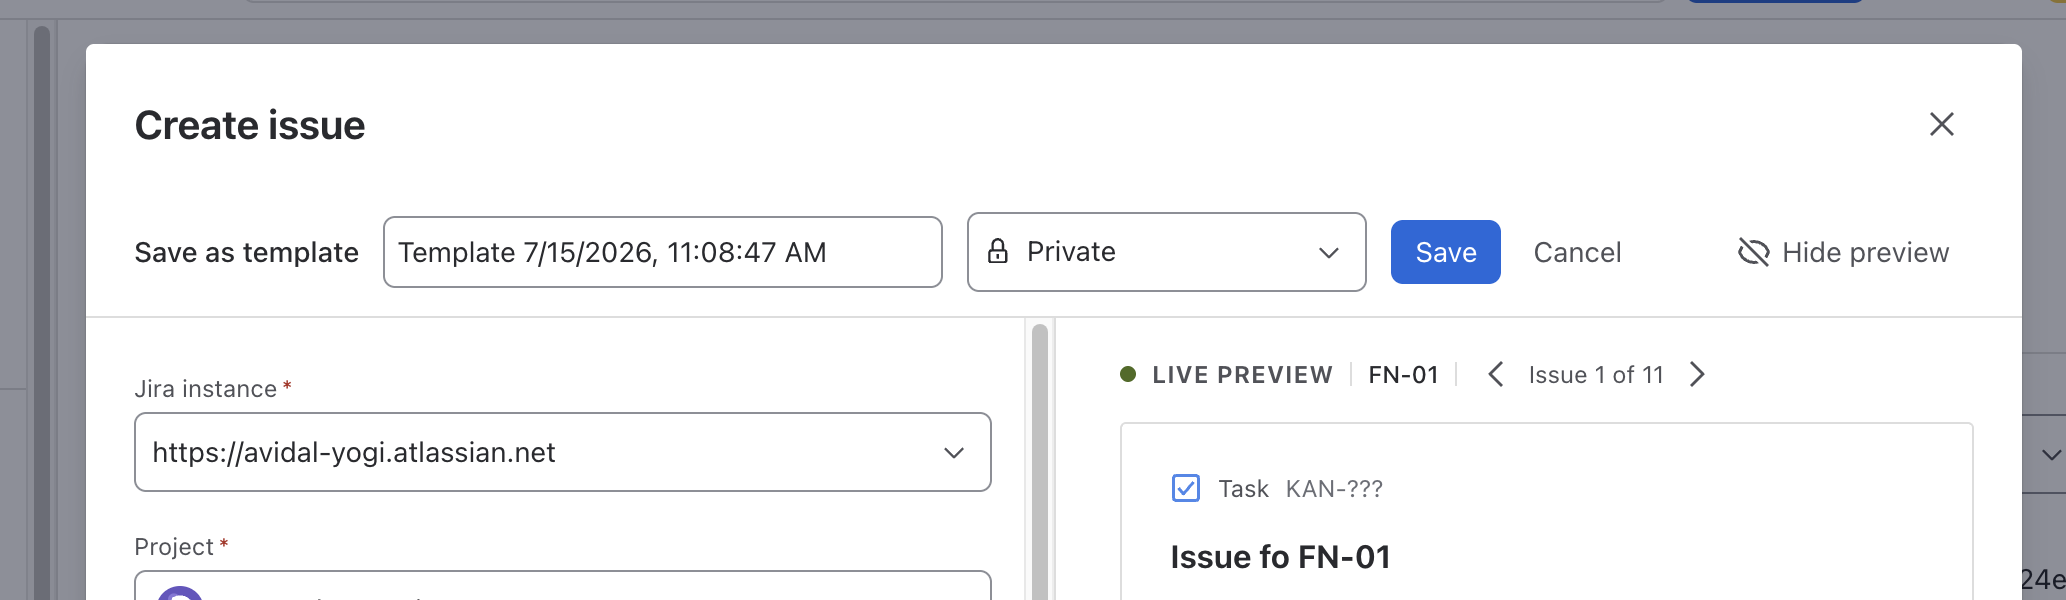
The Live preview shows how a Jira issue will look after its variables have been evaluated.
-
The preview updates as you edit the form.
-
The requirement key identifies the source requirement currently displayed.
-
For bulk creation, use the previous and next arrows to cycle through the issues generated from the selected requirements.
-
For individual creation, the preview displays the issue generated from the open requirement.
-
The preview is read-only. Changes must be made in the form.
-
Click Hide preview if you need more room to complete the form.
For a bulk operation, review several generated issues when the selected requirements contain different properties or external properties. This helps confirm that variables and default values produce the expected result for the entire selection.
Save and reuse templates
Templates can be used for both individual and bulk issue creation. They save all values from the issue creation form, including:
-
Jira instance
-
Jira project
-
Issue type
-
Relationship
-
Jira field values
-
Summary and description variables
Save a template
-
Configure the form.
-
Click Save as.
-
Enter a template name.
-
Choose its visibility:
-
Private (default)
-
Shared view
-
Shared edit
-
-
Save the template.
Use a template
-
Open the issue creation form.
-
Open Search templates.
-
Select a template.
-
Review the loaded values and the live preview before creating the issues.
Update a template
Load an existing template, modify the form values, and save the changes to update the template for future operations.
4. Create the Jira issues
After reviewing the configuration and preview, check the issue count and target project shown at the bottom of the form.
From a single requirement
Click Create issue. Requirement Yogi creates the Jira issue and links it to the source requirement using the selected relationship.
Create issues in bulk
Click Create issues. The button displays the number of issues that will be created.
Bulk issue creation runs as an asynchronous job. You can leave the page while the job is running.
The floating action bar displays the progress of the operation. Click View in queue to open the job queue in the Champion Center.
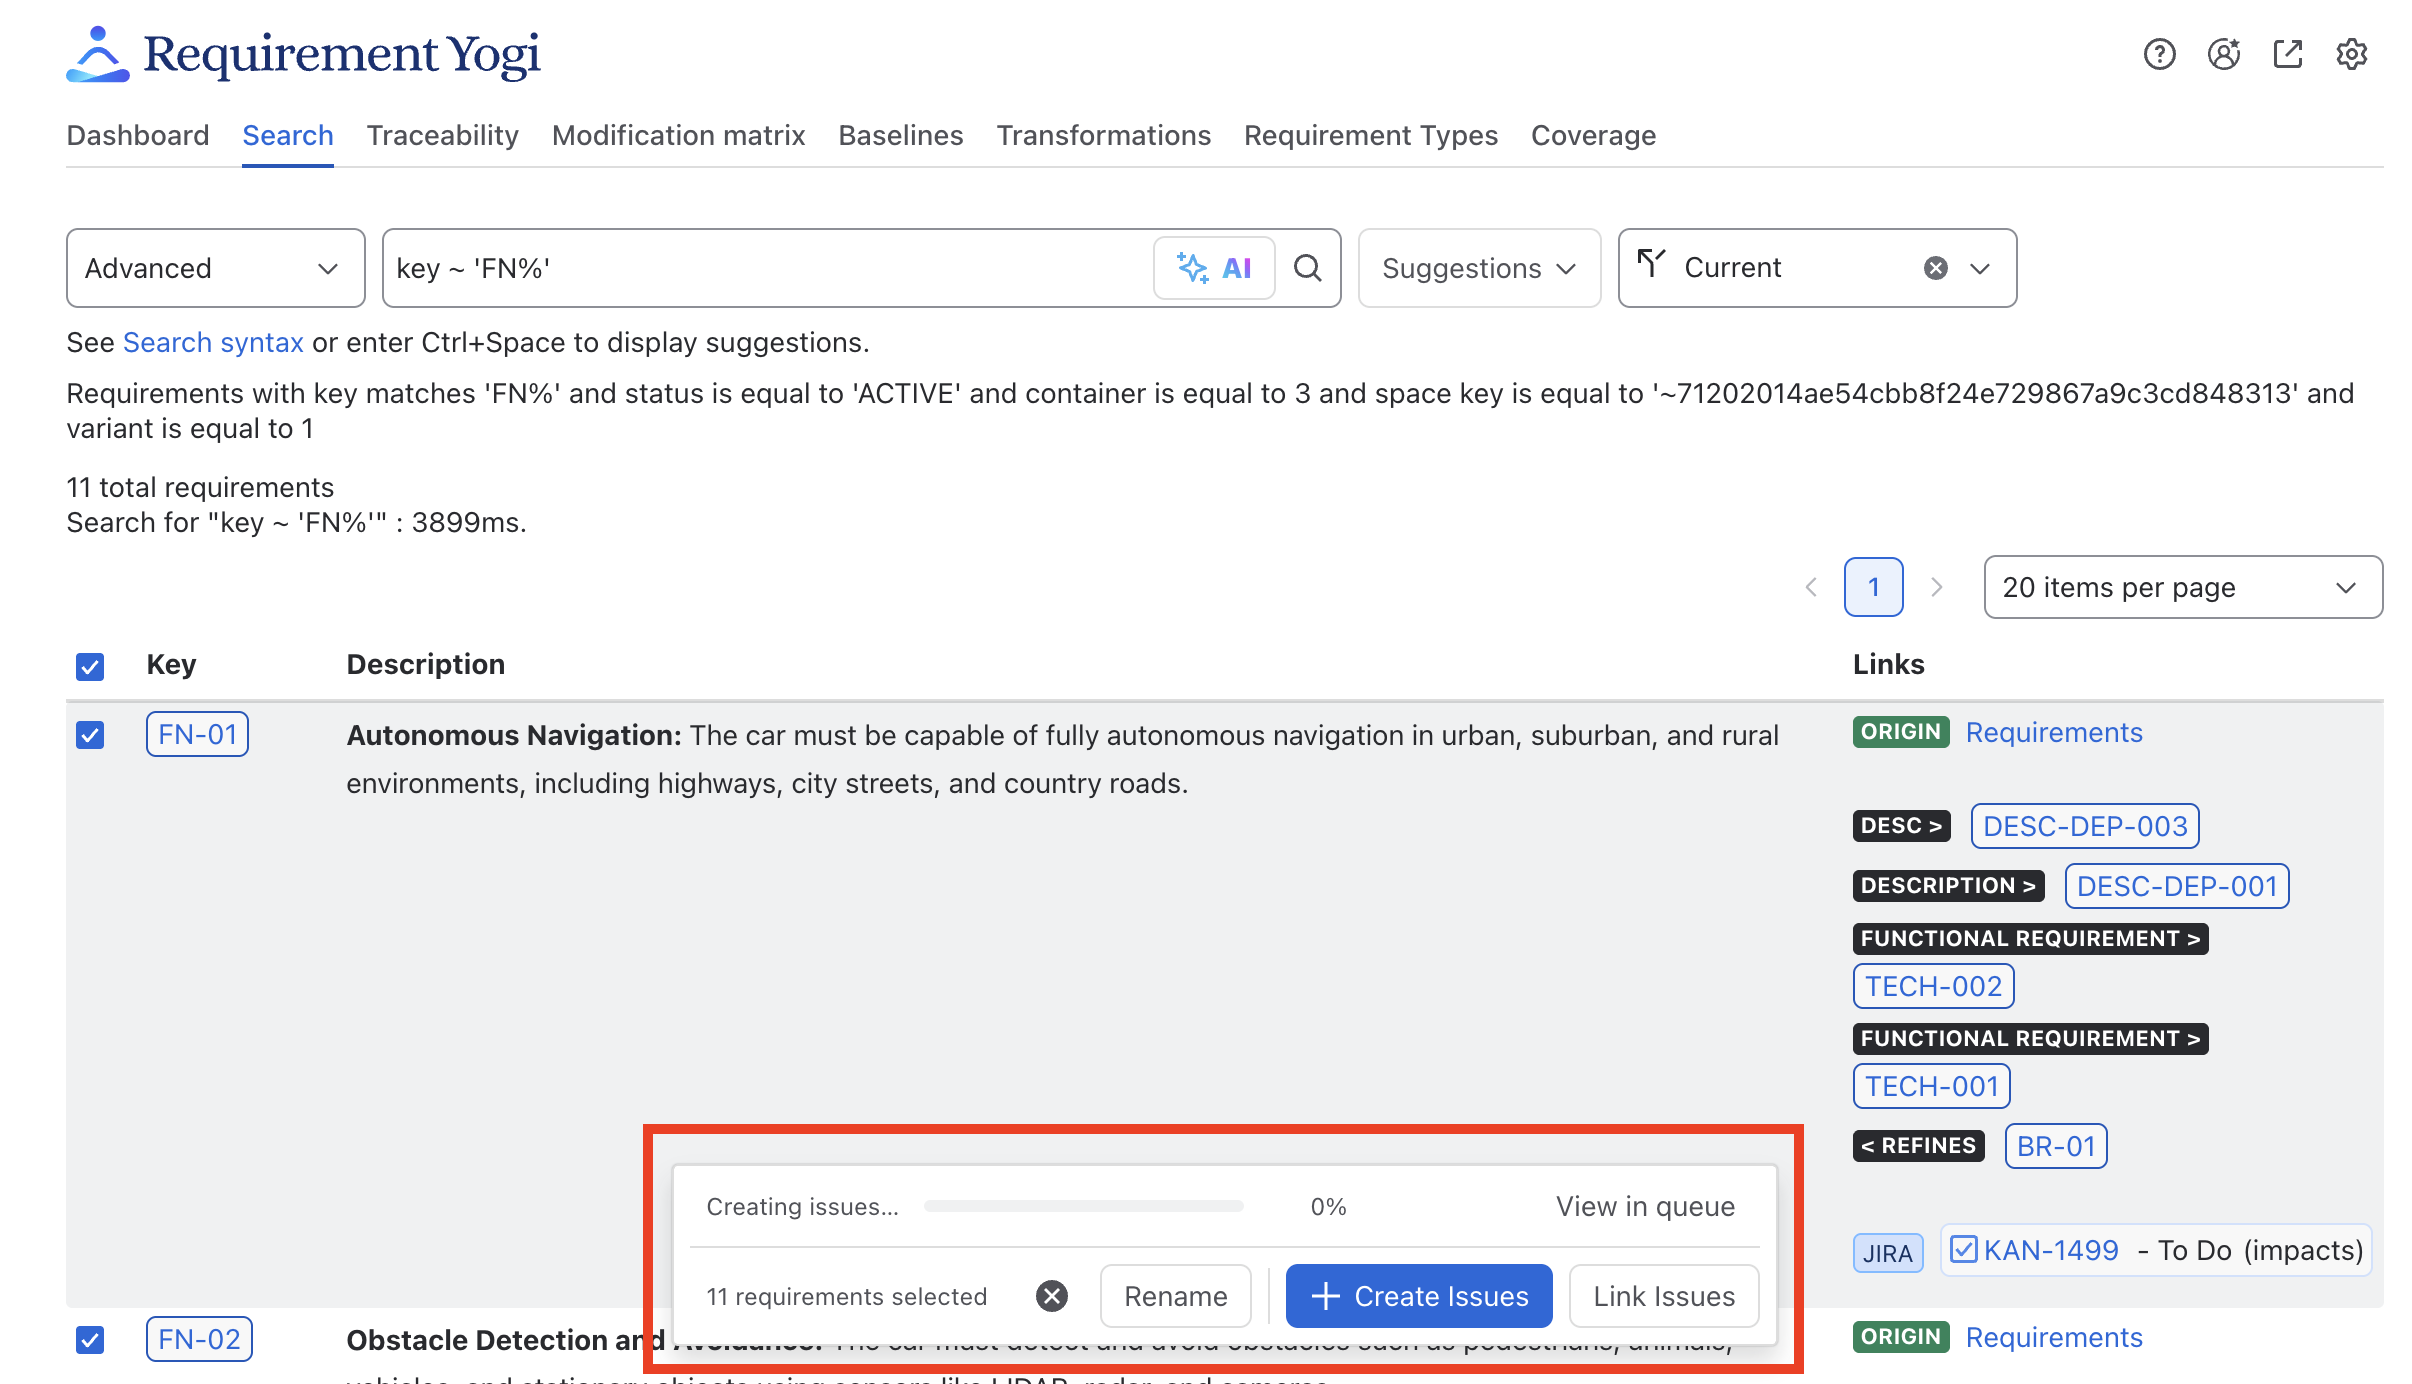
The job queue displays the result of the operation. If one or more issues cannot be created, open the job details to identify the failed issues and their errors.
Troubleshooting and current limitations
-
A single bulk operation can create up to 2,000 Jira issues.
-
One Jira issue is created for each source requirement.
-
Each issue is linked to its source requirement using the selected relationship.
-
Variables are supported only in the Jira issue Summary and Description fields.
-
Supported basic Jira field types currently include text, date, and user fields.
-
If a Jira issue type contains a required field that Requirement Yogi does not support, the issue cannot be created. Select another issue type or update the Jira field configuration.
-
The live preview is read-only.
-
Errors from bulk issue creation are available in the job queue in the Champion Center.