
If you are a Cloud user, note that this is only available for Data Center yet.
A lot of users requested an easy way to create issues in bulk and link them to requirements in Confluence. We are happy to announce it is finally possible !
Check out our video tutorial on Jira links and Jira Bulk Issue Creation →
|
✅ When to use it |
❌ When not to use it |
|---|---|
|
This new screen is particularly useful in the following situations:
|
It is tempting to create thousands of Jira issues with it. Don't. You will then have questions about keeping those issues up-to-date with Confluence, or across baselines. The goal is not to copy the entire Confluence database into Jira. In fact, we've limited to 600 Jira issues per batch for the moment, until we improve scaling.
The value of Requirement Yogi comes from annotating free text. If you keep transforming free text into Jira issues, you are making it painful for you to manage requirements. Perhaps don't create Jira issues in anticipation. Only create issues for tasks that you are going to perform during the next Sprint. |
How it works
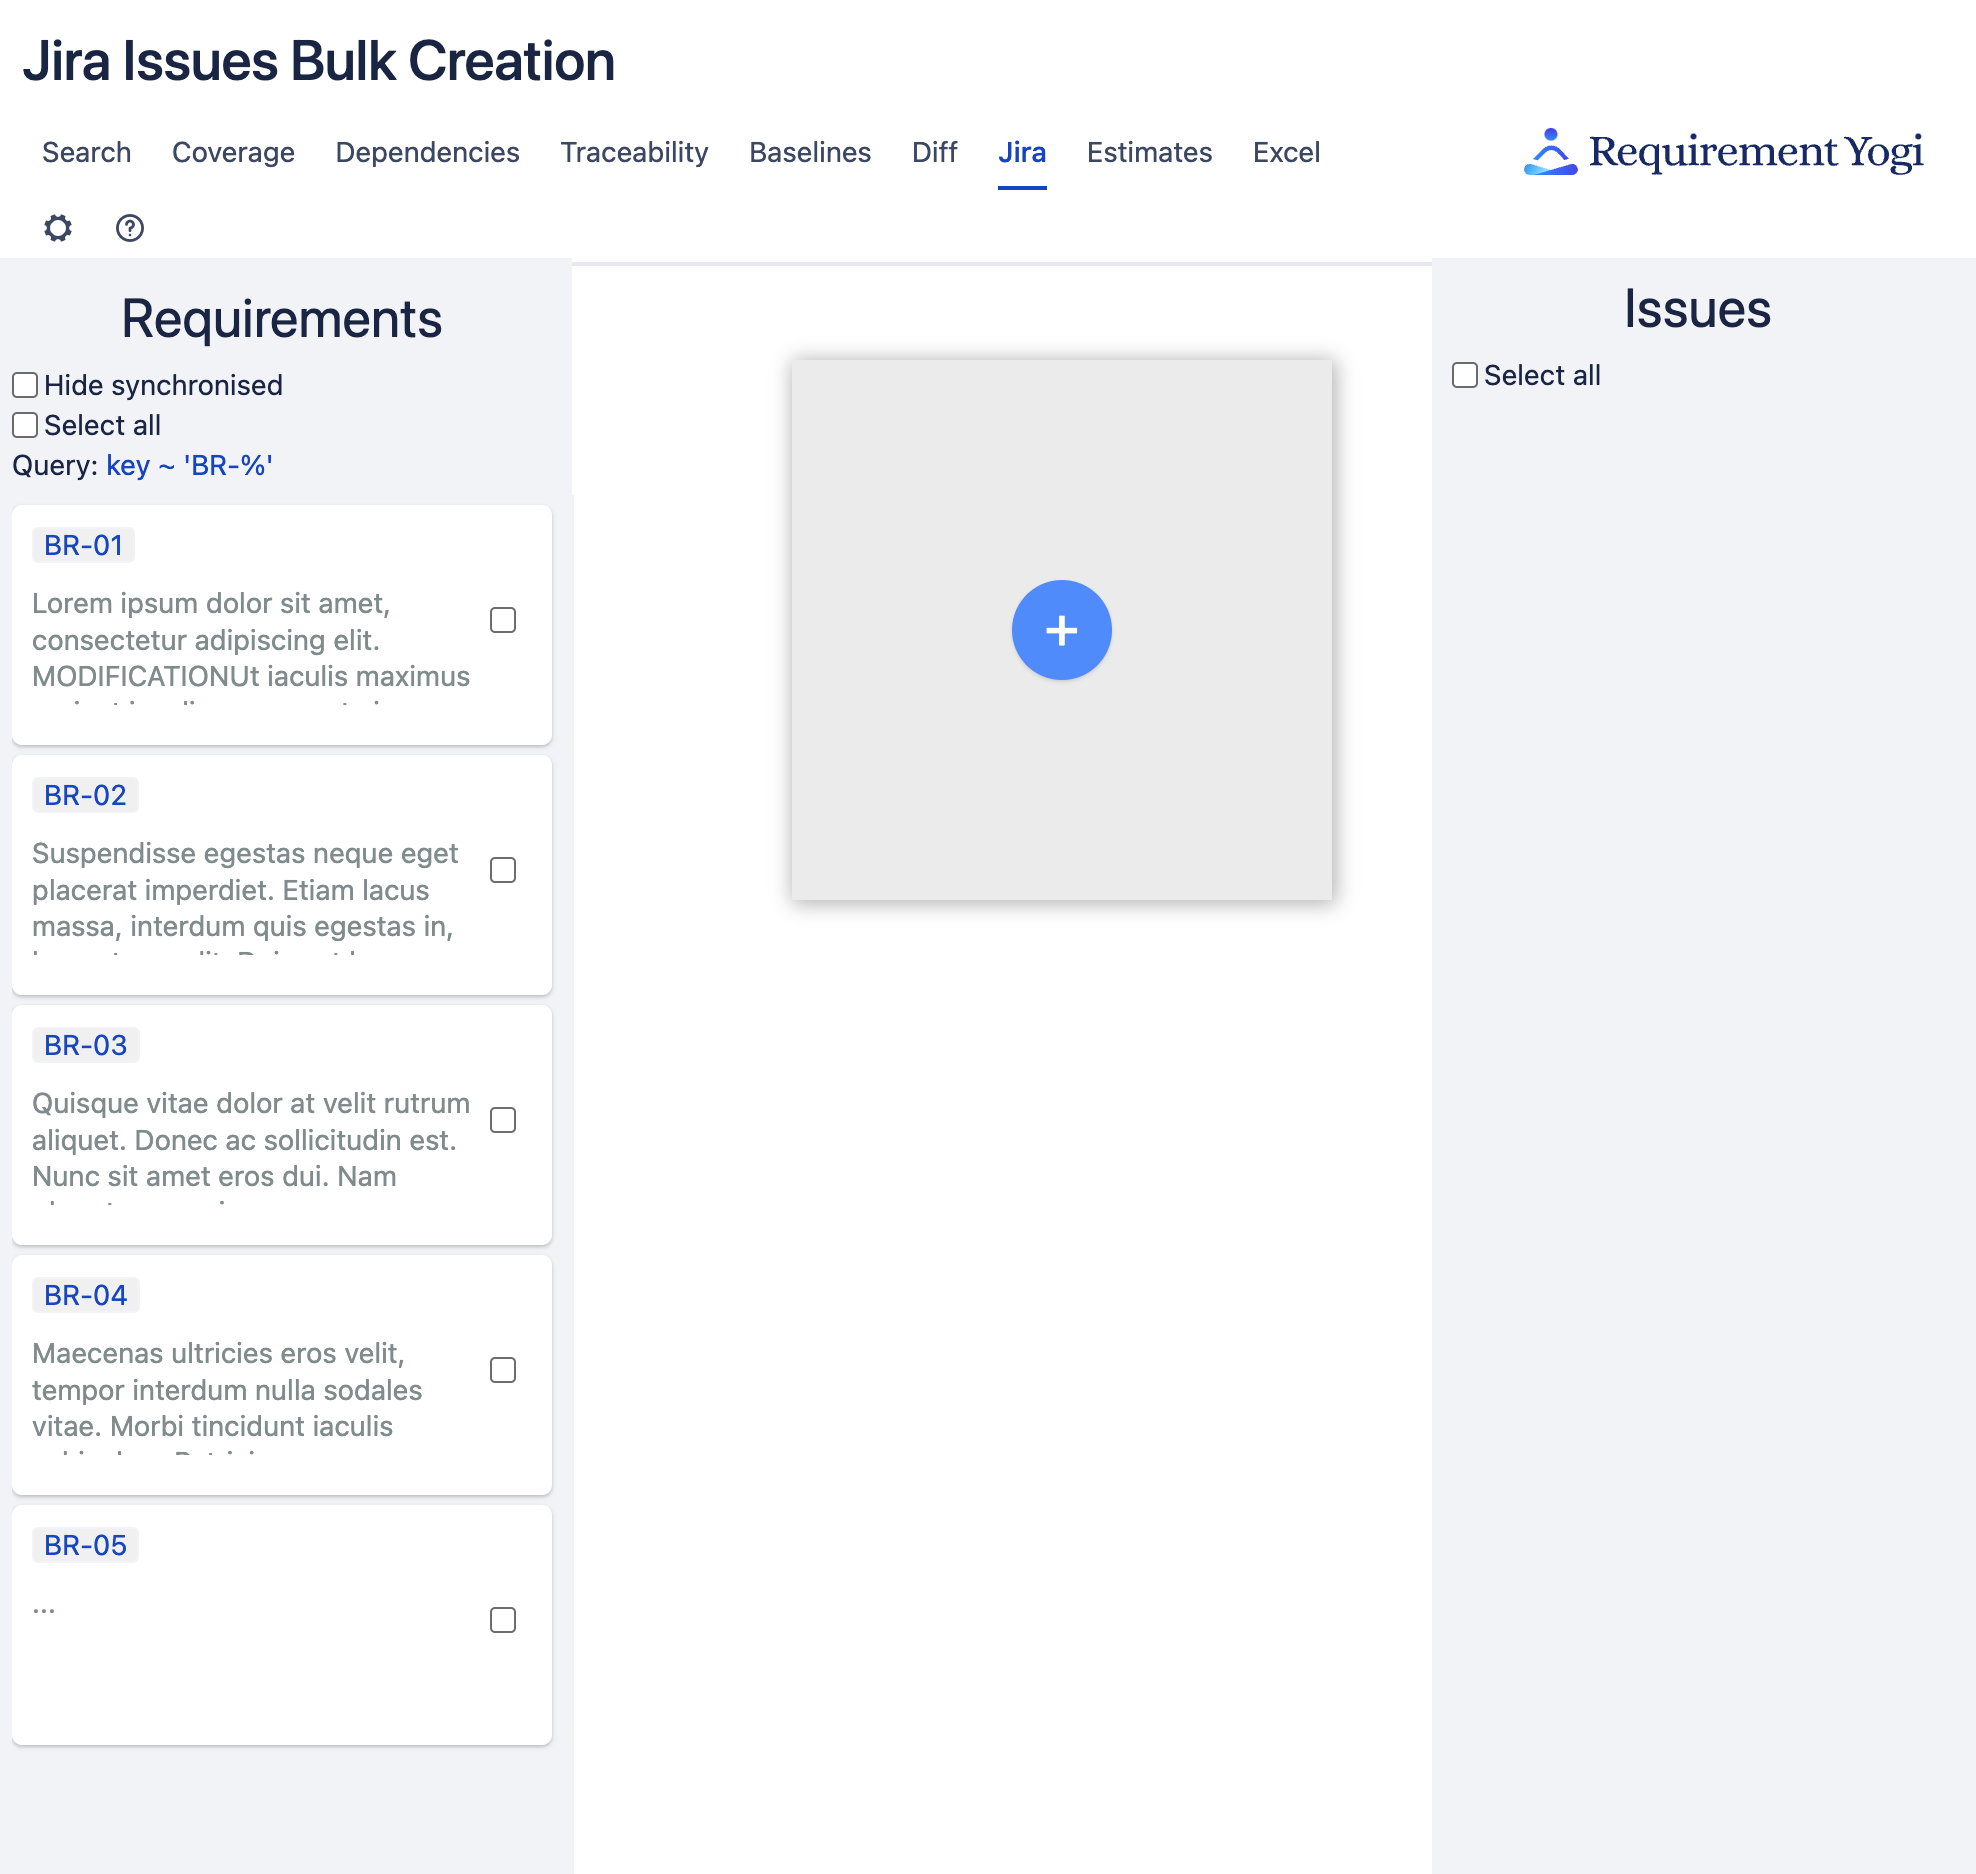
1. Start from the Search screen,
2. Select a set of requirements and click on 'Create Jira issues'.
Note: The limit by default is 2000 requirements. It is defined by the global limit, available in the administration. |

|
3. Create a new issue template.
Click on the blue button to create a template. This step is necessary so we know where to put new issues, and to what type they match to. |
|
|
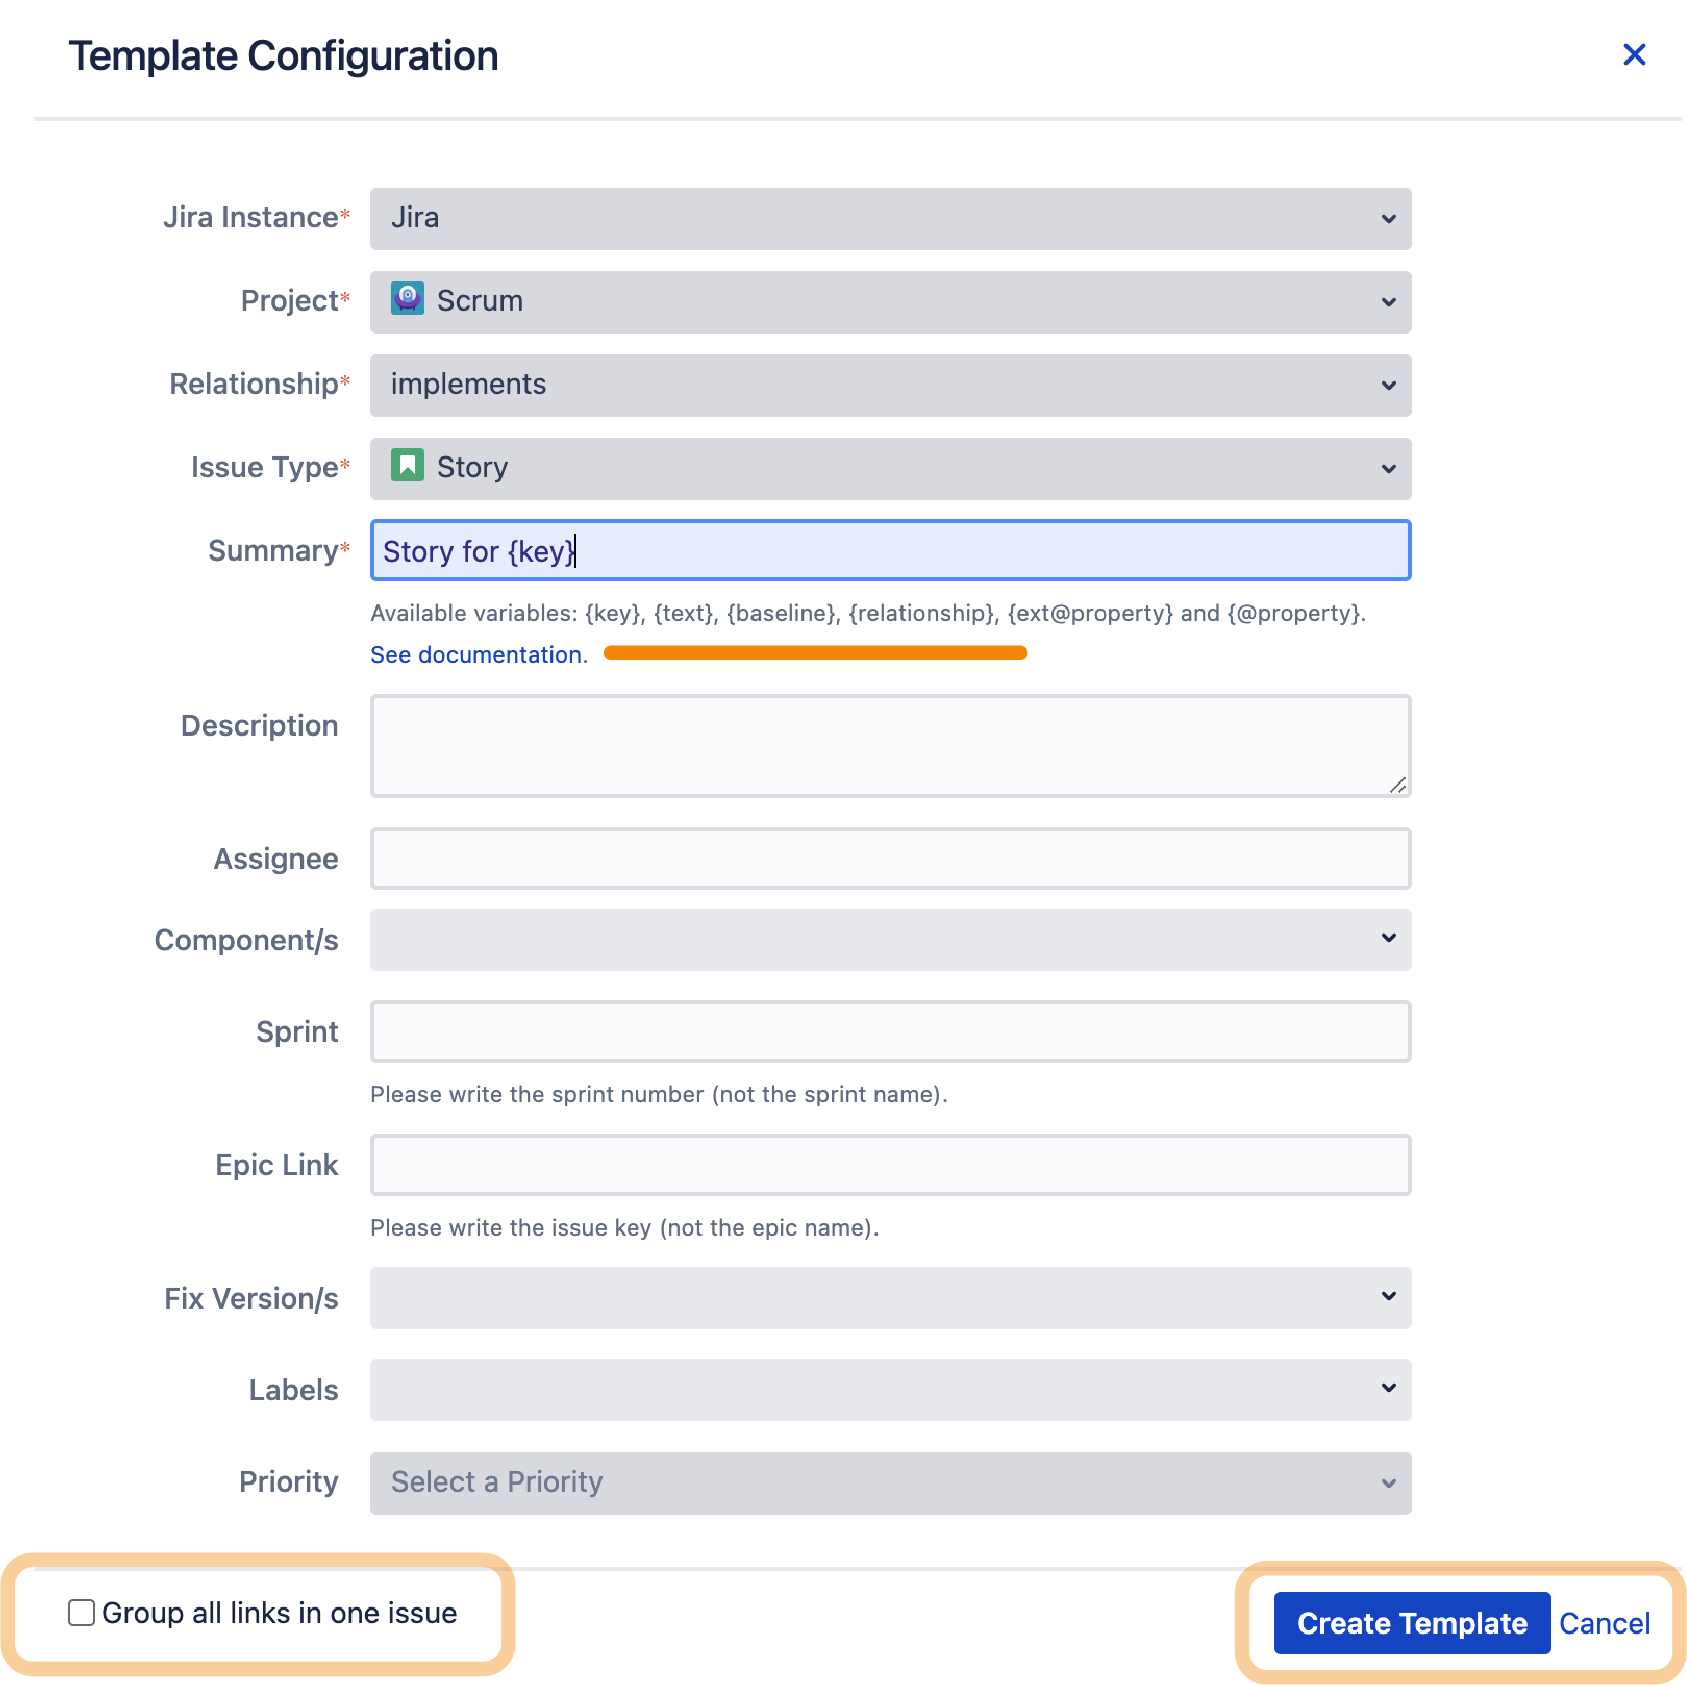
Template configuration:
If the checkbox 'Group all in one link' is checked, it will create one issue for all the selected requirements, otherwise, it will create one issue per requirement. You can use some keywords to configure the issue's fields:
Note that these reserved keywords will be ignored if you create one issue for multiple requirements. Once an issue template is created, you can re-configure it. Note that only fields are editable. If you wish to change the project or the Jira instance, you will have to create a new issue template. |
|
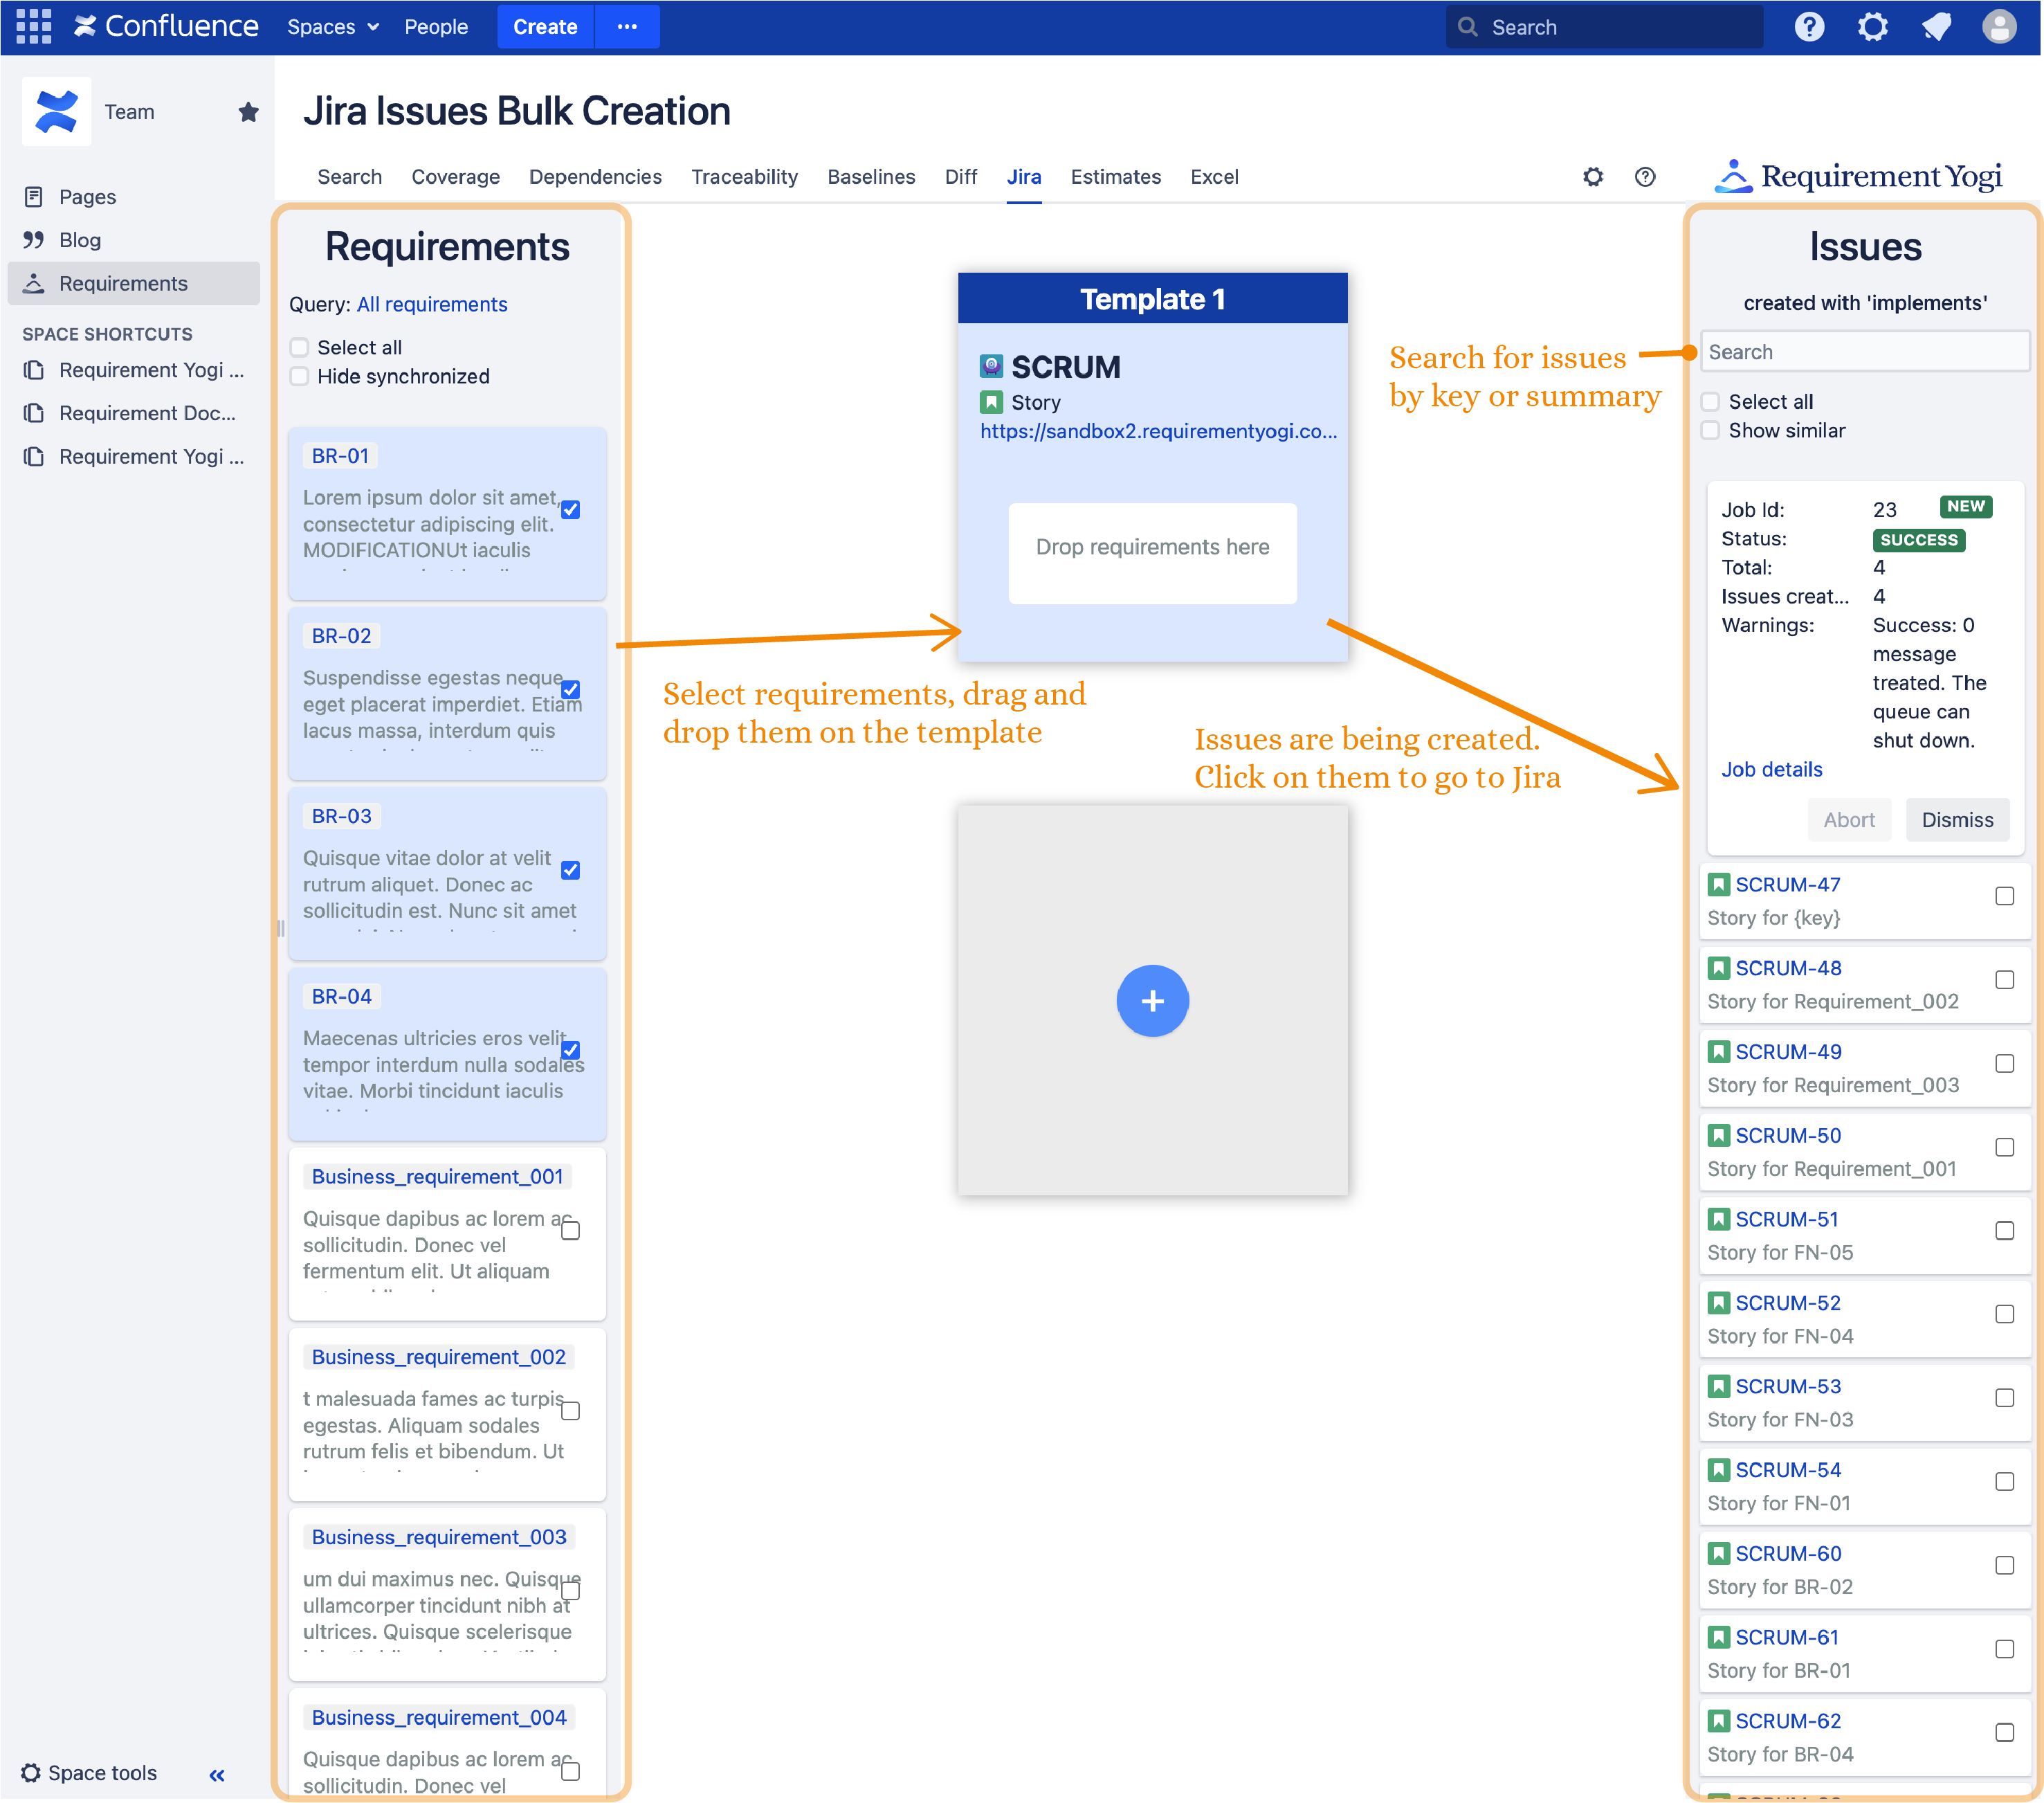
4. Select requirements and create Jira issues
Select requirements and drag and drop them into an issue template. Adjust your fields and click on create issues. Once issues are successfully created, they will appear on the right sidebar.
|
|
📌 Good to know
-
The templates limit is 30 per space.
-
You can't group more than 20 requirements in one Jira issue.
-
We truncate the summary to 253 characters because this is the Jira limit.
-
The left and right sidebars are paginated and will display 600 requirements per page.
-
If you don’t know which requirements you have already created Jira issues from, tick the "Hide Synchronized” box to show only requirements that you have not linked to the templates created.
Right sidebar
-
If you want to find a specific issue, we’ve now introduced a search bar. You can look for issues by key or summary
-
When selecting a template, the right sidebar shows issues created using this template. This option fetches and caches Jira issues (only issues with the same project and issue type are cached to limit performance issues) then it uses the cache to find Jira links to issues matching the selected template (same project, same issue type, same relationship name). The timeout for Jira Issues retrieval is 5 minutes.
-
If you want to update Jira issues, you can drag an issue from the right to the template. Their fields will be updated like in the template.
-
If you have manually created a Jira issue and linked a requirement to it, you might want to find it in the Jira Bulk Issue Creation search and apply the template to it. If you look for its key in the search and it does not show, tick the "show similar" box. As the issue was manually created, it does not have a template id. To apply a template to it, drag the issue on the template and the manually created issue will now have a template id → the issue will be updated as if it was created by the template. If an issue has more than one link, this process fails (as before, because we don’t know how to replace the templated values).
Limitations
-
We support most Custom Fields in the Templates but please checkout this list with the full details.
-
If you put a property for the labels, such as {@requirement_category}, it will be replaced.
-
If you put a property of type "list" for the labels, such as {@requirement_categories}, it will not be expanded. It will write the full list into a single label, instead of inserting n labels like one would expect.