Introduced in Requirement Yogi 3.6
Looking for a quick dive into the Excel Loop? Check out the tutorial:
The Excel loop can answer 3 use cases:
-
I want to send my RY requirements to my customer for validation. Once he has added his comments to the Excel file, I want to be able to add these comments to my requirements as external properties.
-
I am using a testing solution in Jira or outside of Atlassian’s ecosystem, and RY does not integrate with it. I want to be able to see my test results in the requirements popup, and Traceability, without taking too much time.
-
I need to add the same external property (a tag or label for example) to a lot of my requirements, but doing it with the External Properties matrix is taking me too long. Excel can be way quicker.
If you are not facing one of those use cases, and you want to add new requirements to Requirement Yogi, using Excel, you can use the Legacy Excel Import: Excel Import: Add external requirements to RY .
Before uploading your external properties
-
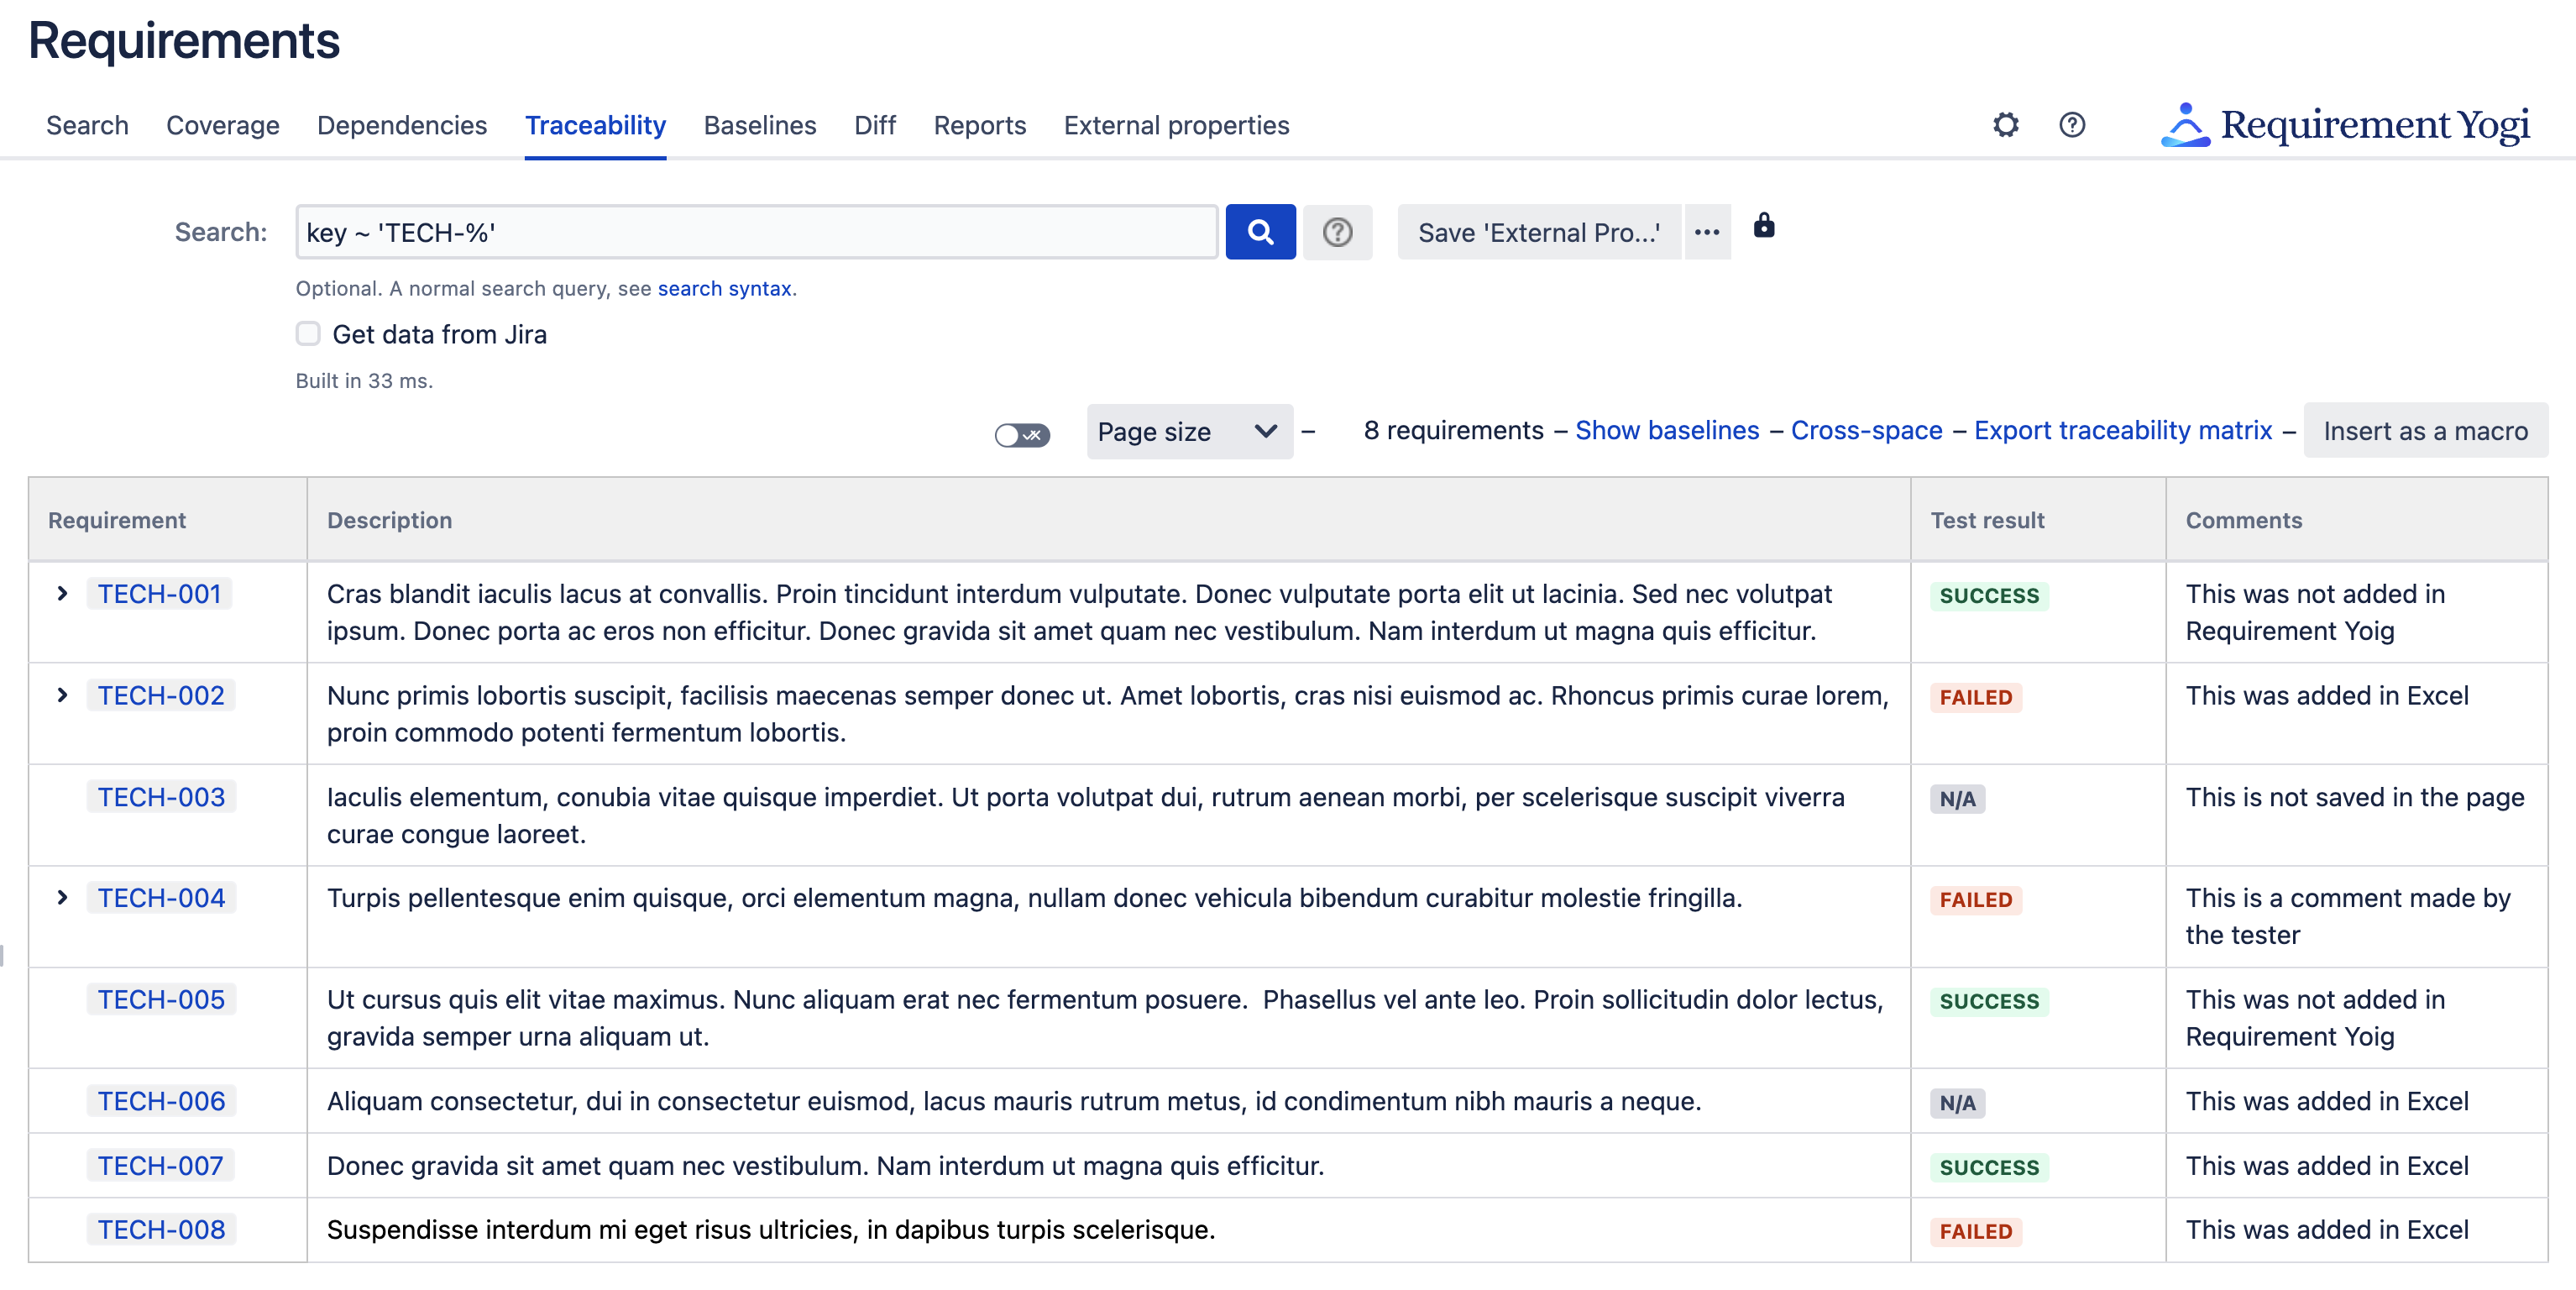
The Excel loop is useful when the file you want to import contains requirements you have defined with Requirement Yogi. You can export requirements using the Traceability Matrix for example.
-
Make sure you have already created the external properties you wish to import, before starting to upload the file. You can add new external properties in the Administration.
Step by step guide
1. Upload
To upload your external properties, go into the External properties tab → Click on Upload Excel File |

|
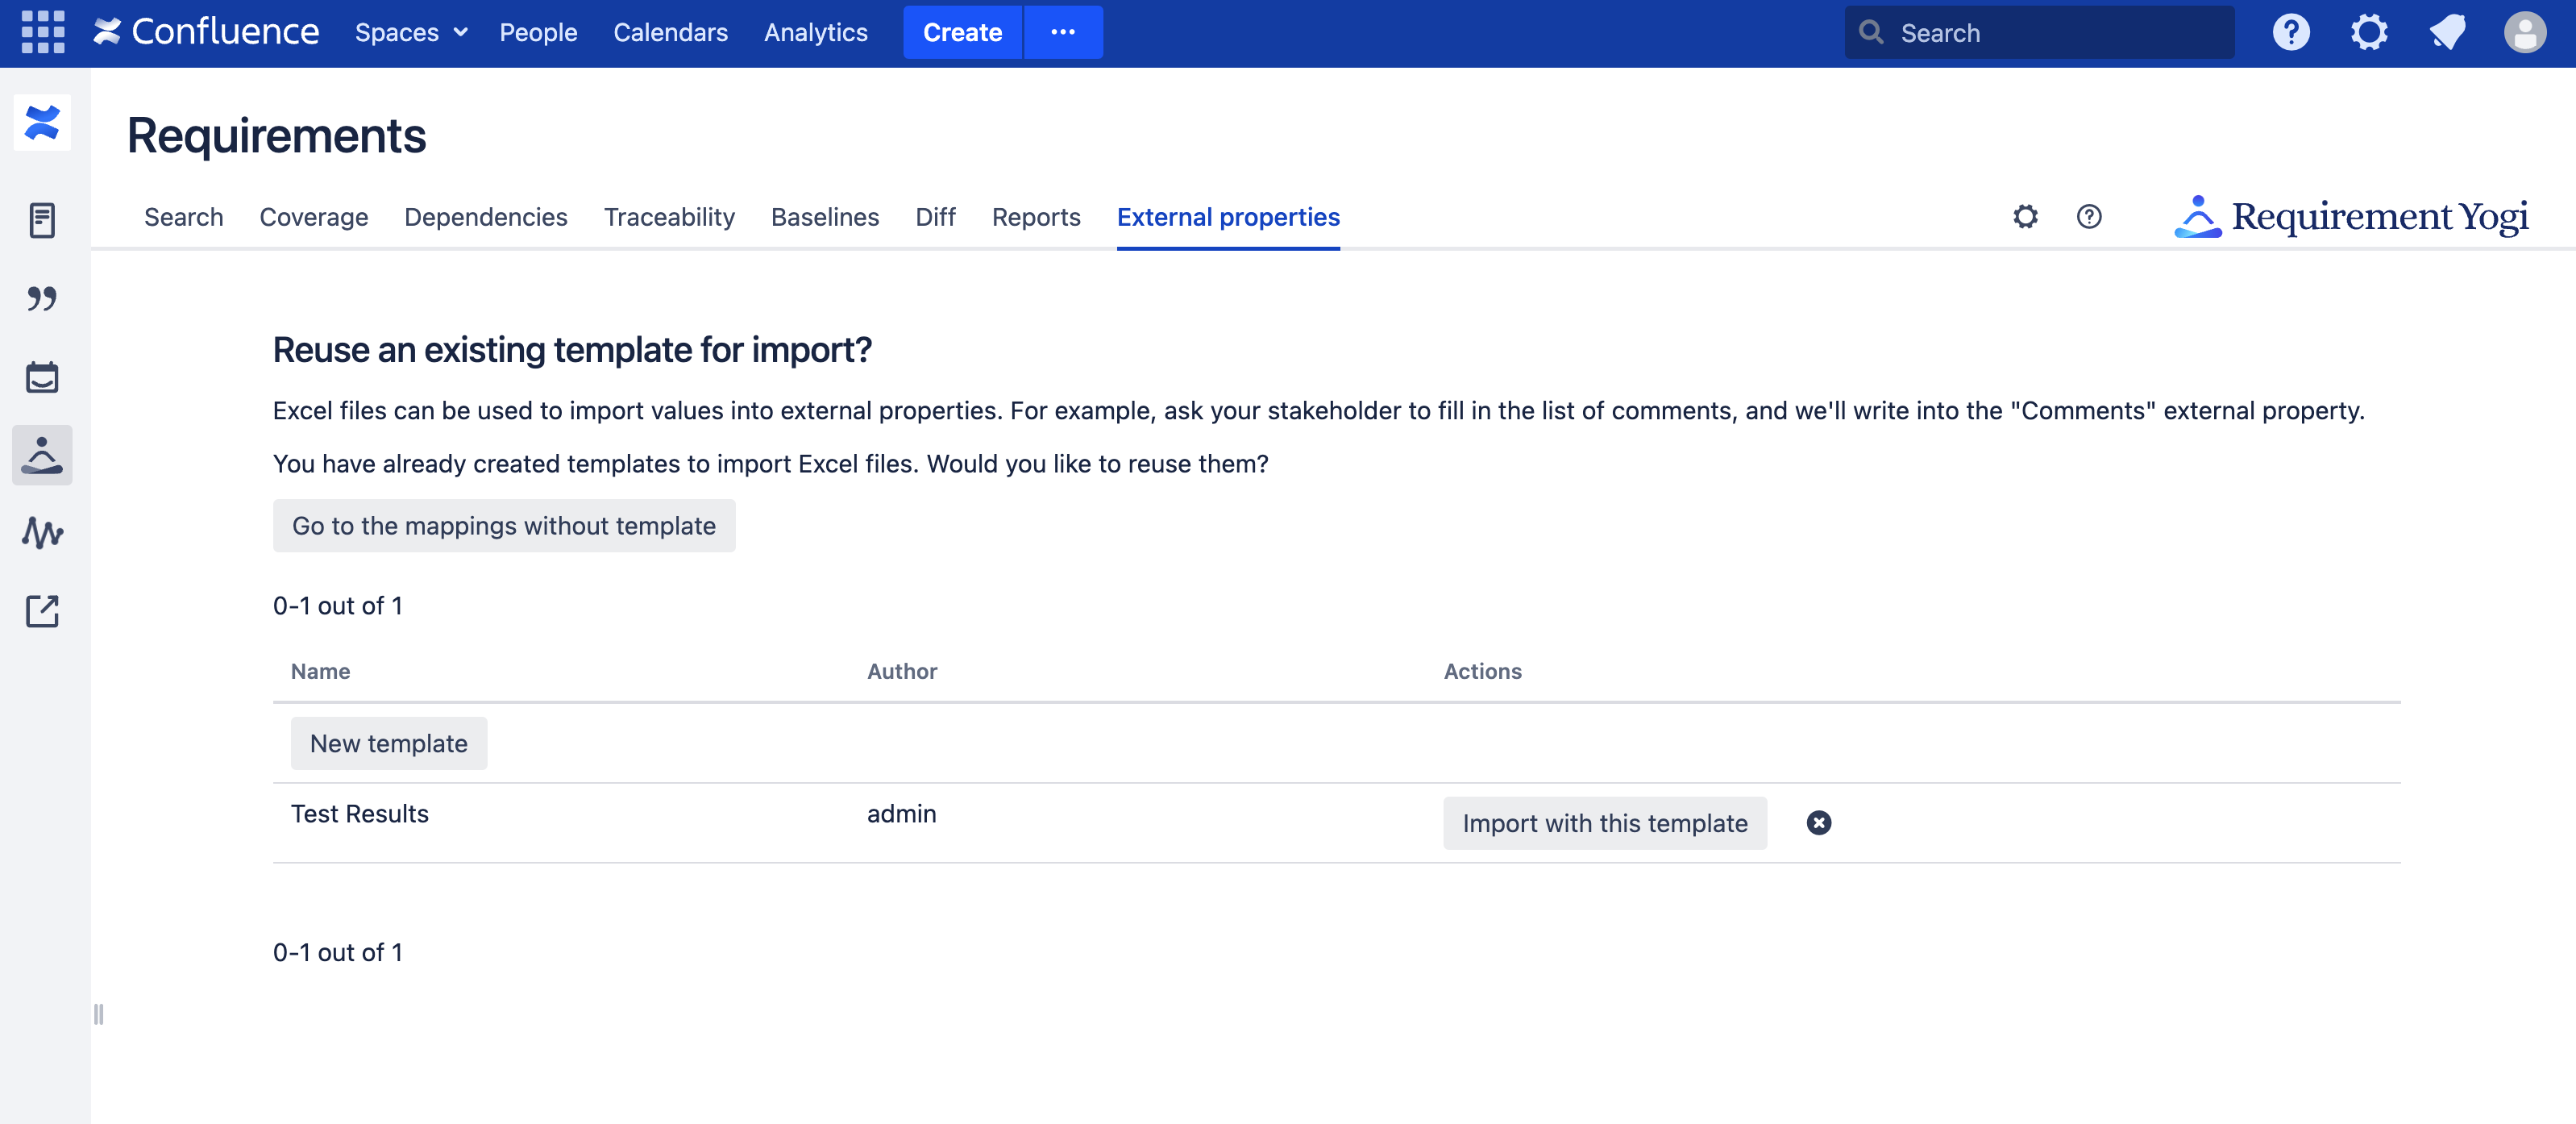
2. Choose a template
Once you have chosen the correct file, you will need to map columns to what they are (key, external property etc.) → You can use an already existing template if you have one, or go to the mapping without using a template. |
|
3. Overview
In this screen, you can do multiple things:
|

|
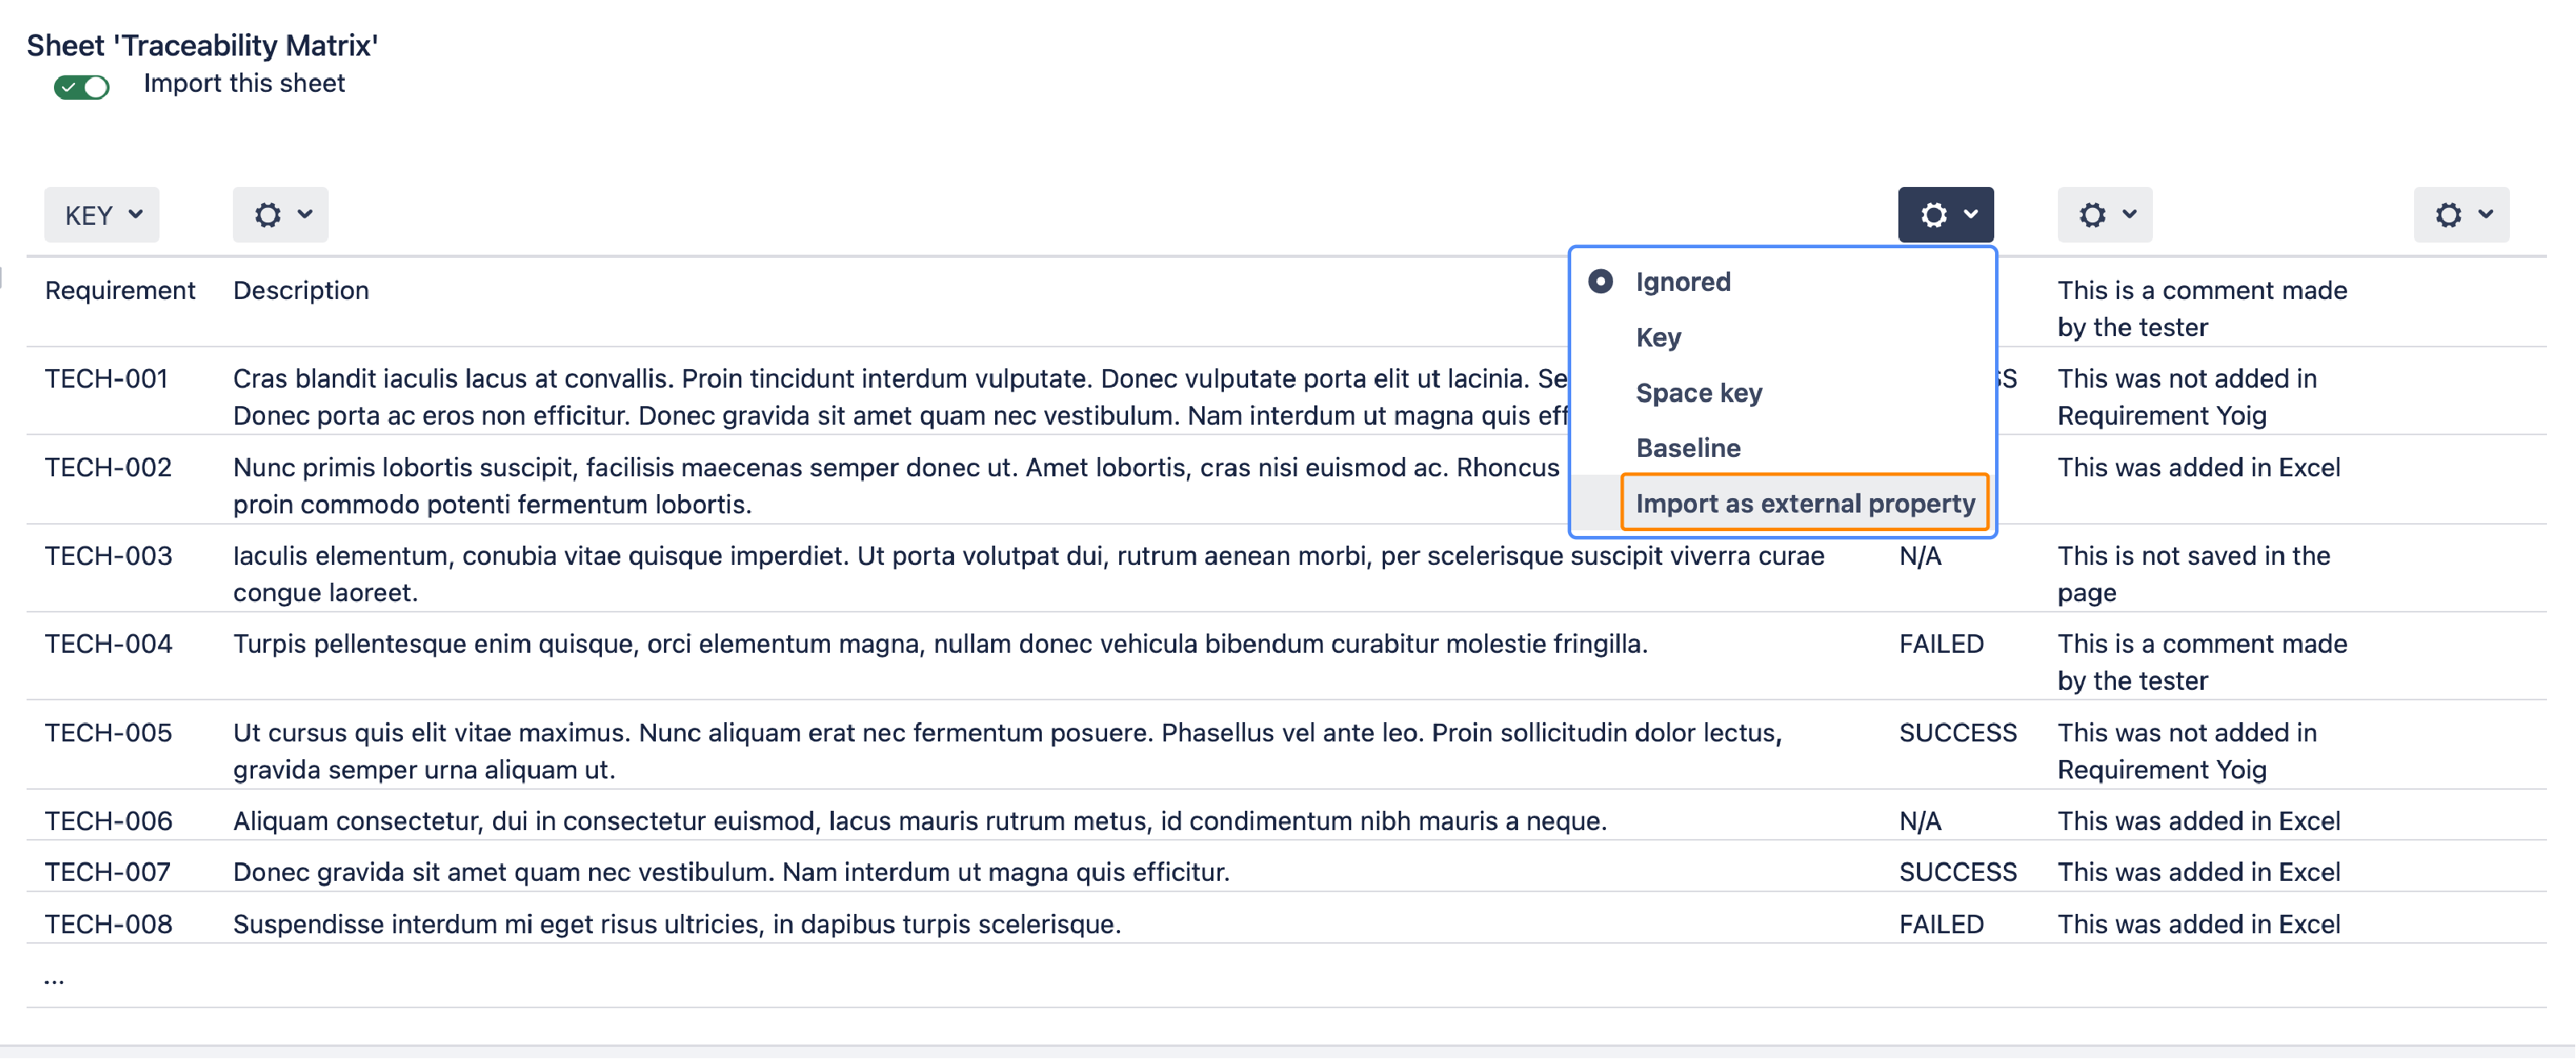
4. Mapping options
Cog menus have 5 options:
You may have other columns as well, that are your requirements properties, but we do not care about them. We only care about the external properties. By default other columns will be put as “Ignored". → Go on an external property column and select “Import as an external property”.
|
|
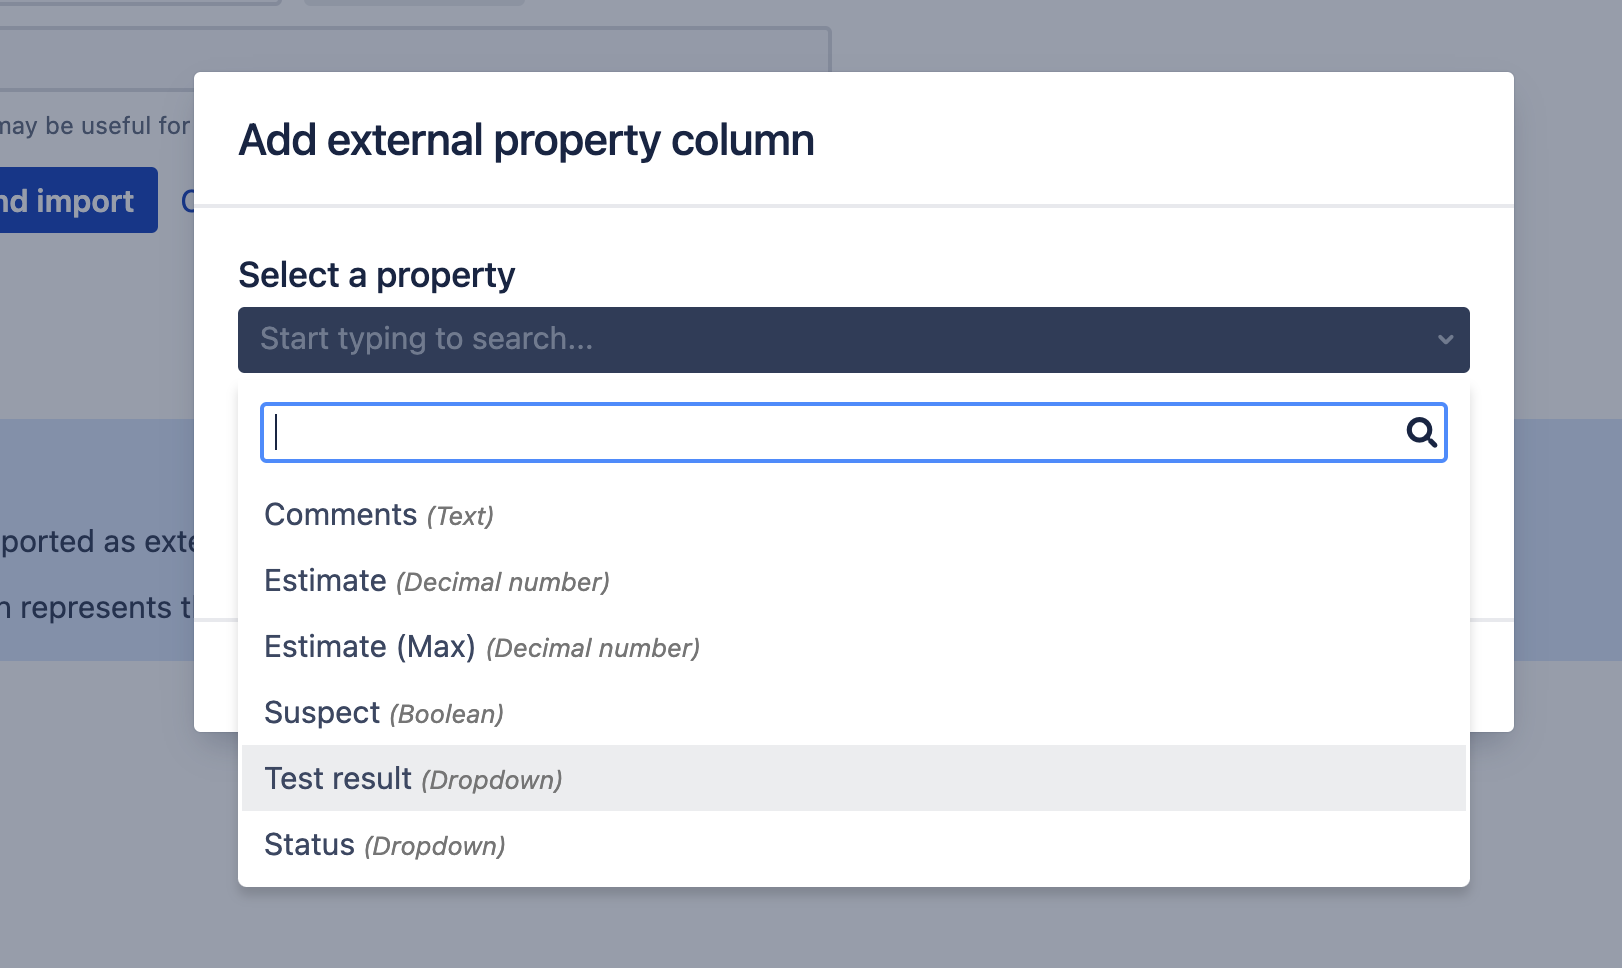
5. Select a property
Choose the corresponding external property. → Only already created properties will be displayed, this is why if you want to import a new external property. Creating it beforehand will avoid backs and forths. |
|
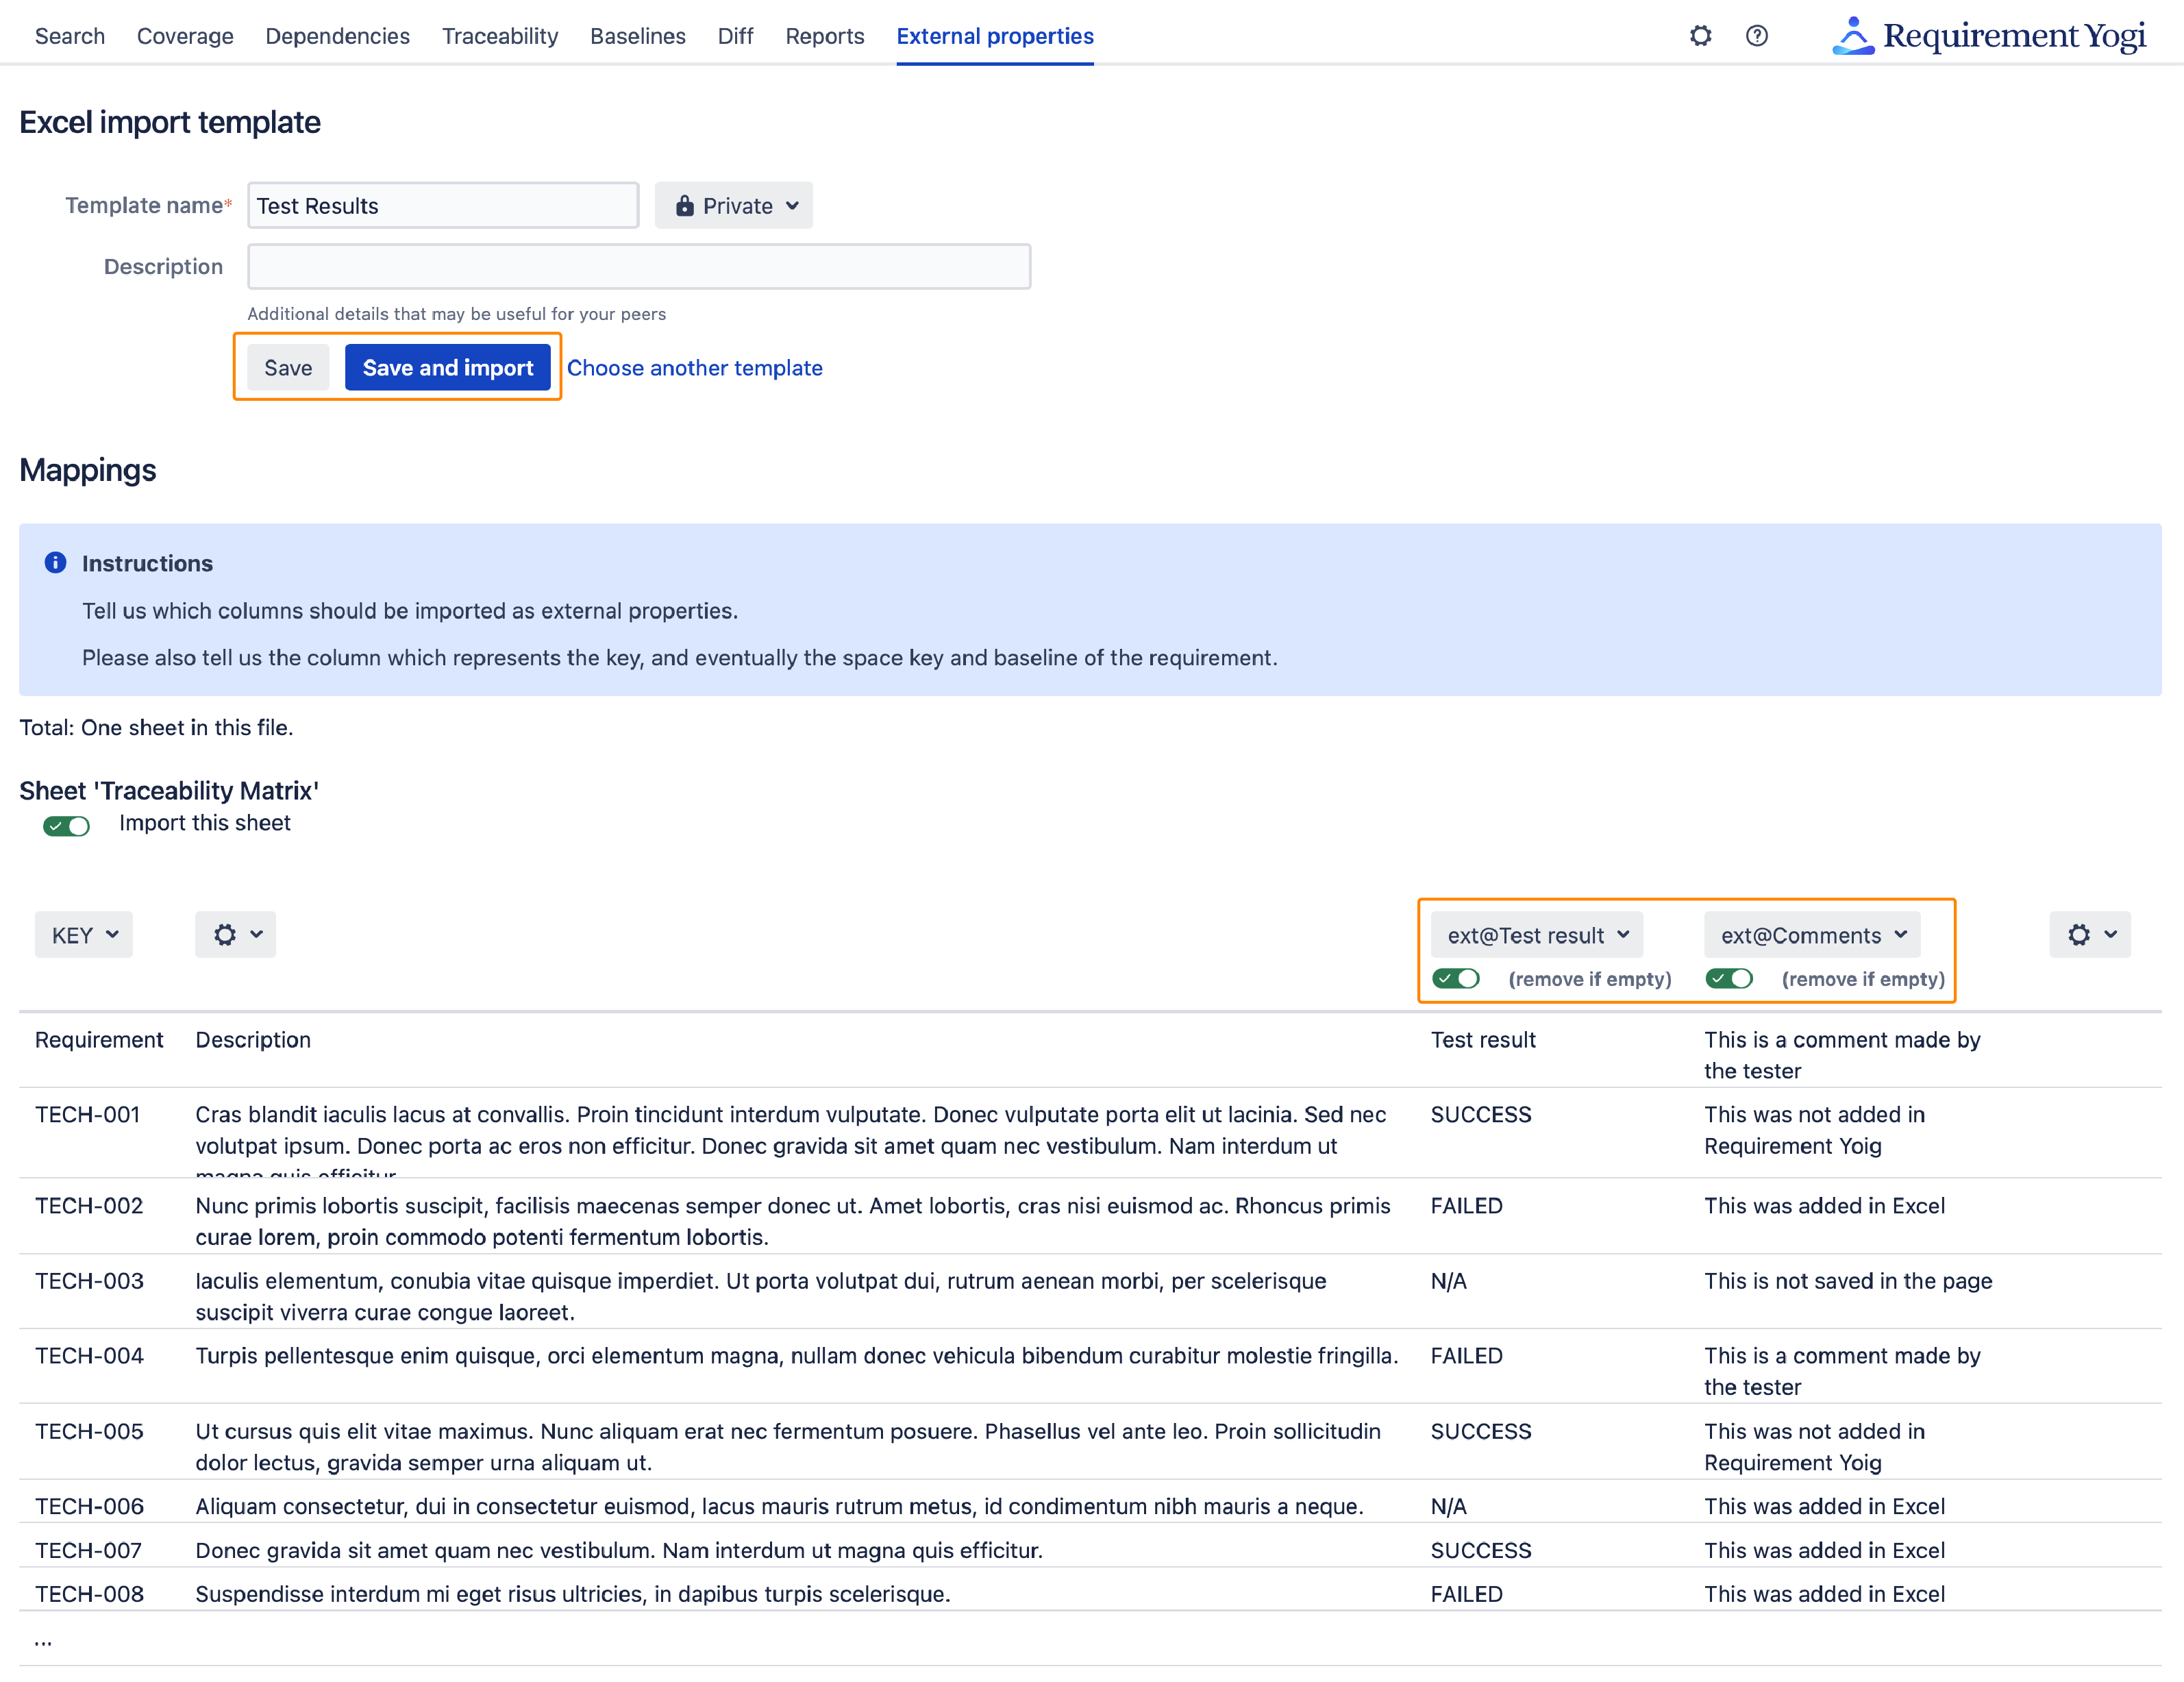
6. Save and import
You can see in the screenshot external properties columns have been mapped properly by looking at the top of each column.
|
|
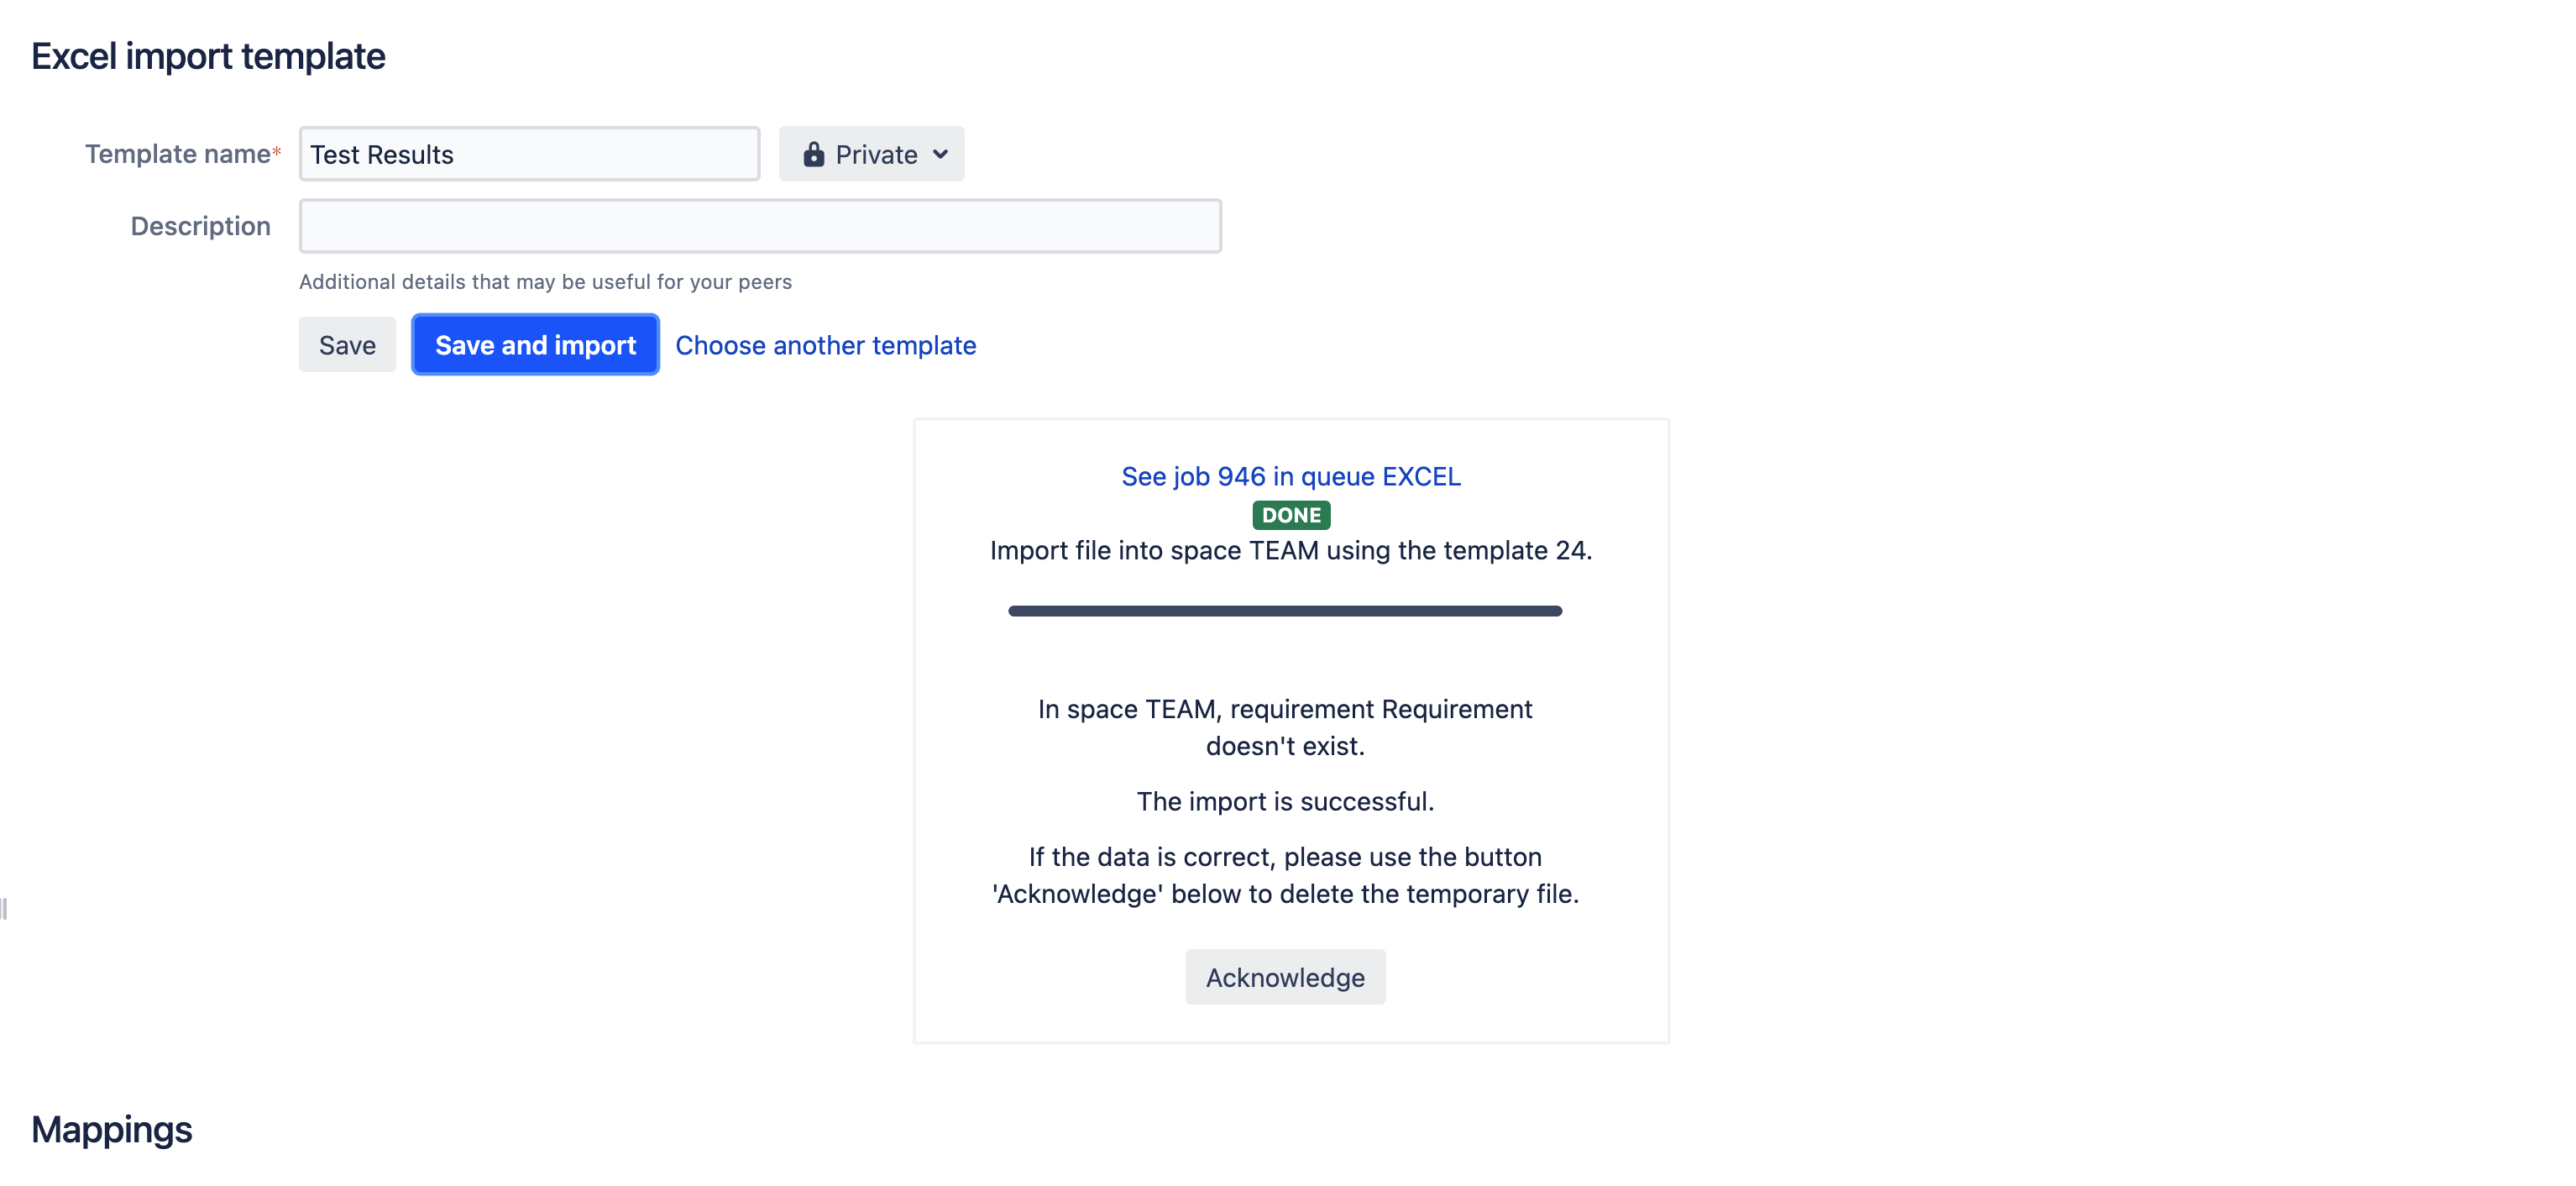
7. Watch for errors
Wait for the job to finish, acknowledge the import is successful and you’re done! |
|
You’re done!
You will be redirected to the External Properties tab, to check if your comments have correctly been added, you can click on the property and build your matrice (if you did not have one saved before hand).