
At its core, Requirement Yogi is very simple... Learn the basics in less than 4 minutes:
3 ways to insert the macro
|
Alt + Shift + R (or Option + Shift + R on Mac) |
|
|
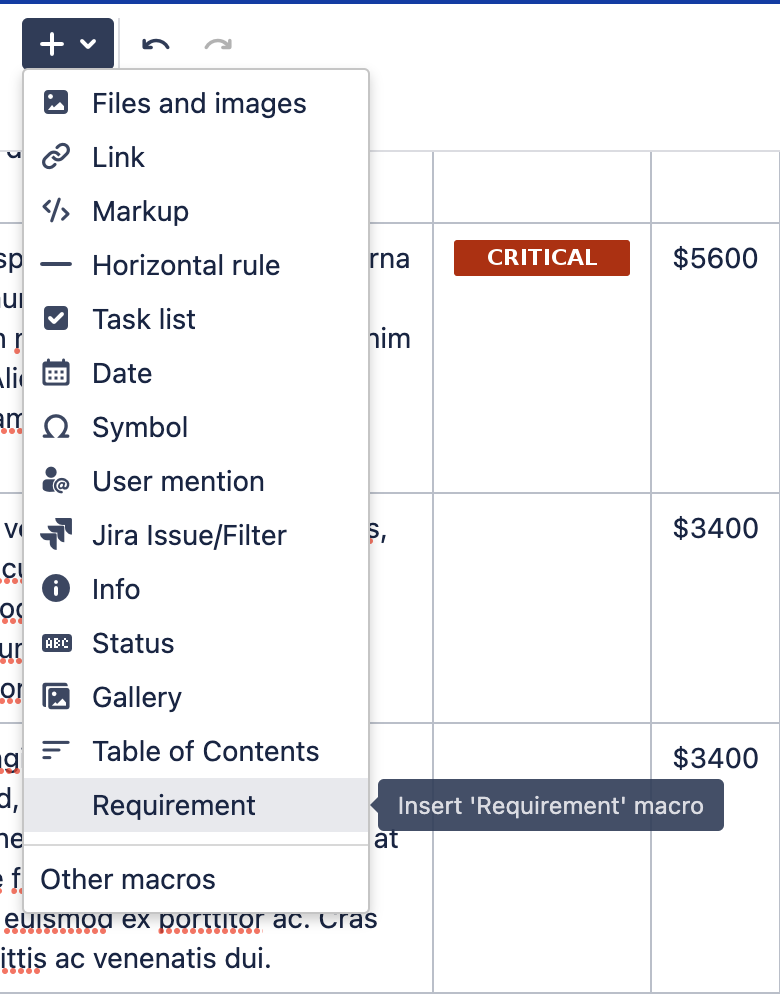
Or the "Insert more content" menu. |
|
|
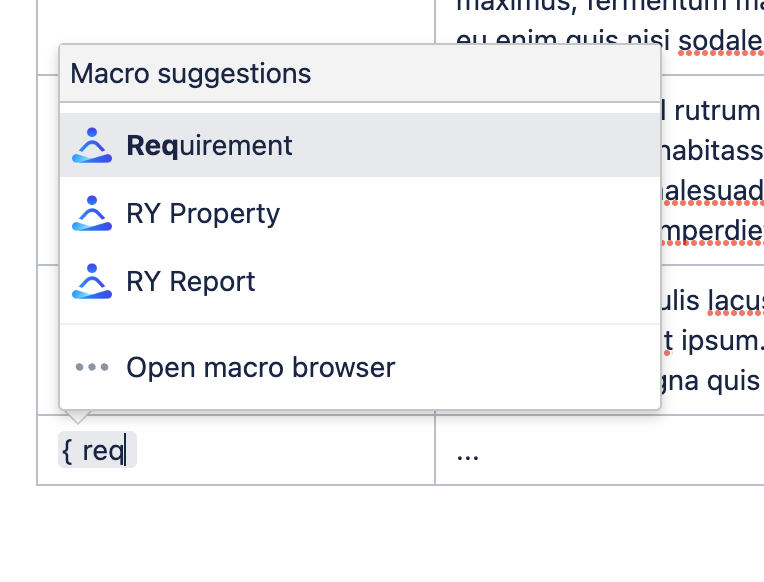
Or type "{" then "req" |
|
What’s the purpose of the macro?
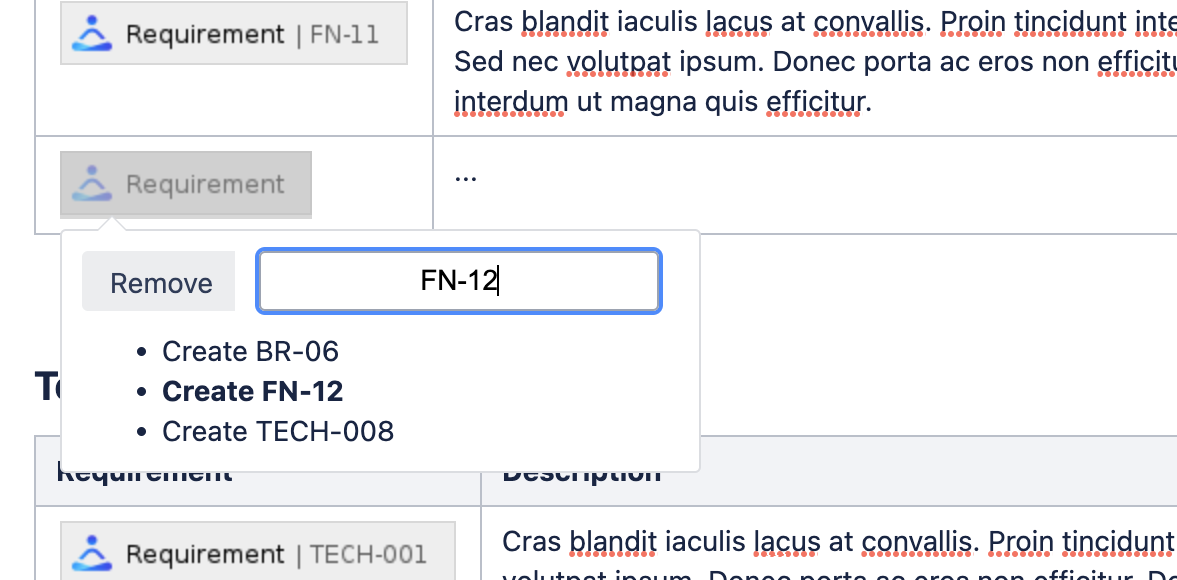
When the page is saved, the macro makes the whole line into a requirement. Example:
|
In the editor |
.png?cb=7d26fe0e6f56aca1c0d94e4624159f3b)
|
|
When viewing the page |
.png?cb=c511da4b5aebb05c3d1ef78239e3aa13)
|
|
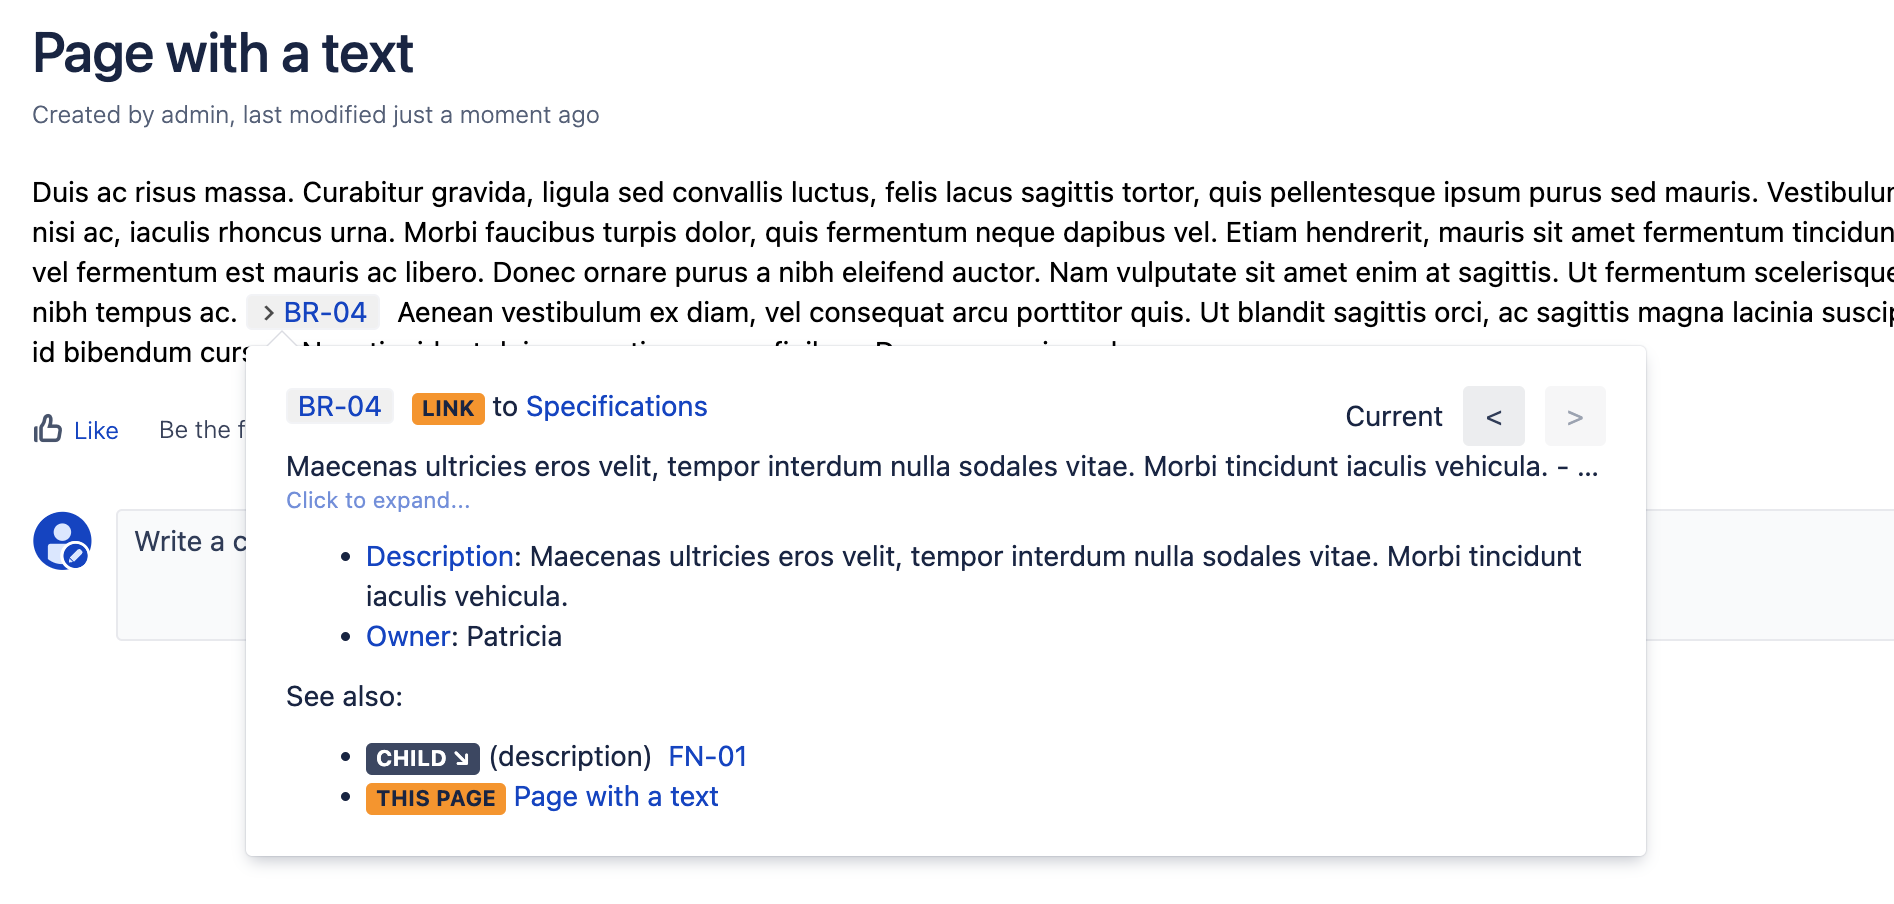
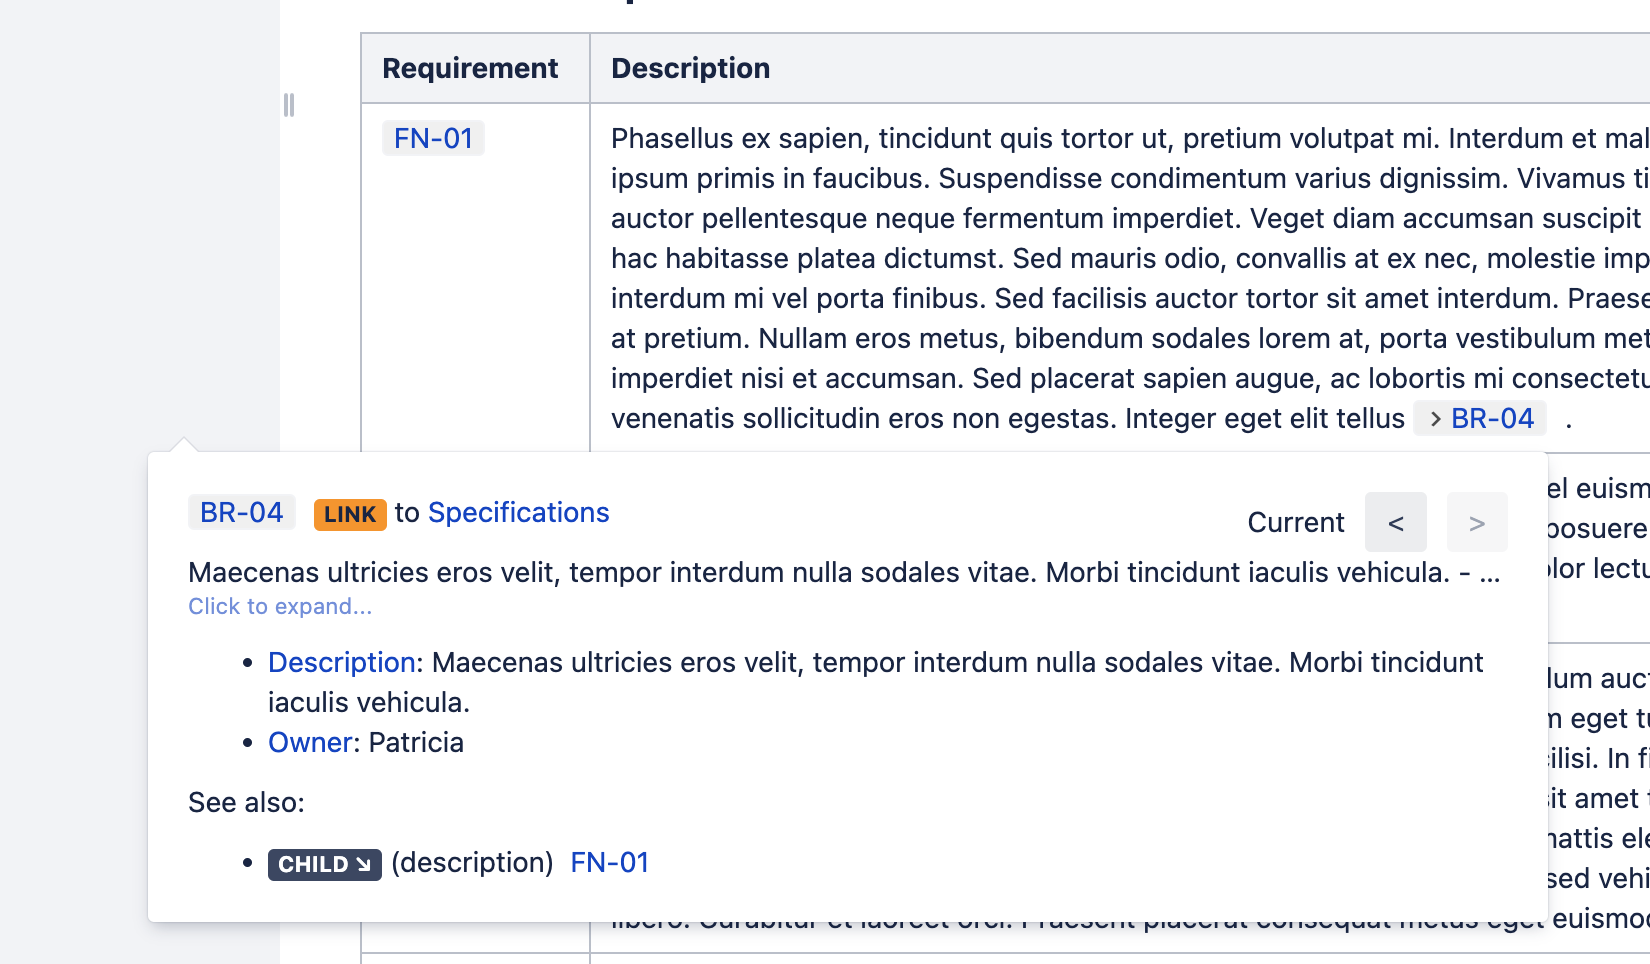
Displaying the popup |
.png?cb=111f34545478bbdb3dfe0a425334c22e)
|
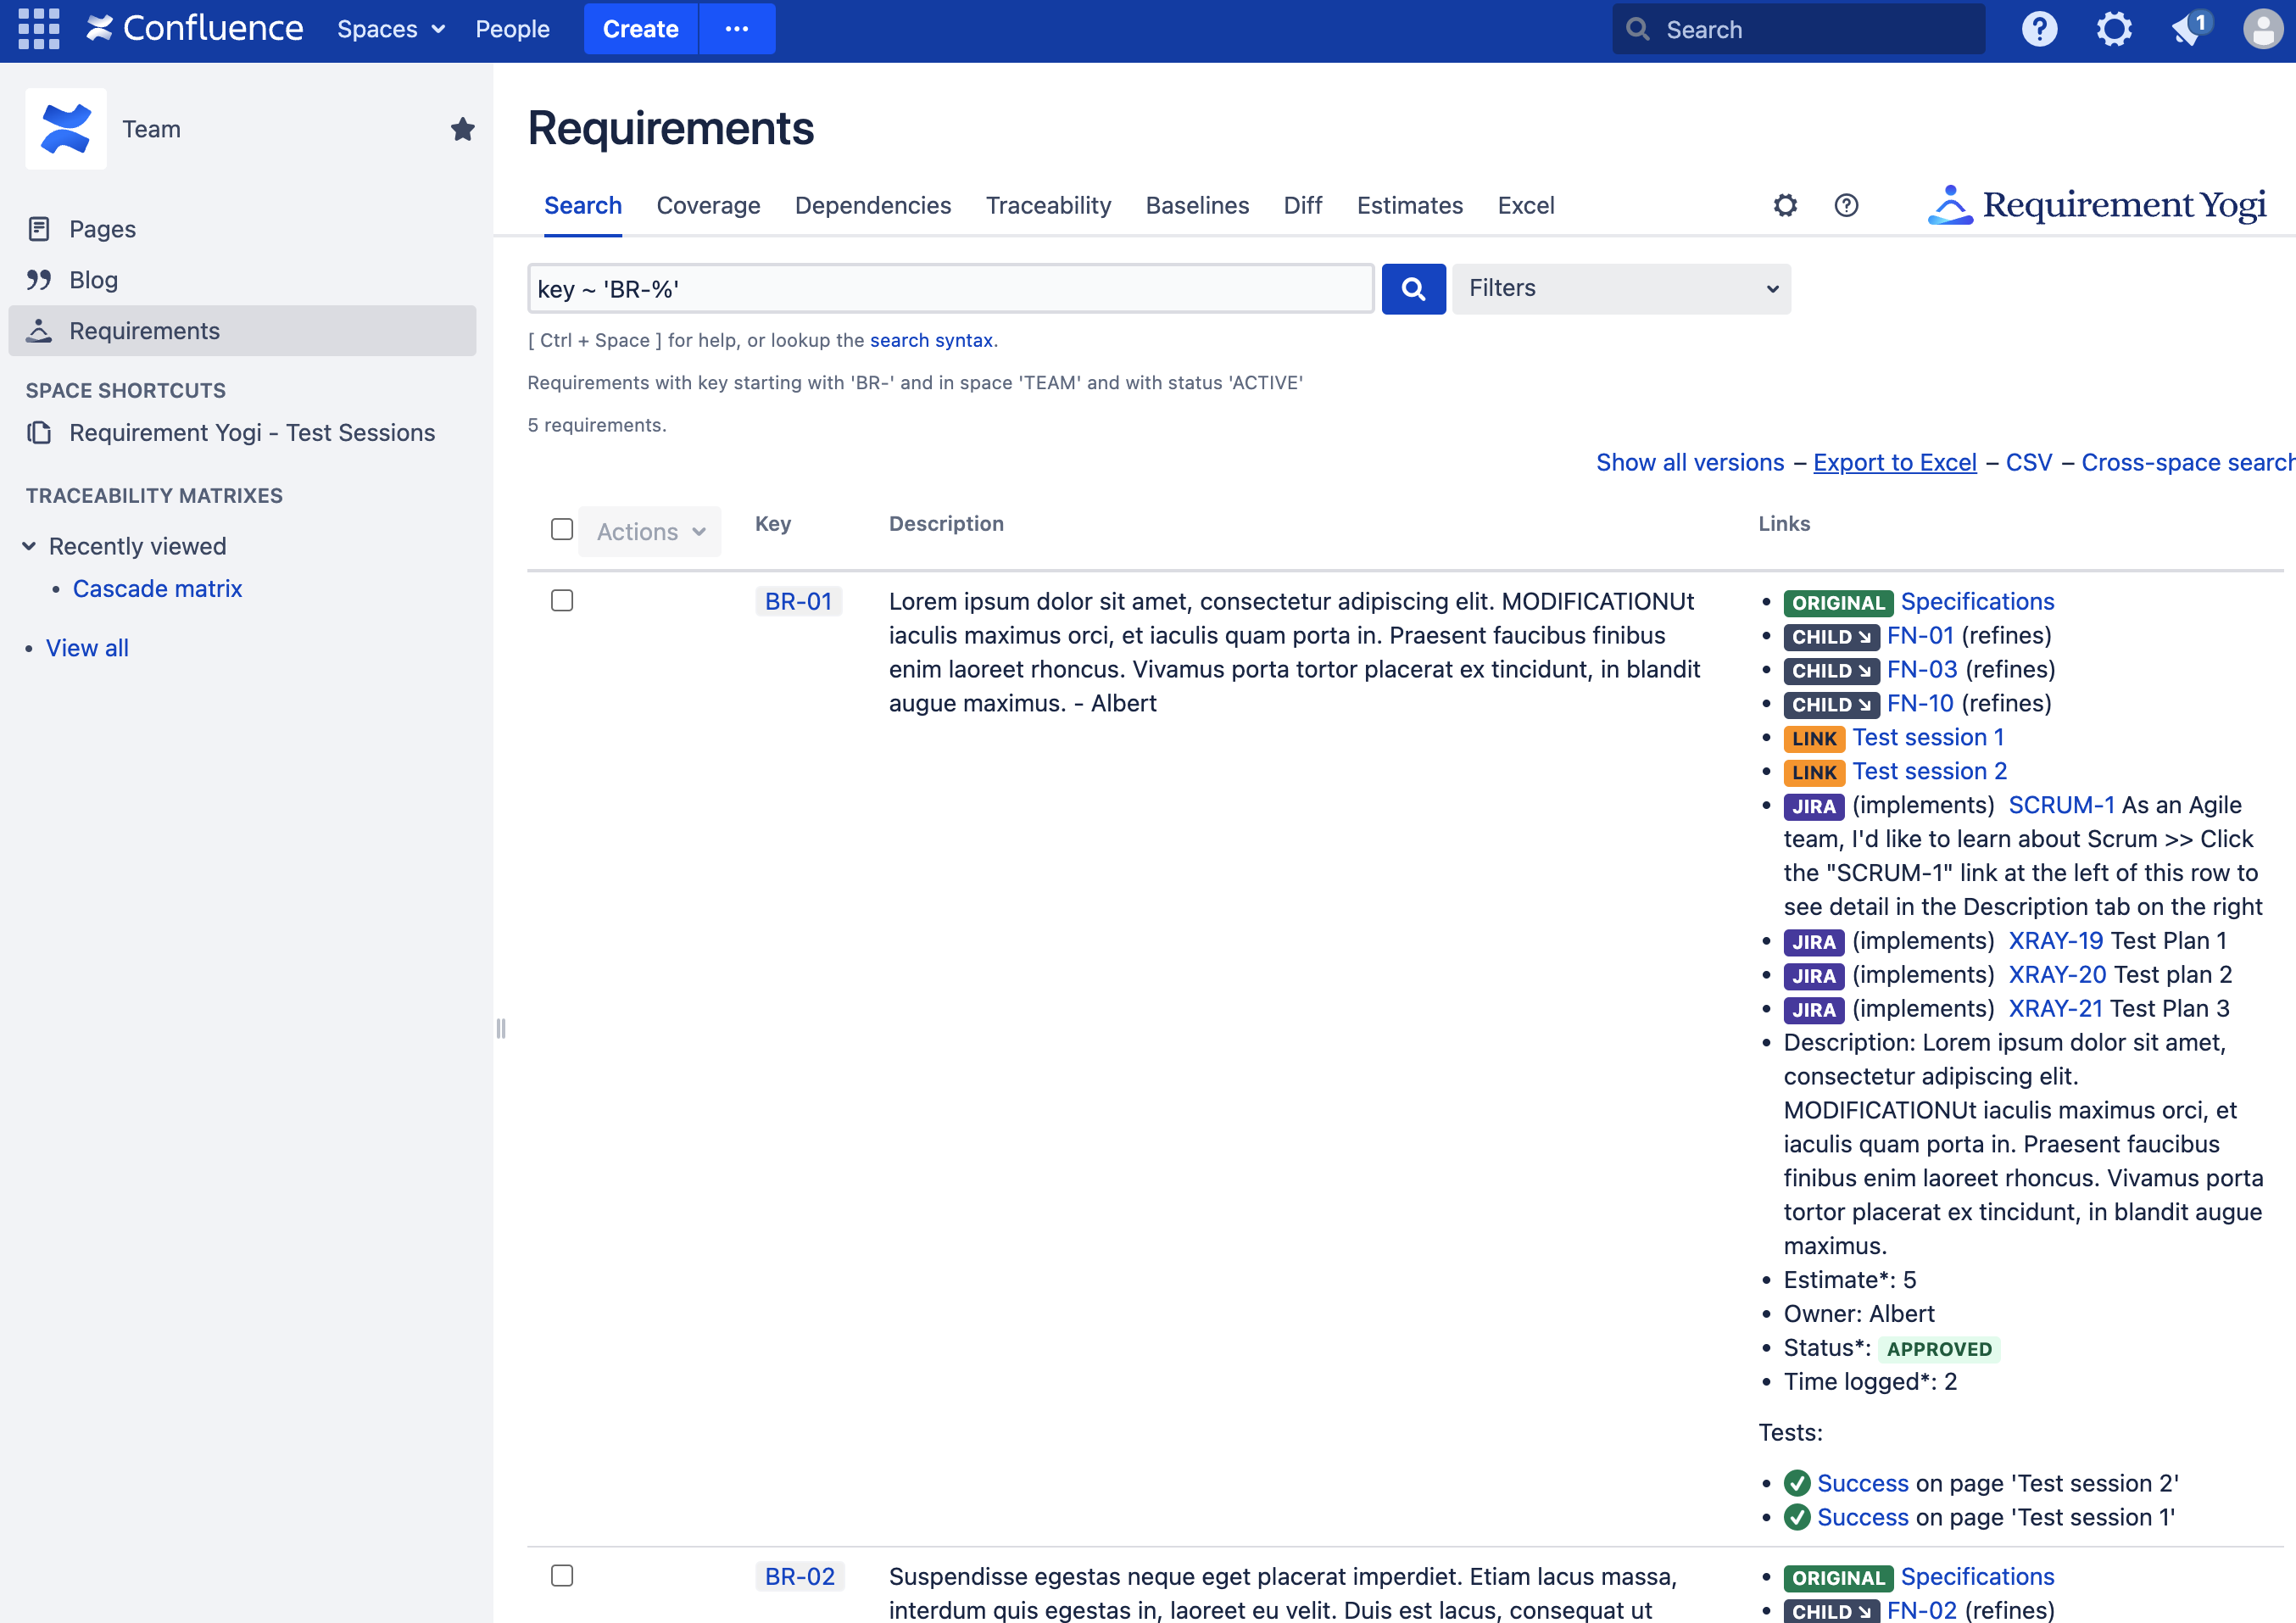
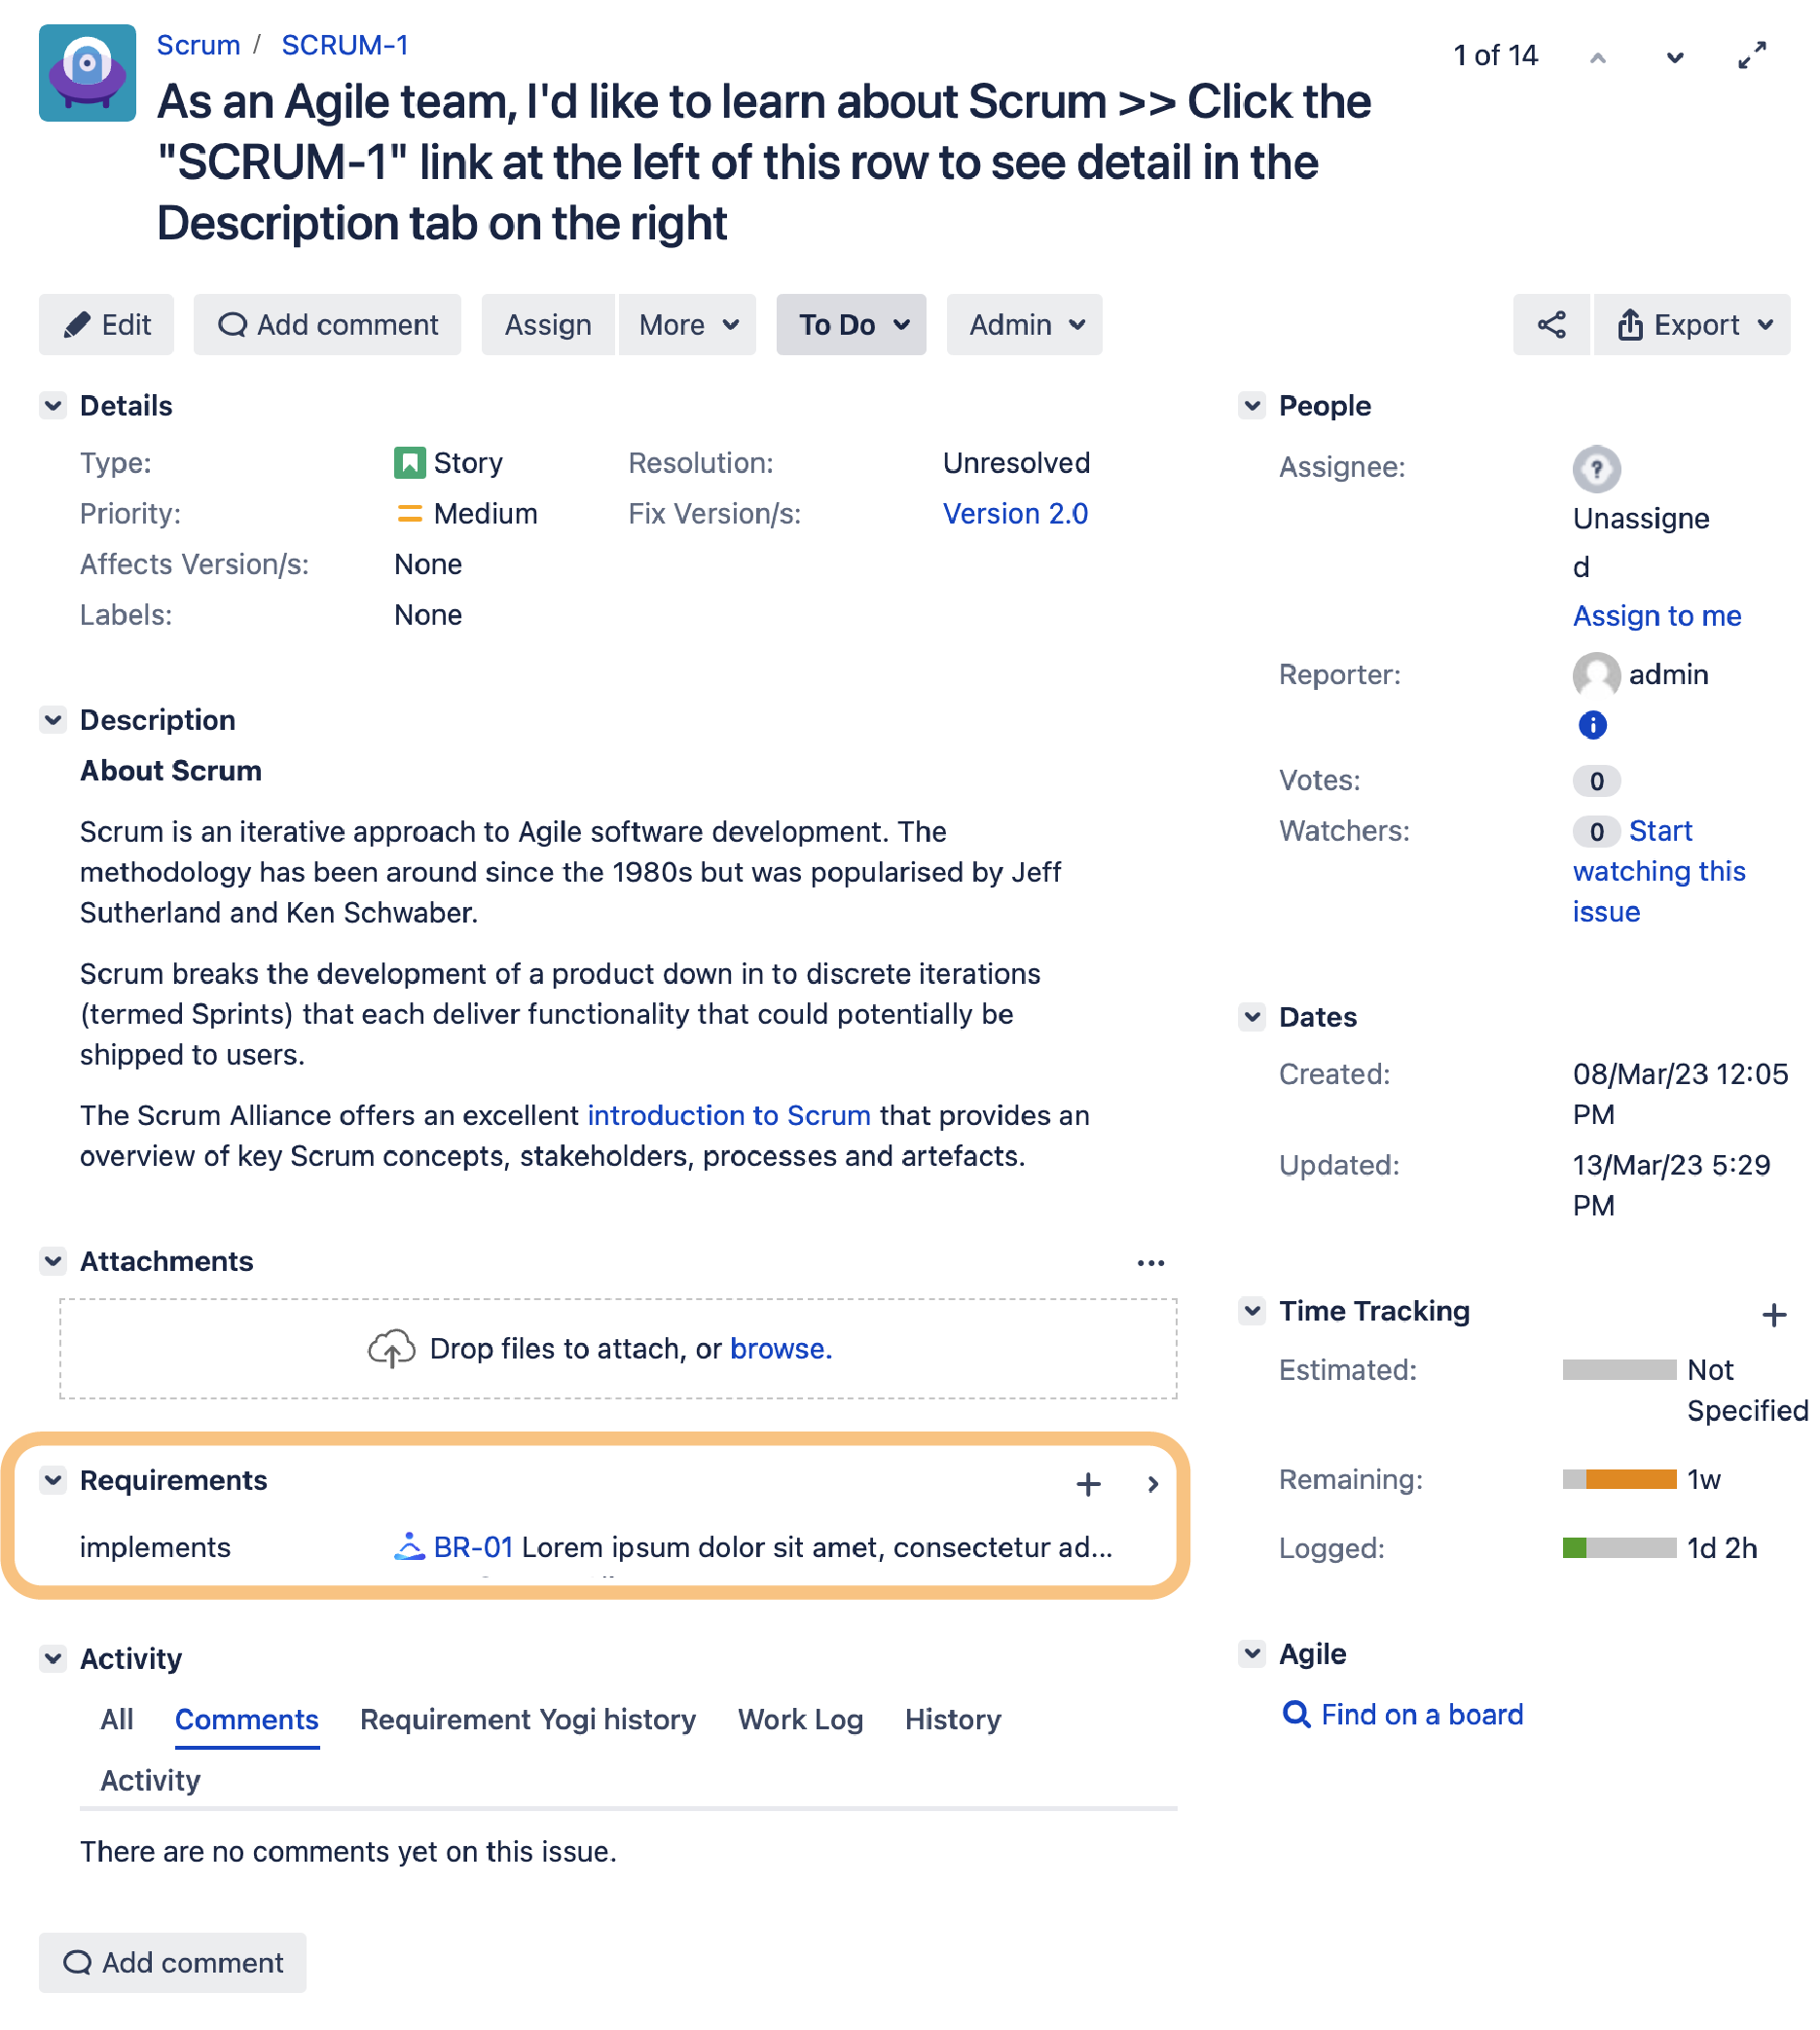
Where can I see requirements?
Thanks to the macro, requirements have a unique hyperlink. Requirements can be seen:
|
In the popup |
|
|
In the text, the popup that references to this requirement |
|
|
In other requirements (in which case they're called dependencies) |
|
|
In the search |
|
|
In JIRA |
|
Do's and Don't
|
Do |
Don't |
|---|---|
|
Write relatively short titles for your requirements, then add details in other columns. |
Don't write a full document inside a requirement. It is not useful for a user to display "everything" in JIRA, especially since it is not designed for it. Confluence is much better at displaying content. |
|
Use a table to structure your requirements, link one requirement per row. |
Better not try to define a full paragraph or section of a document as a requirement. |
|
Use short requirement keys with a prefix. Example: "FUNCTIONAL-001" or "FN-001". |
Use spaces or expressions as requirement keys. Only letters, numbers, underscore (_), hyphen (-) and dot (.) are accepted. Don't use the view mode's "inline creation" if you're starting. That only becomes useful when you're tired of importing requirements from Word. |
Tips
-
You can use the shortcut (Alt + Shift + R) on a full table, and Requirement Yogi will add one key per row.
-
You can paste an entire Word document, then save, then use the inline creation to switch all sets of letters to requirements.
🚀 That's all you need to know, literally!
Everything else is tools around the Requirement macro. Get going with your job!
-
You'll need some search at one point,
-
You can use some blueprints so all your documents look the same with requirements in the middle,
-
You'll ask for versioning at one point, we've built it,
-
You'll make cross-dependencies and ask for coverage, we have that also,
-
Obviously we have Excel export,
-
You'll ask for a testing solution, either you use our extension (RY Testing and Compliance) or you integrate with others like Xray or Zephyr.
But keep it simple, start with writing requirements!