Why do we recommend to use tables?
-
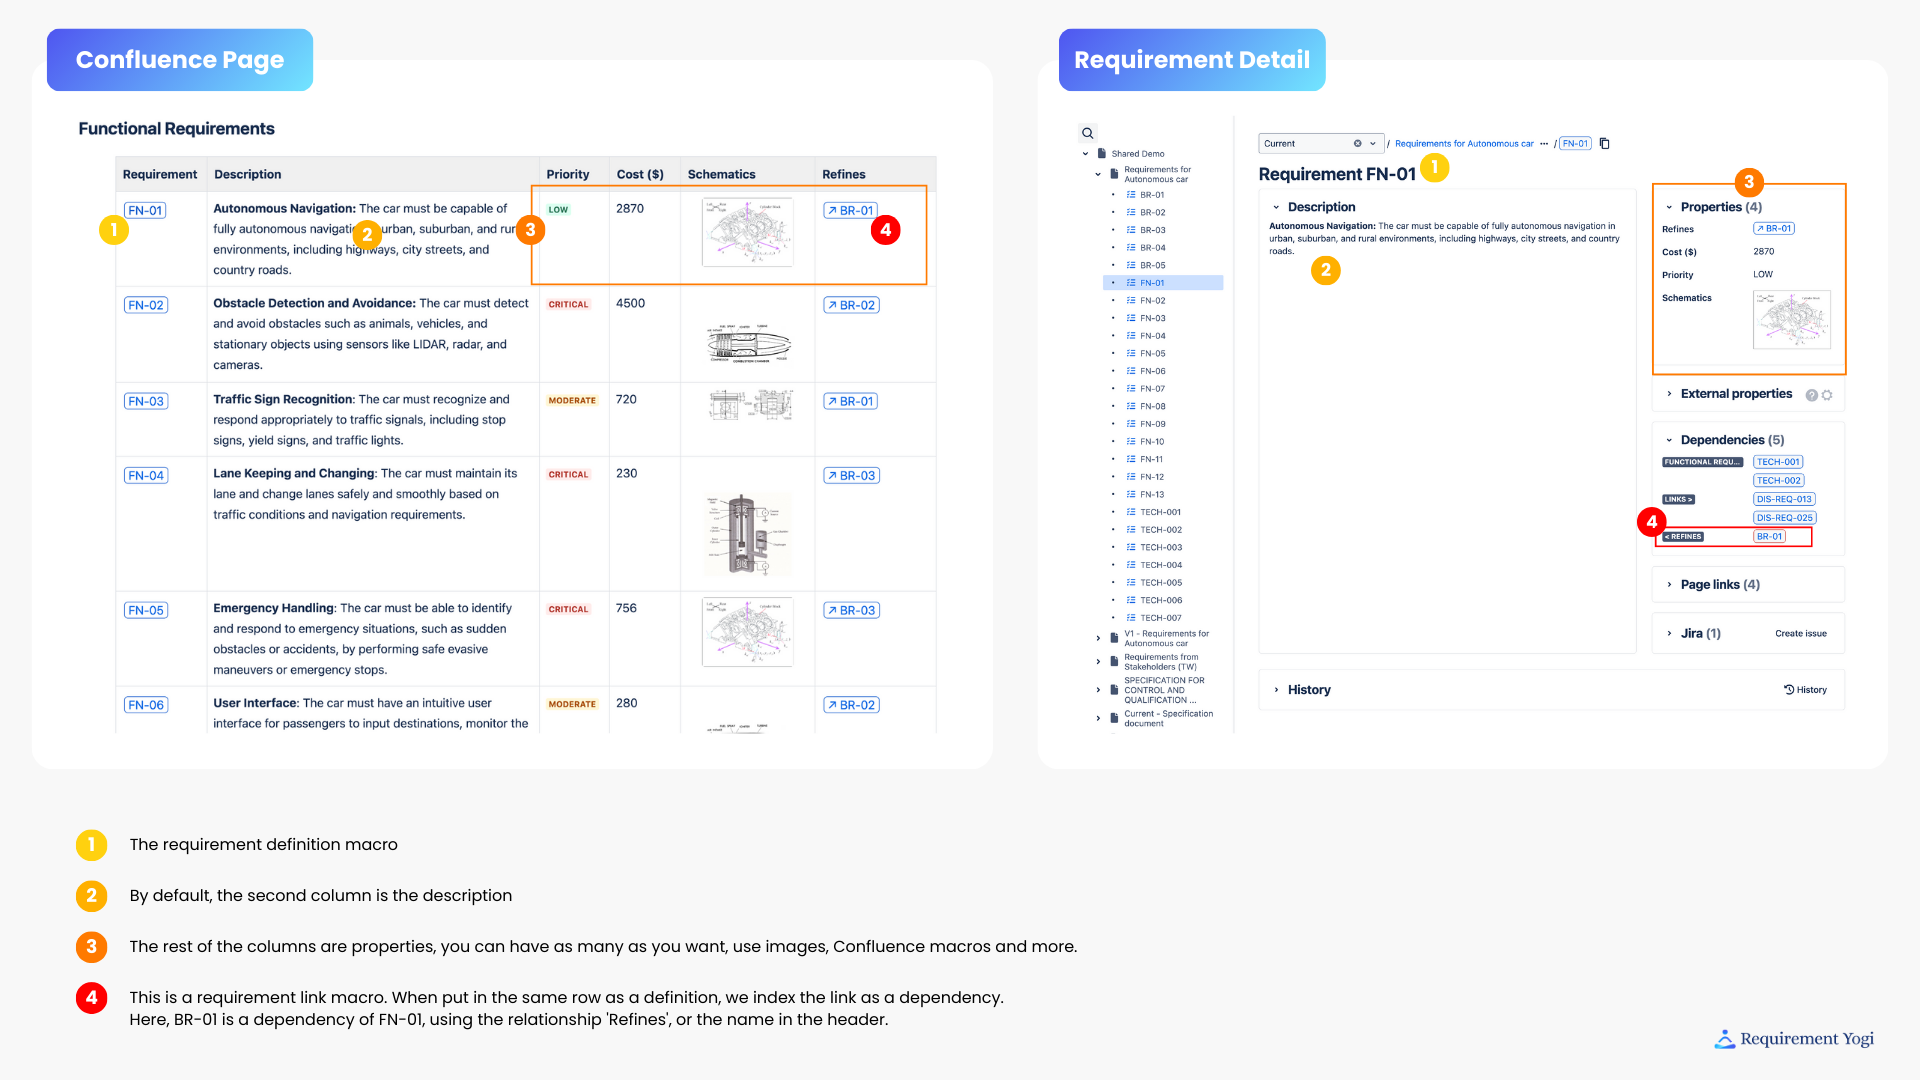
Each column becomes a property of your requirement.
-
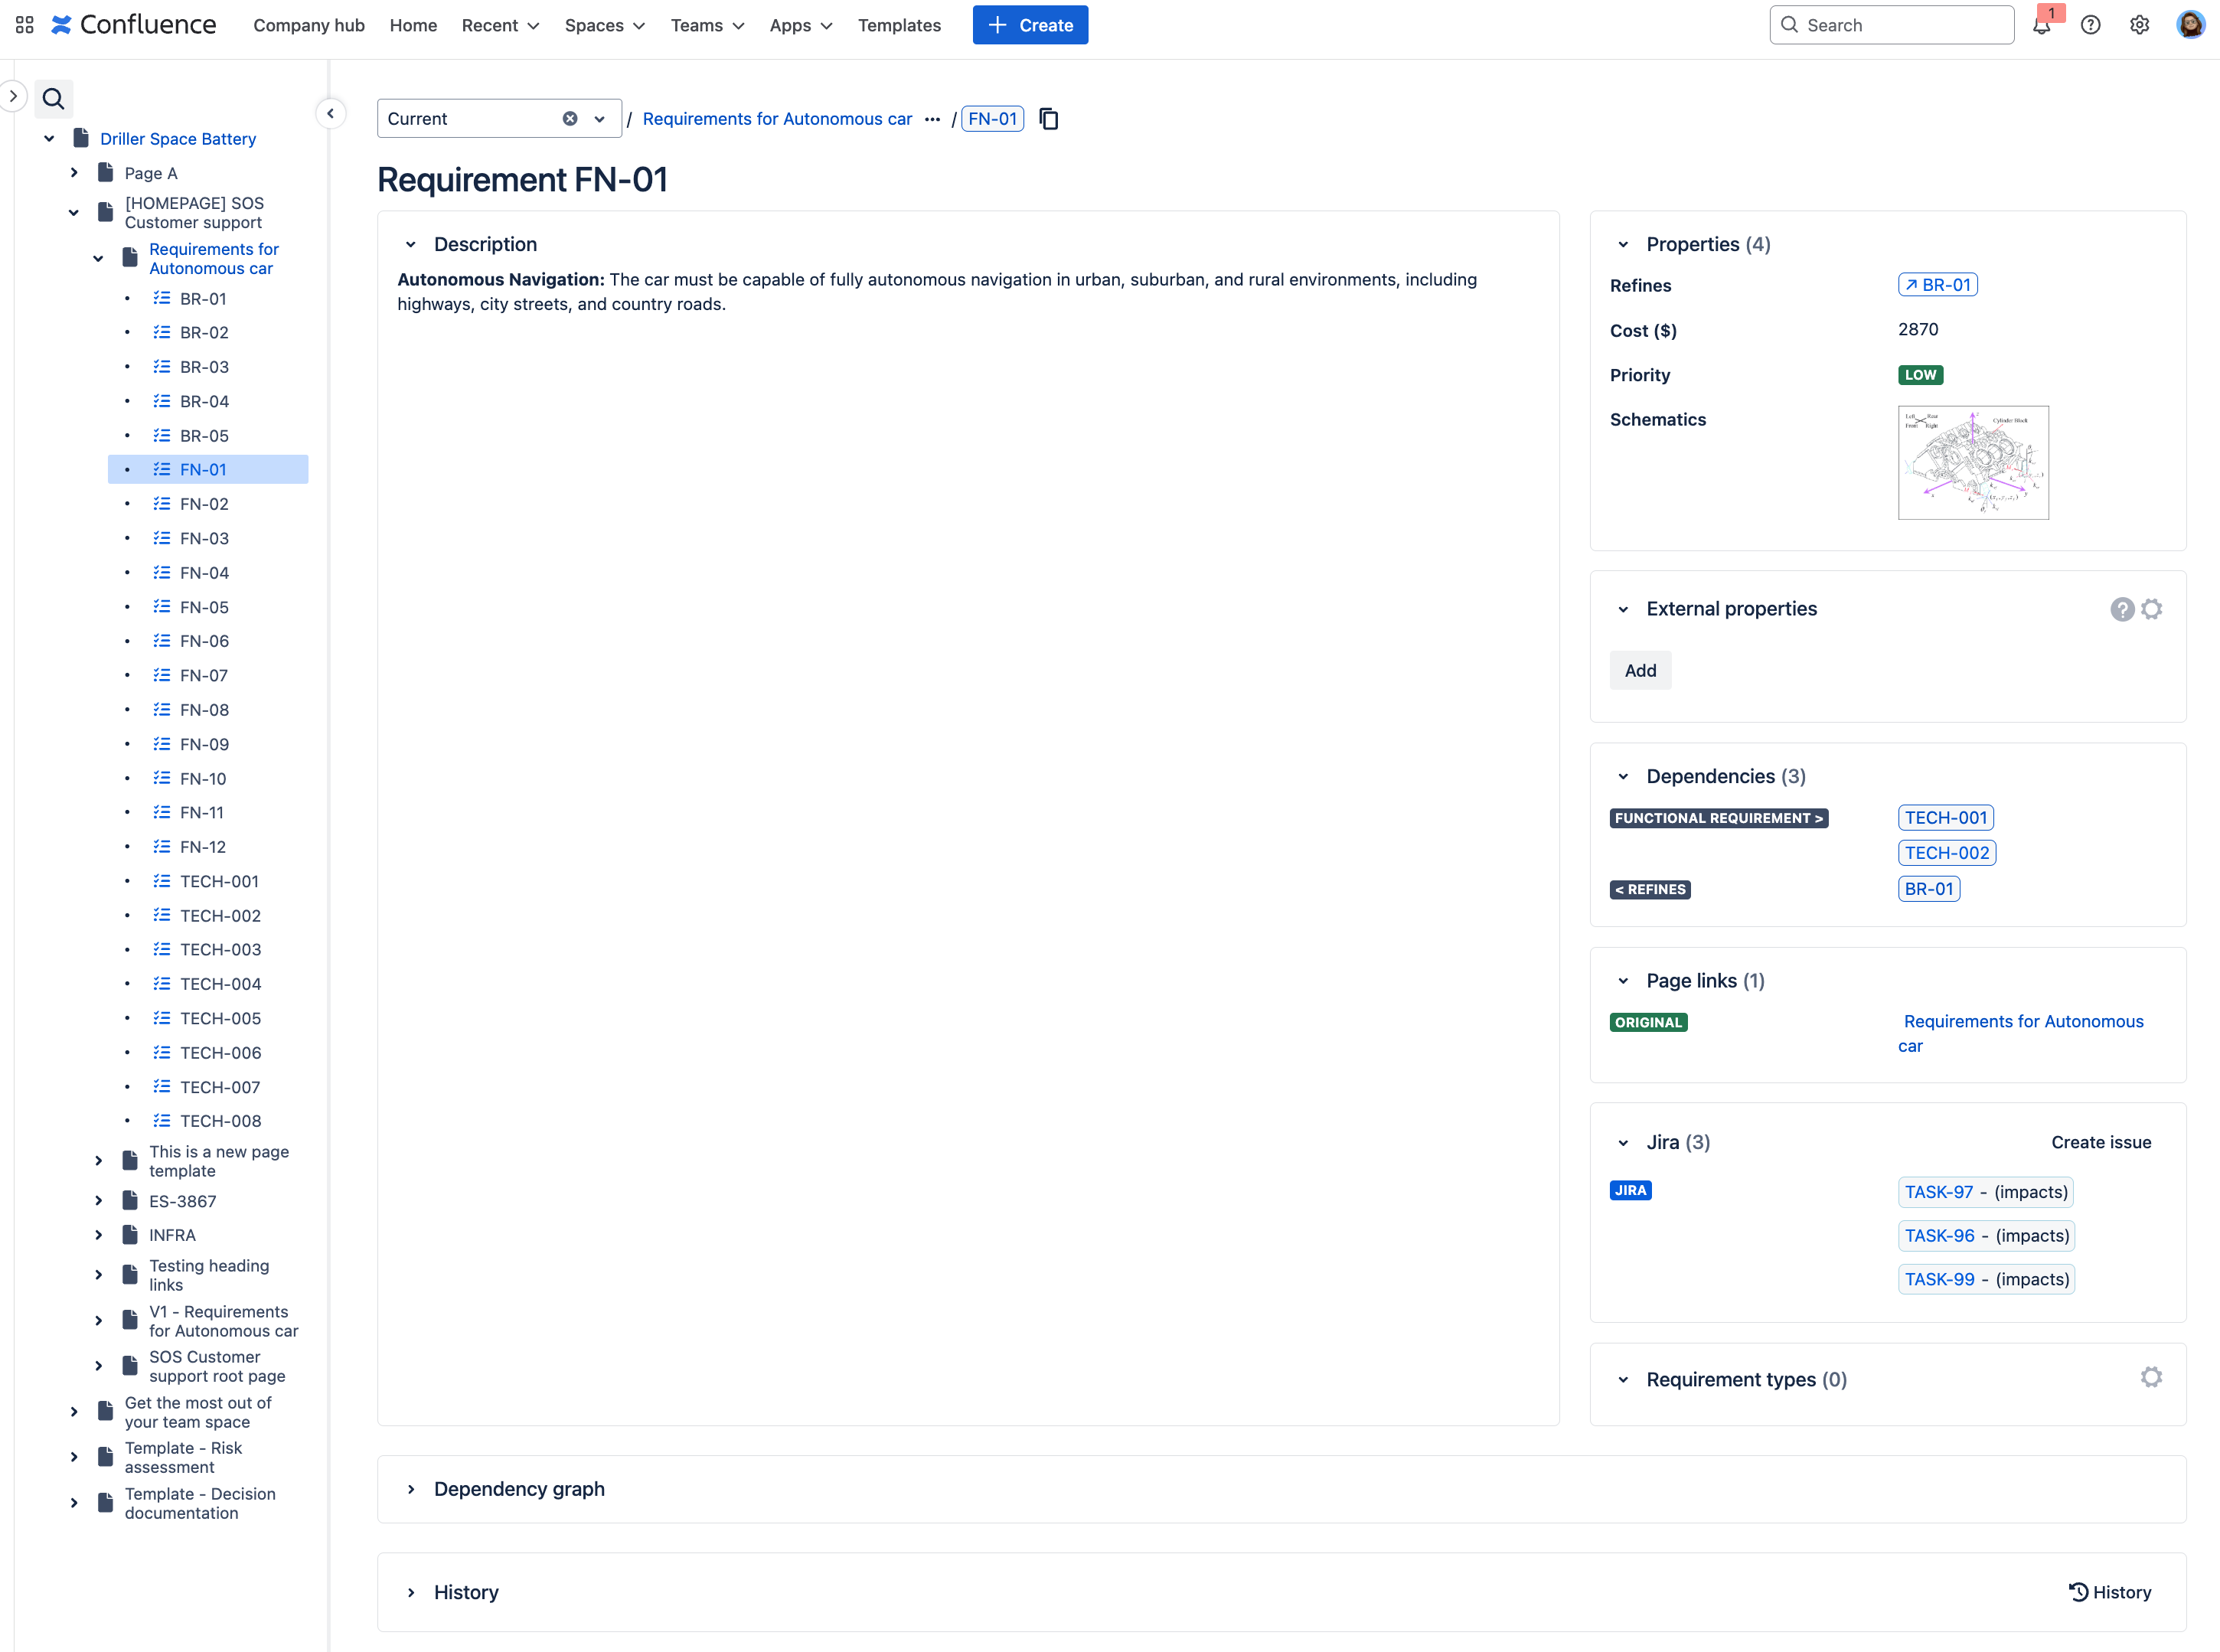
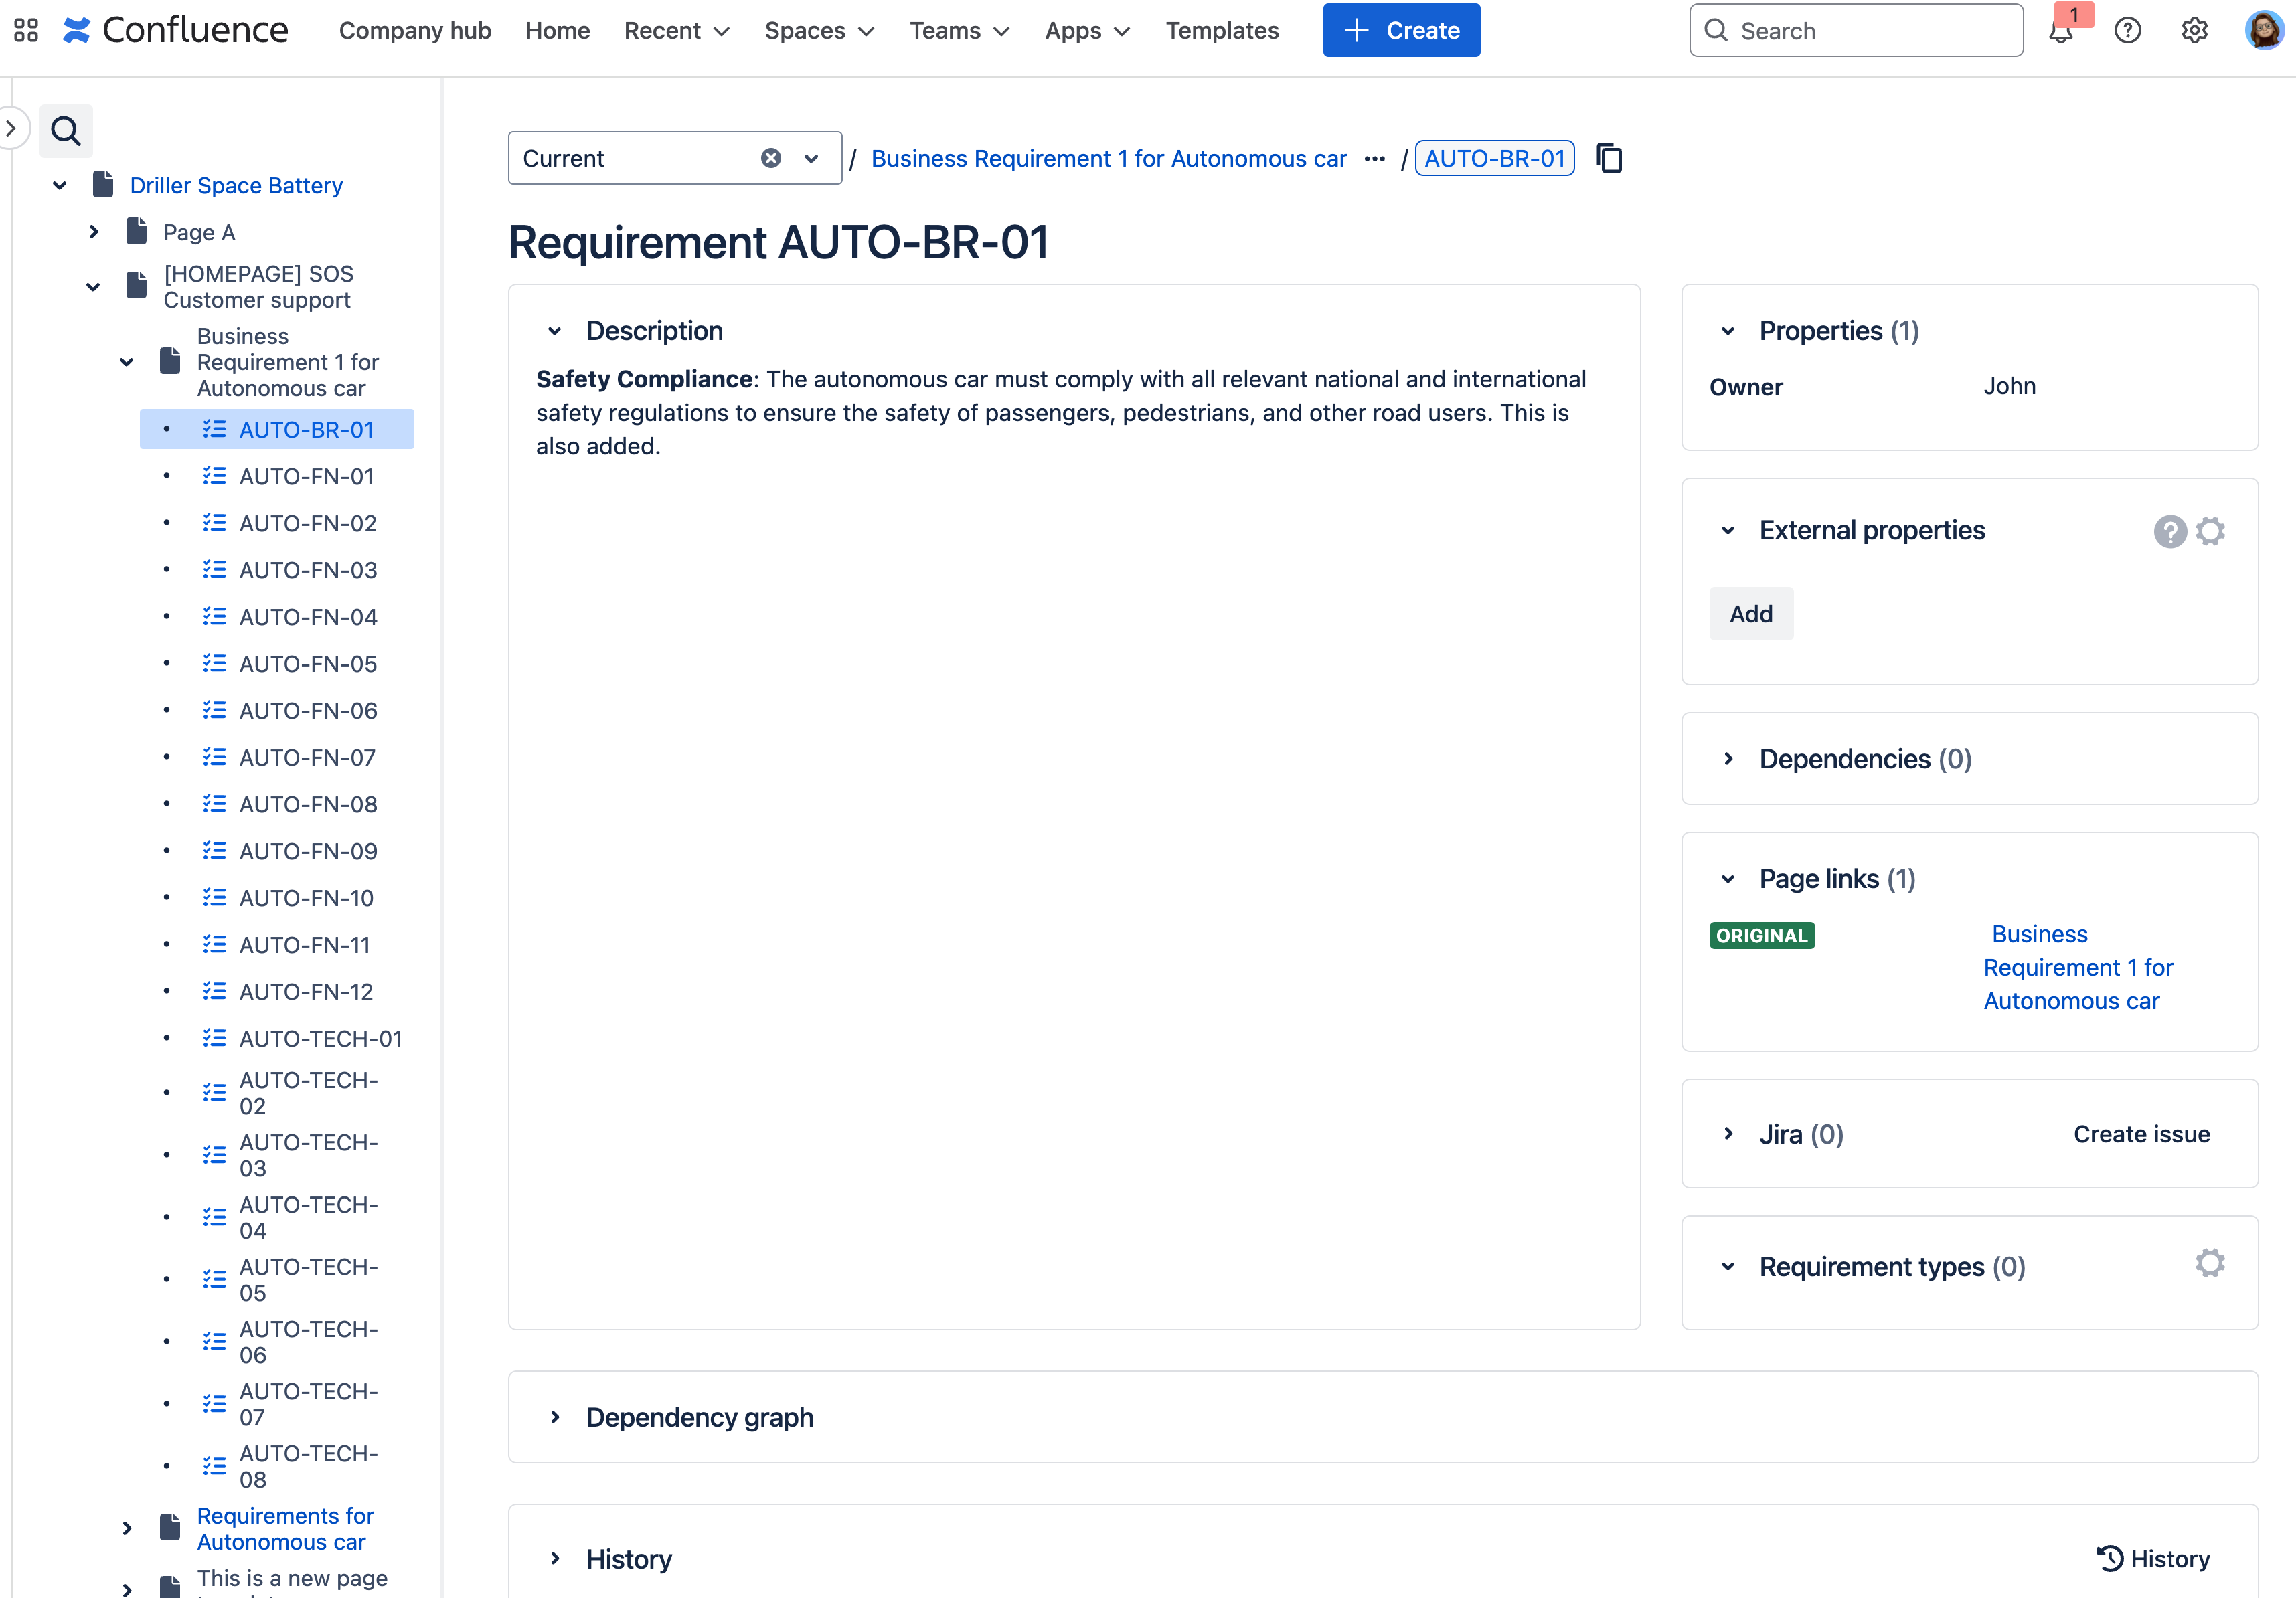
A property is present in the Confluence page where your requirement is defined. A property is different than an external property, which is not present in the page and can only be added in the requirement’s detail or traceability matrix.
-
-
You can then use those properties in the search syntax,
-
Or, add them specifically to your traceability matrices.
-
Use the Transformation wizard and optimise your work to generate requirements, and much more.
If you want to know more, please follow this documentation page for the best practices.
Horizontal Tables
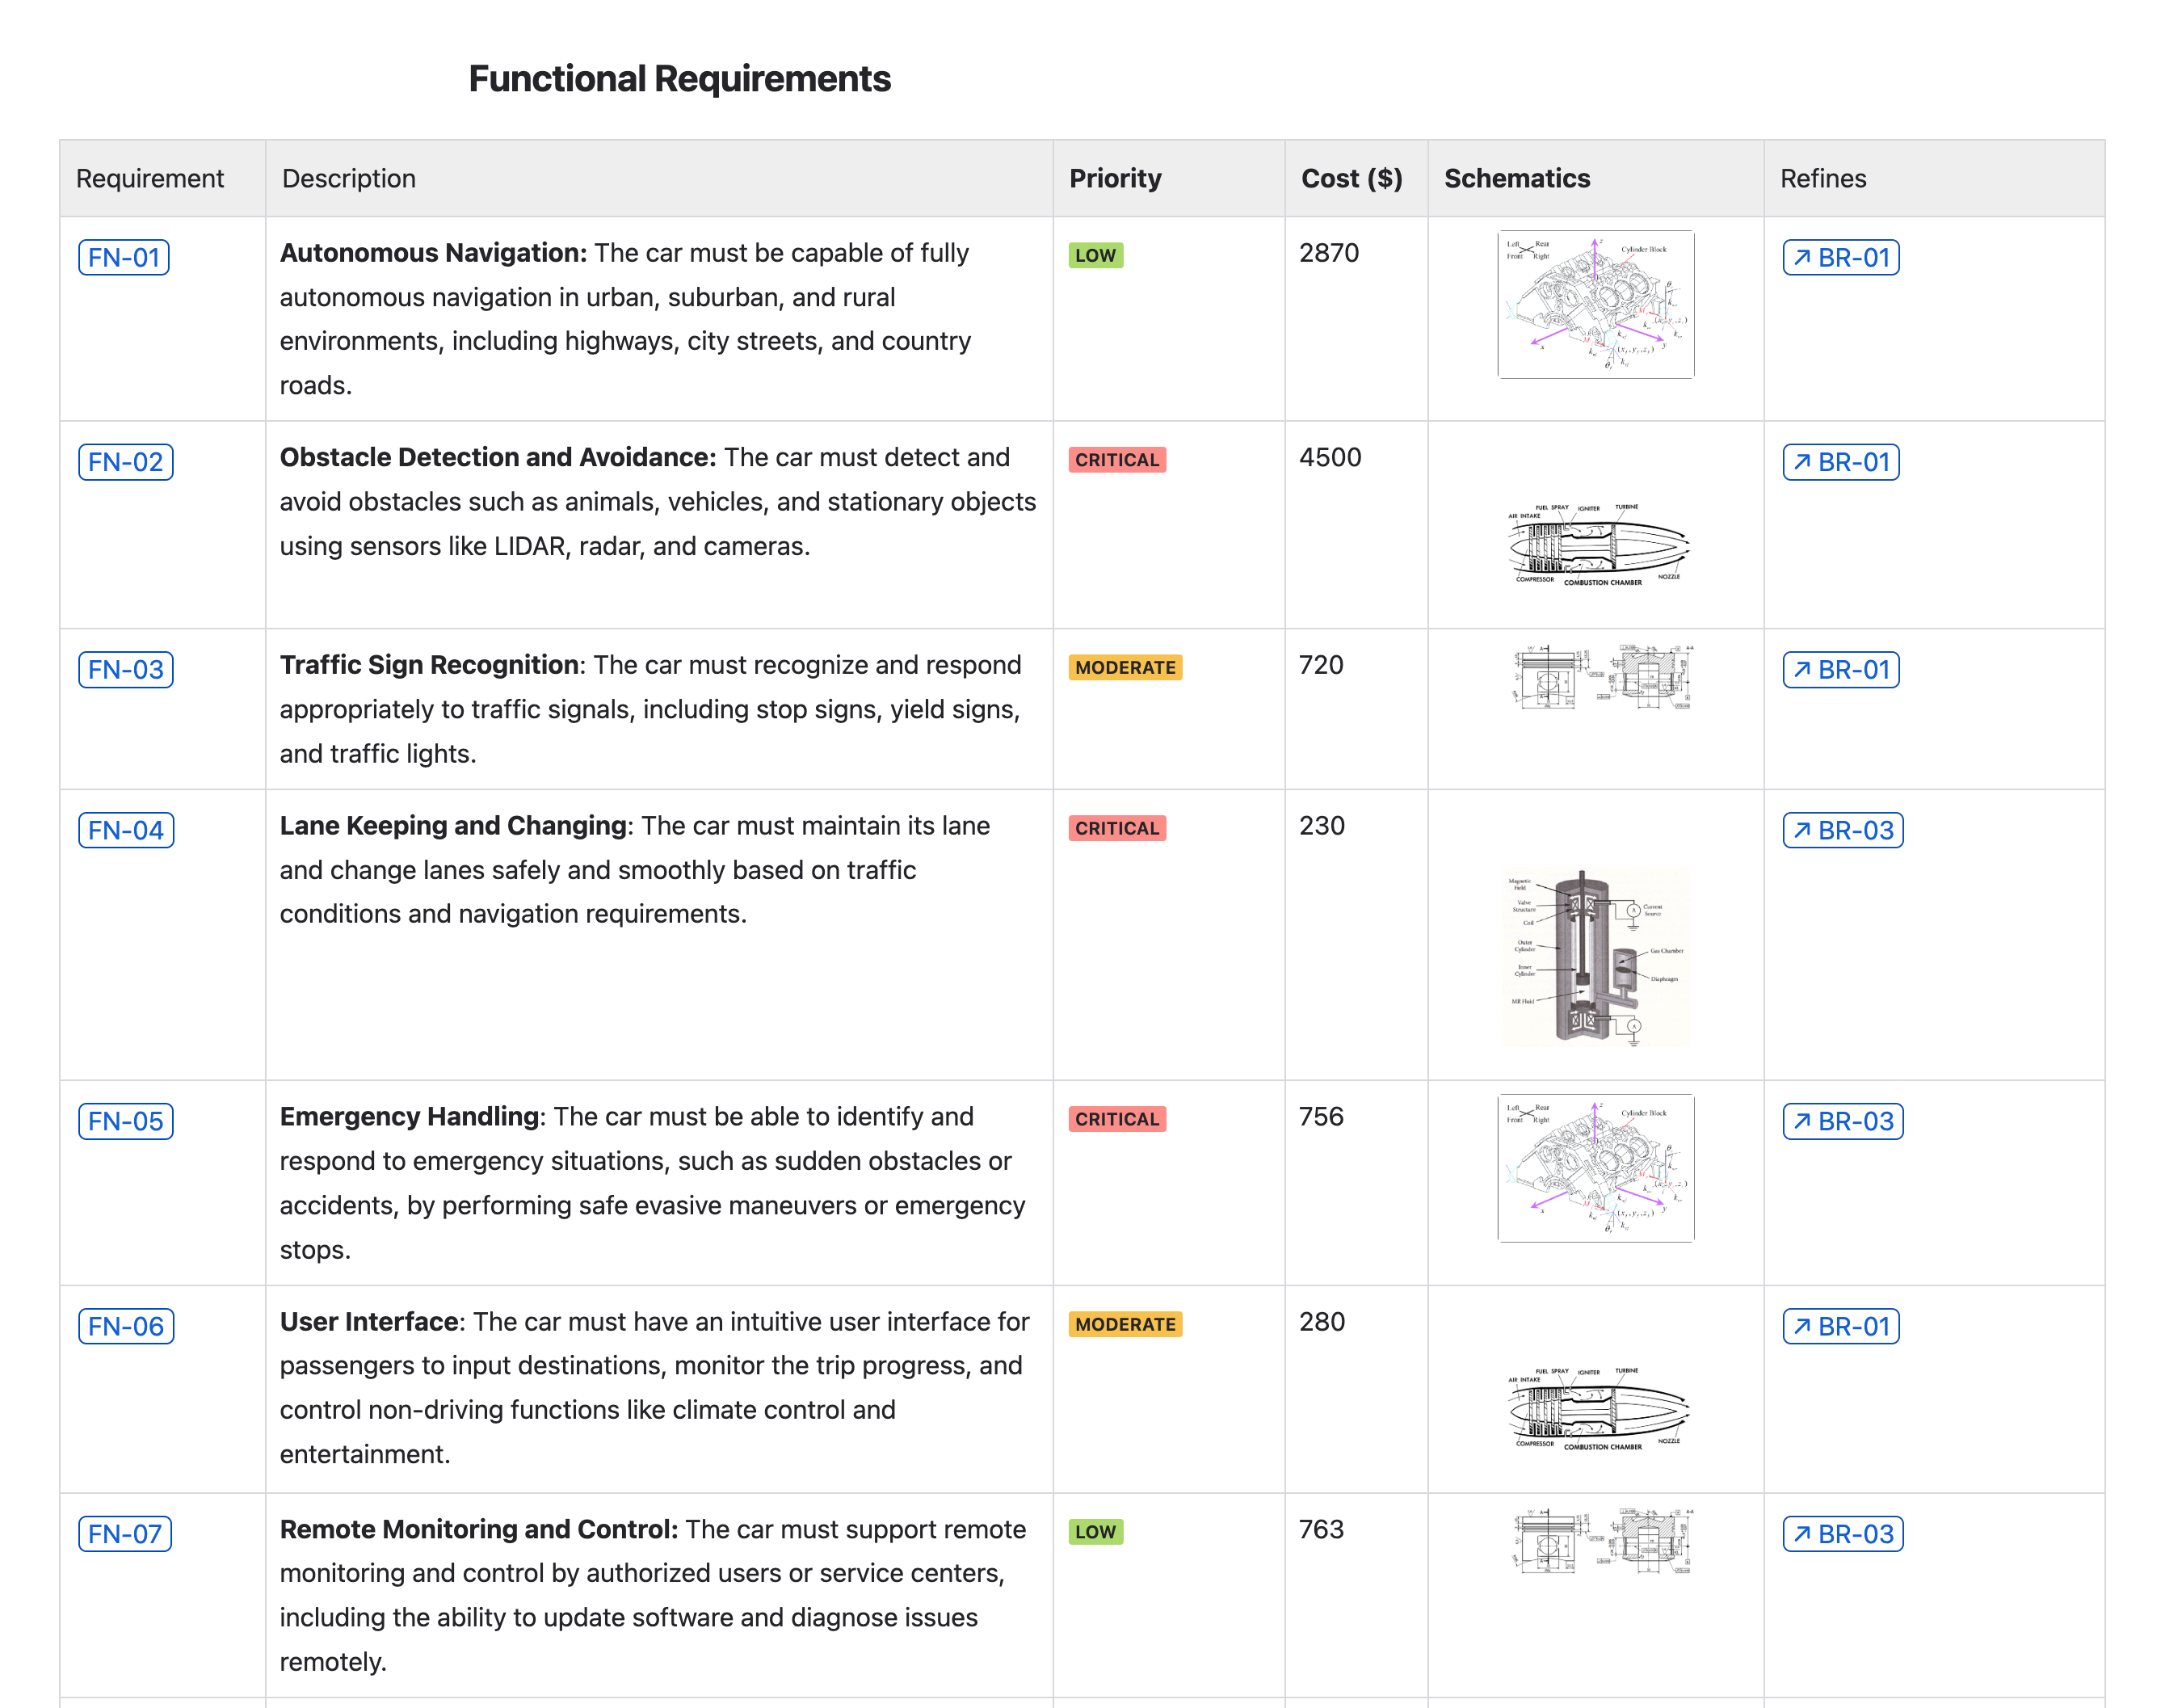
The first way to write requirements is in horizontal tables, like this:
|
|
Each column will be indexed as the requirement’s property. By default:
-
The first column is the requirement key.
-
The second column is the description of the requirement.
-
Other columns are properties or dependencies.
-
Properties can have text, confluence macros such as the status macro , images etc.
-
Dependencies are requirement yogi link macros present in a column. The name of the column is the name of the relationship between the two requirements.
-
In the example above:
BR-01is a parent of the requirementFN-01, with the relationshipRefines. -
If you have more questions on dependencies, read the documentation page.
-
-
-
It is possible to configure columns and override the column’s name with the Configuration macro. (It is not mandatory to use this macro).
Vertical Tables
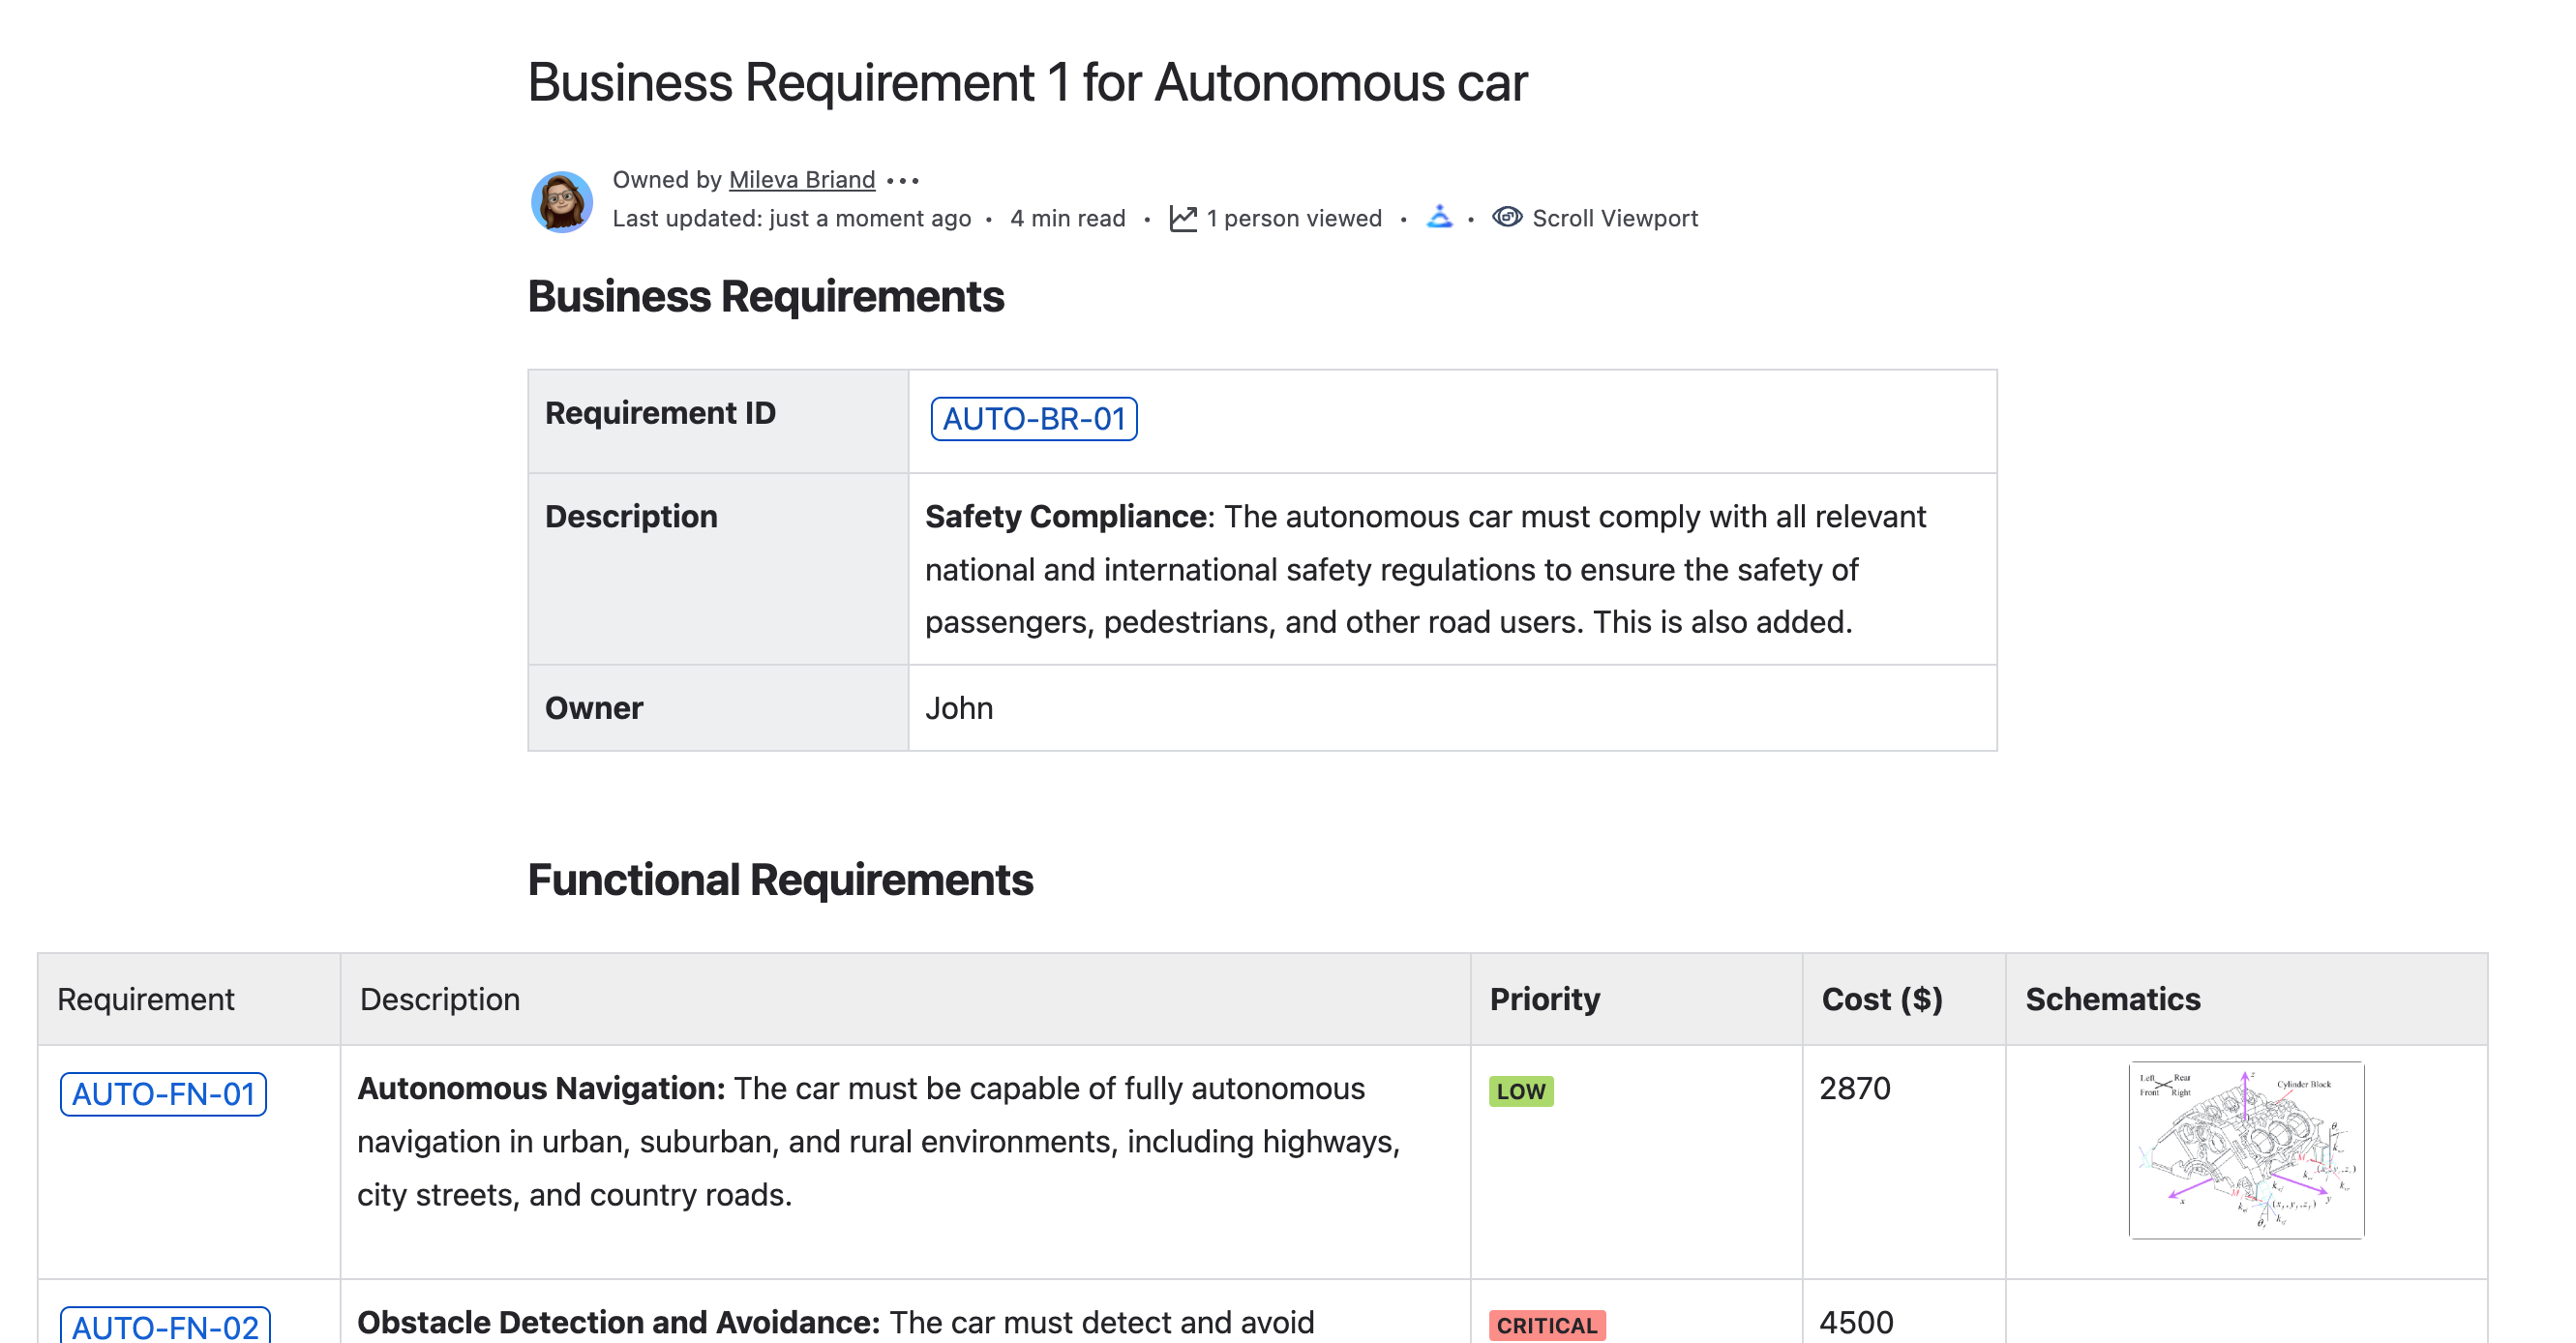
It is also possible to use vertical tables for your requirements. It works the same way as horizontal tables, but instead of columns, it’s rows.
|
|
Each row will be indexed as the requirement’s properties. By default, we use the same order as the horizontal tables:
-
First row is the requirement,
-
Second row is the description,
-
Other rows will be properties or dependencies.
-
You can also use the Configuration macro to override the name and configure rows specifically. (Still not mandatory to use this macro). You just to be aware that the UI in the configuration macro will still indicate columns instead of rows:
-
Column 1 = Row 1; Column 2 = Row 2 and so on.
-
Frequently asked questions
What is the difference between properties and external properties ?
-
Properties are defined in the Confluence page, as columns of your table (for horizontal tables), or rows (for vertical tables). The only way to edit properties is to edit the Confluence page of your requirement.
-
External properties are defined in the requirement’s detail, or in the Traceability Matrix. Their use case is to let you add metadata to requirements without affecting the Confluence page.
