This page describes how to migrate Requirement Yogi Data Center to Confluence and Jira Cloud, using the official CCMA (Confluence Cloud Migration Assistant) and JCMA (Jira Cloud Migration Assistant).
This document is mostly a checklist to ensure the task will be successful.
Follow each steps
What will be migrated?
Due to technical difficulties with the APIs, we have only just published the Phase 1 and 2 of CCMA. It will allow you to migrate requirements, and Jira links.
|
|
|
|
Note that the feature is different. RY Properties macro are replaced by a Configuration macro: RY Configuration instead. For each RY Property in a column header, only one configuration macro is used at the top of the page. Find more information on differences here: https://confluence.intranet.requirementyogi.com/wiki/x/LwAHpw. |
|
|
|
|
|
|
Not within the CCMA but it is possible to manually export Baselines from Server and import them back to the Cloud (since 4.2.14) |
|
|
|
|
|
|
Overview of the migration process
-
Perform the prerequisite steps,
-
Migrate the Confluence data,
-
Check and acknowledge the warnings and errors in Requirement Yogi for Confluence Cloud,
-
Migrate the Jira data,
-
Check and acknowledge the warnings and errors in Requirement Yogi for Jira Cloud,
-
The migration is done.
1. Required steps before migrating
|
1 |
On the Server/DC side, upgrade the CCMA plugin to the latest version; |
On the Server/DC side, upgrade the JCMA plugin to the latest version; |
|
2 |
Upgrade Requirement Yogi for Confluence Server to the latest version (minimum 4.4.10) |
Upgrade Requirement Yogi for Jira Server to the latest version (minimum 4.4.10) |
|
3 |
Install Requirement Yogi on Confluence Cloud. |
Install Requirement Yogi on Jira Cloud. |
|
4 |
Once the installation is complete, make sure you link your RY for Confluence and RY for Jira instances together, see docs. |
|
|
5 |
Make sure permissions are set up so we can view and create pages in your spaces:
|
|
|
6 |
Make sure pages with requirements on your Server / Data Center instance are not restricted.
|
|
|
7 |
Open the migration endpoints:
|
Open the migration endpoints:
|
|
8 |
|
If you are using multiple relationships for requirement-issue links in Server / Data Center, make sure you create the same relationships in the RY for Jira Cloud administration as well.
|
2. Starting the migration
If you have both Jira and Confluence, we recommend doing the Confluence migration first. If you choose to migrate Jira first, we will still create links to requirements that were not yet migrated, but show a warning that the requirement was not found.
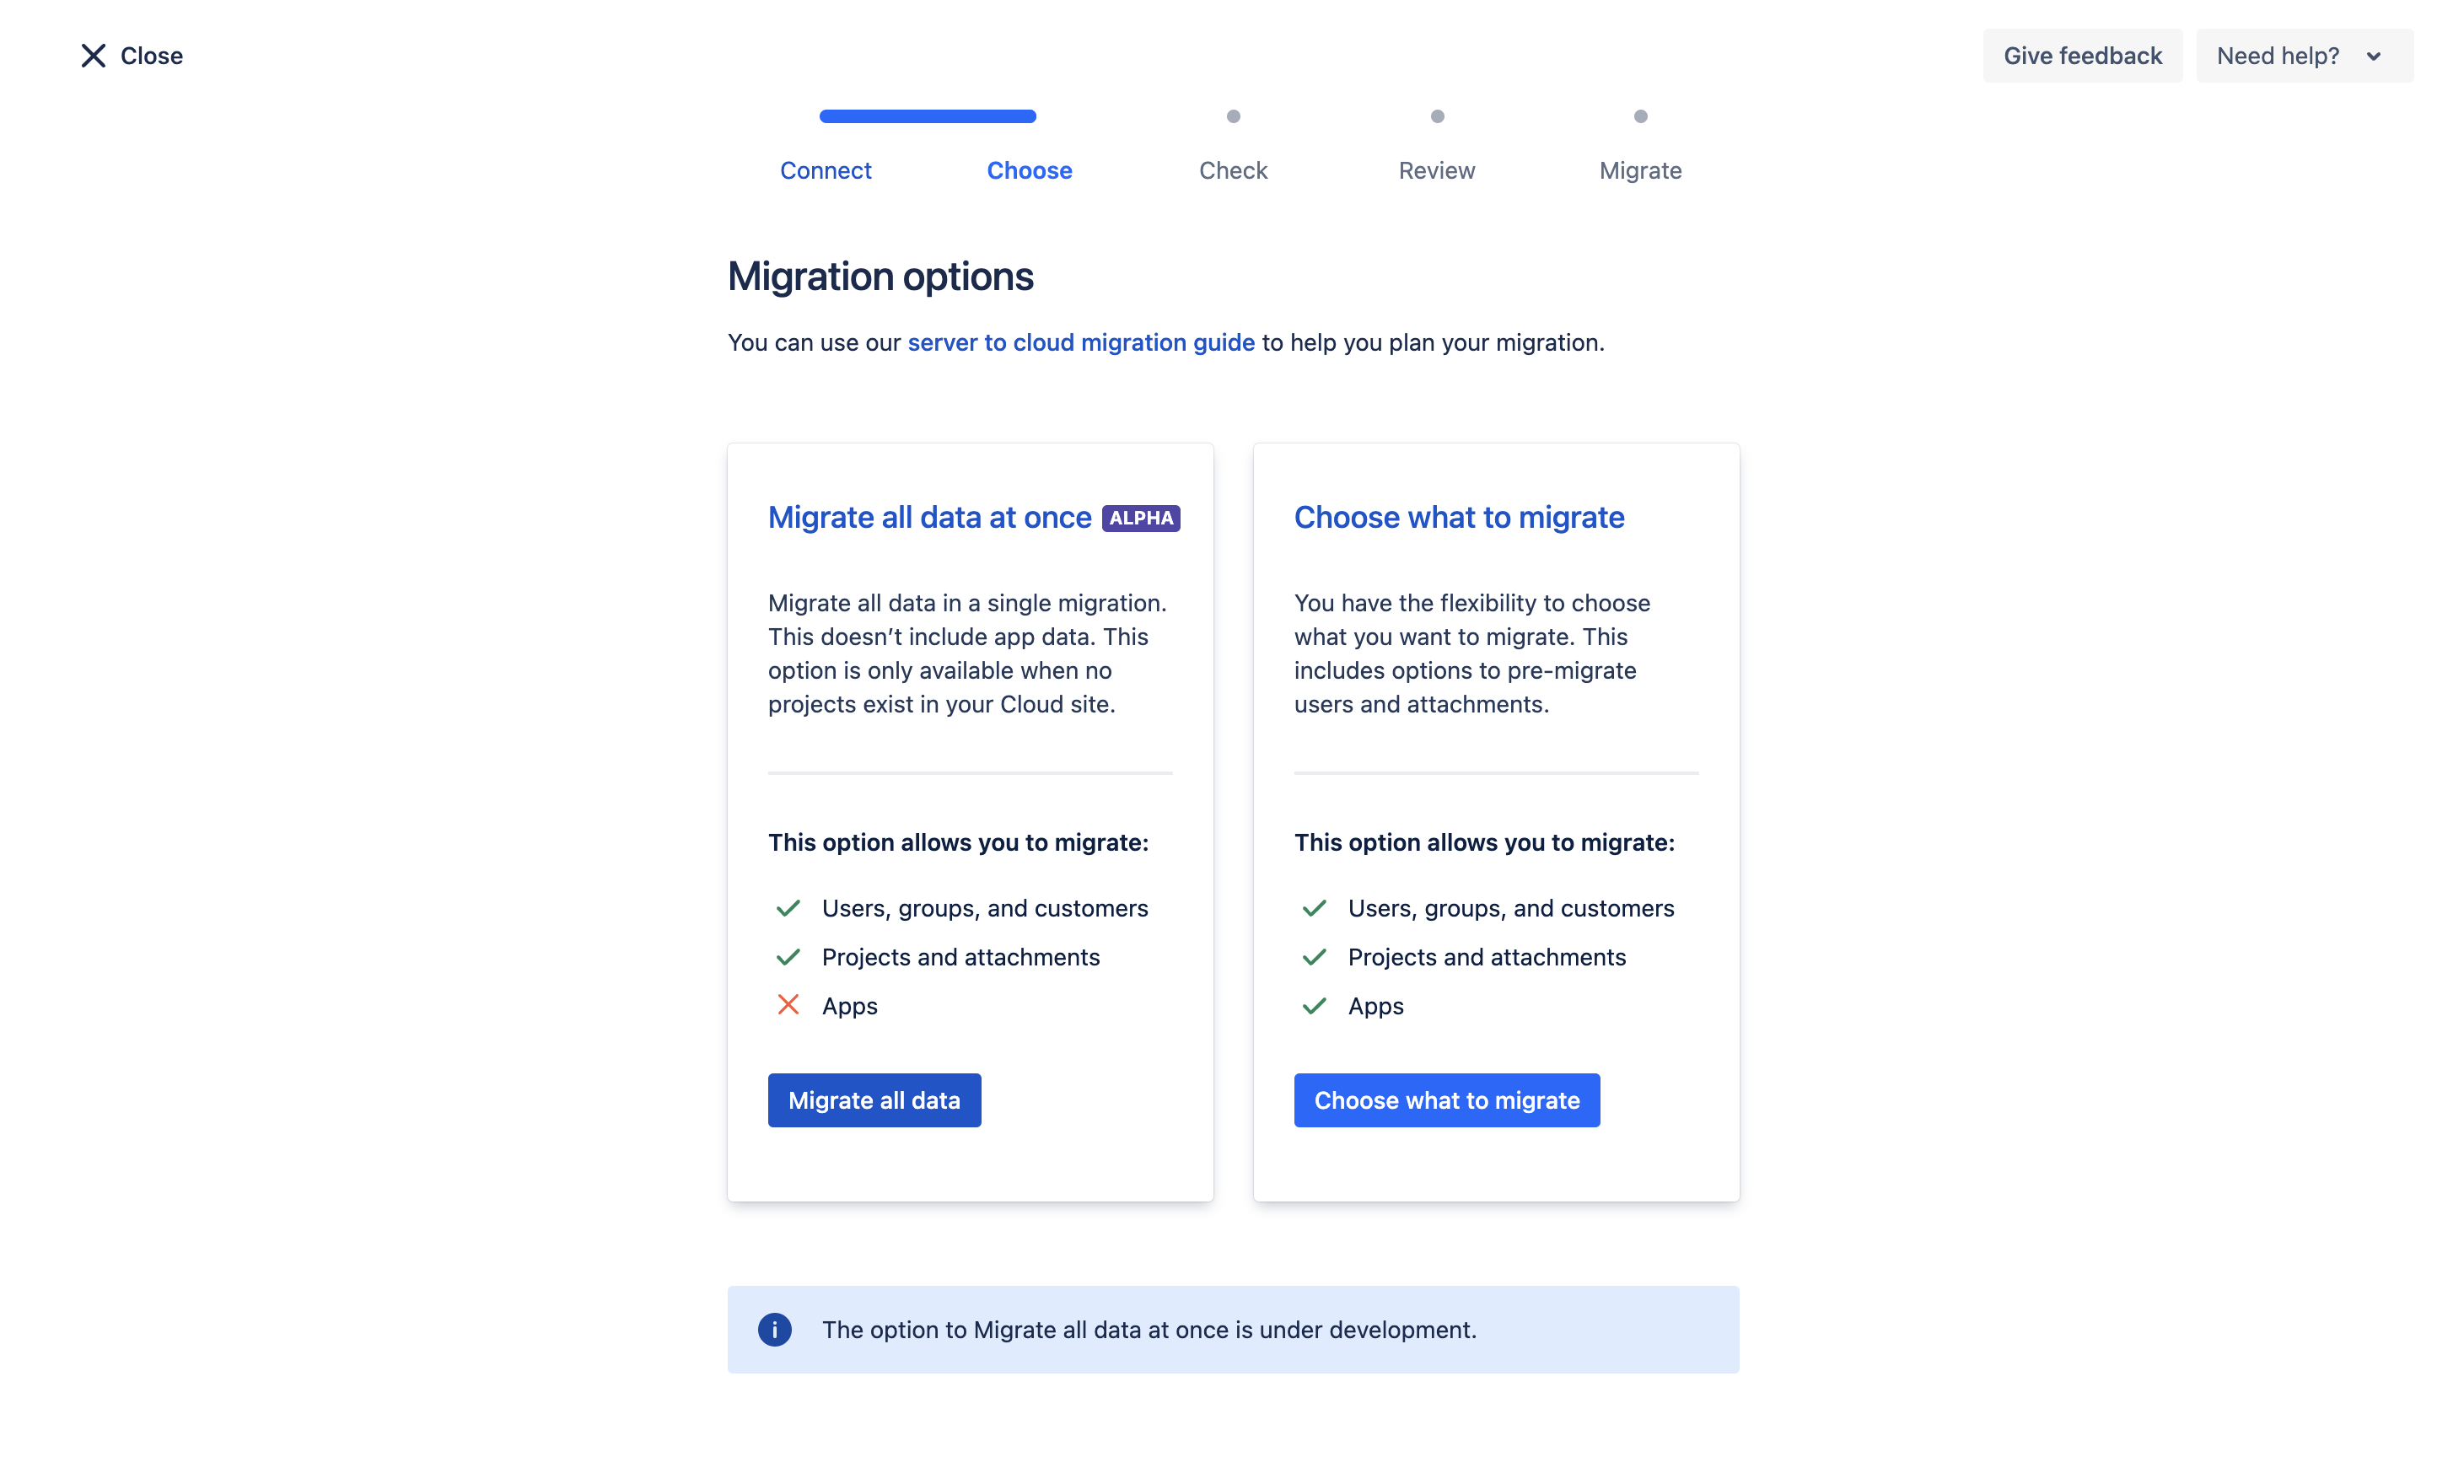
In Jira, ensure you click “Choose what to migrate” (see screen below). In our tests, if you import everything at once, it… removes everything from the Jira instance, reimports something and forgets to install apps again, therefore Jira isn’t aware that it kicked Requirement Yogi out. In summary, select what you import, do not tick “Migrate all data”.

Go to the Migration Assistant
In your Confluence Server / Data Center instance, go to the General Configuration > Migration Assistant.
-
In the section ‘Assess your apps’, mark Requirement Yogi as “Needed in cloud”

-
Proceed to the rest of the migration steps required by Atlassian.
-
Keep track of the progress of the migration and wait for it to be complete.

💡 App migration can take a long time to run, especially if you have thousands of pages. On our test instance, the migration took 20s per 1000 requirements (1h30 for a sample of 220k requirements spread on 2000 pages).
3. Ending the Migration
How to check progress of the migration?
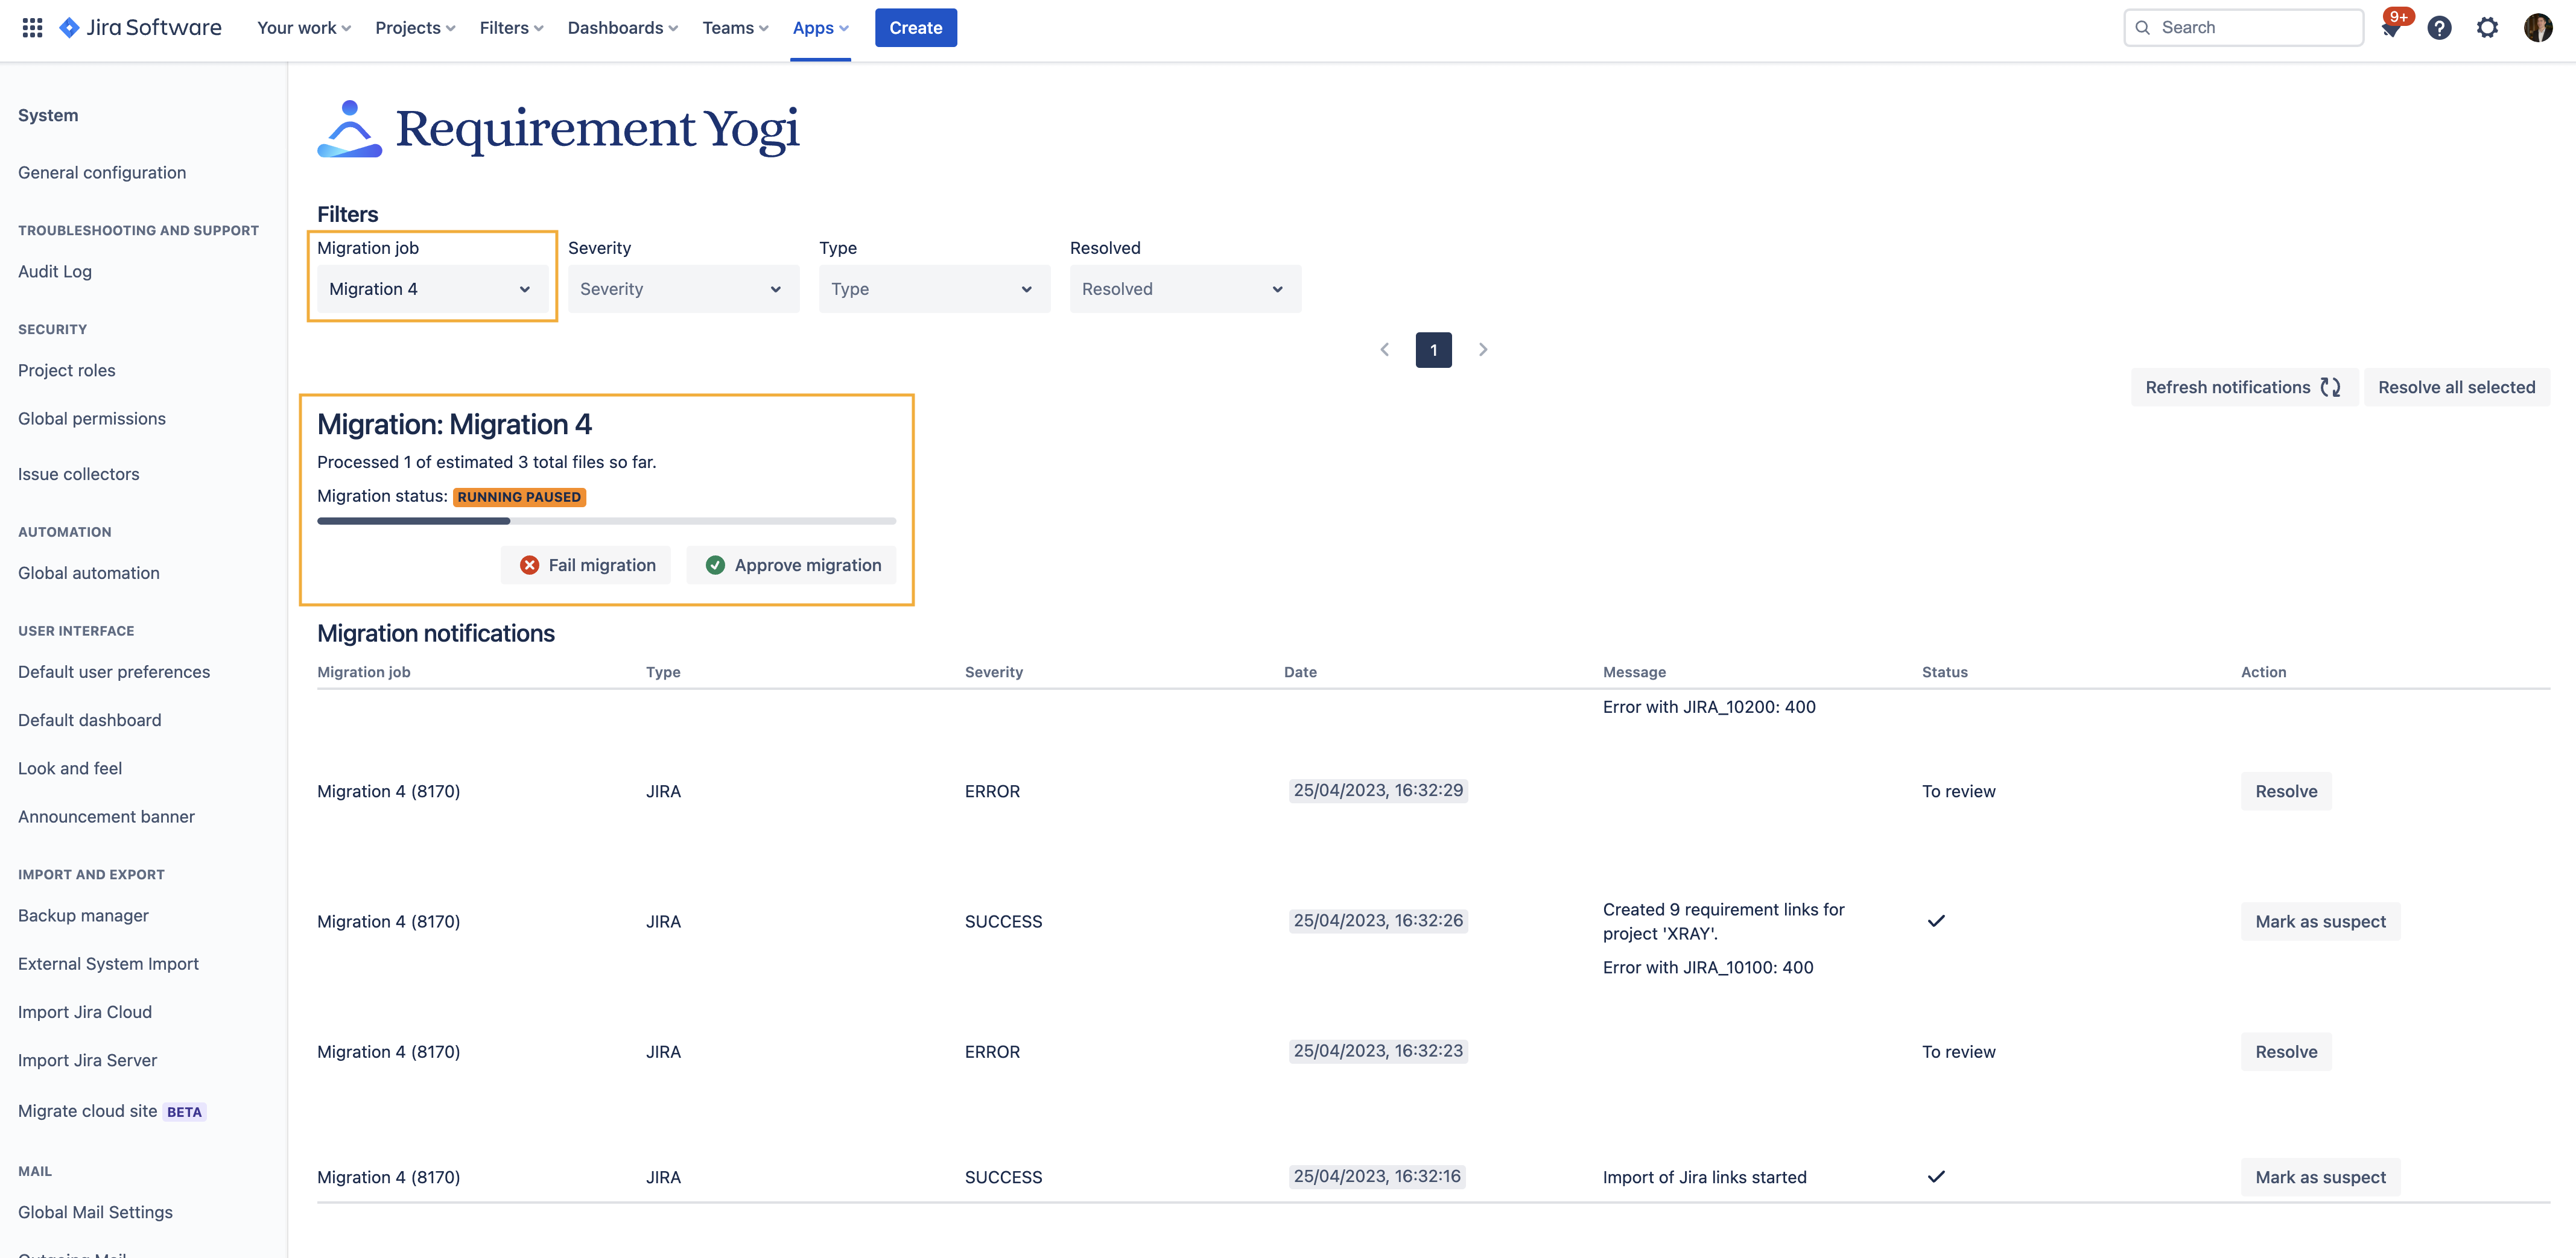
You can check the migration notifications in the cloud by:
-
Clicking on the link in the app migration details in CCMA (Confluence Server),
-
Or in the cloud, in Requirement Yogi configuration > Support > View the migration notifications.
How to check and acknowledge the warnings and errors?
-
Errors and warnings are listed on the Requirement Yogi Migration Notification page (Admin access is required).
-
Errors on pages have a link to the page that generated an error. You can navigate to said page and manually verify if the migration was a success. If the migration wasn’t successful (ex: Requirement Yogi macros are shown as ‘Unknown macros’), you can manually transform those macros and mark the notification as “Resolved”.
Please do feel free to open a ticket to notify us of errors generated by the migration tool by raising a support ticket.
Acknowledge the migration task
In the end, ensure you acknowledge the Requirement Yogi migration task on the Cloud side. It is important, so that the migration task on the server side knows that Requirement Yogi is done.
See typical warnings in the Troubleshooting page.

Limitations
-
On the Cloud, pages containing requirements must be migrated to the new editor experience, since we only have transformers for the new JSON/ADF storage backend, and not for the XML one. The migration will be triggered when we apply the transformation.
Frequently Asked Questions
Using an old version of Requirement Yogi?
Please head to Migrating to the Cloud (before RY Data Center 3.5). Or better: Upgrade and use the easy guide below!
-
If you have any questions regarding the migration, please find more information here: FAQ & Troubleshooting .
-
If you have any questions, please reach out on the support.
